
Convert your FileMaker Layout to a Web Viewer with Genie
In this walkthrough, we turn the Claris Content Management starter solution into a Web Viewer app with Genie, starting with just a couple of prompts.
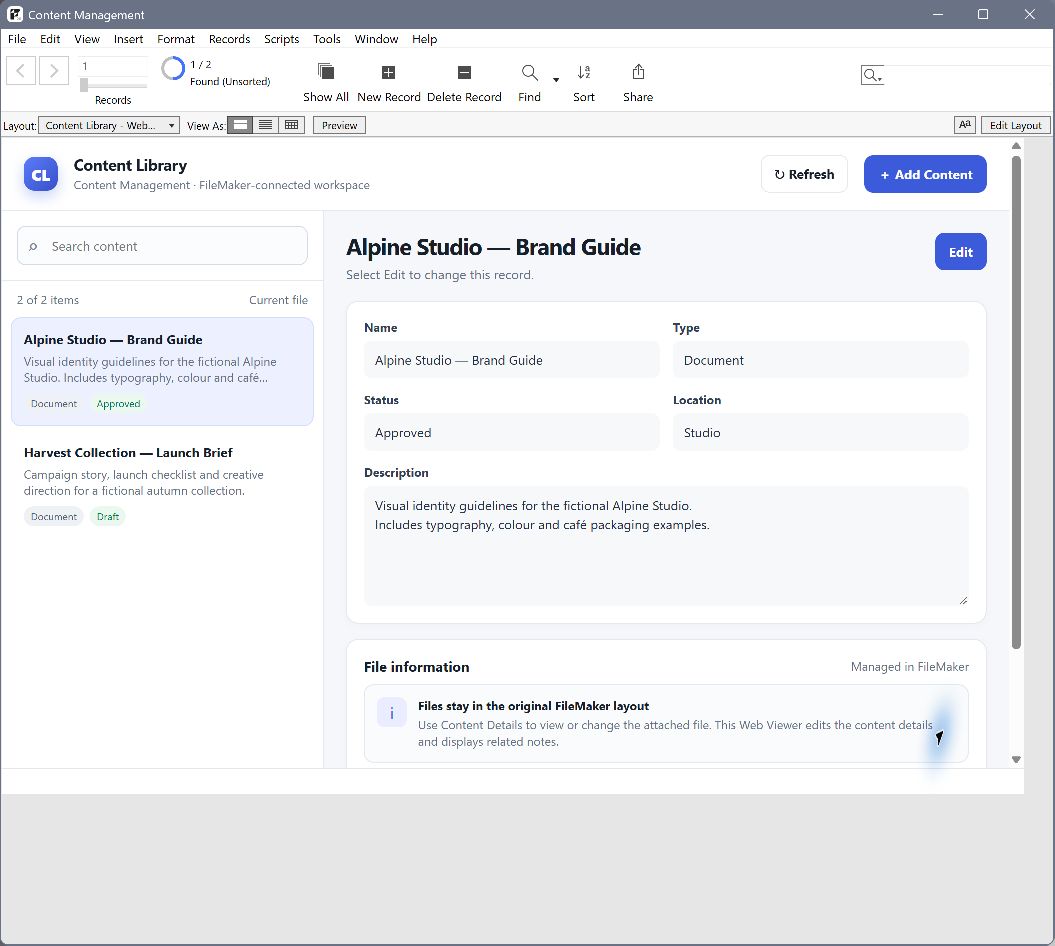
The Claris Content Management starter solution with its Web Viewer interface, after reopening the file.
First, we ask Genie to inspect the Content Details layout. Then we ask it to prepare a Web Viewer interface connected to the solution’s existing tables, fields and records. From there, we refine the result, review the generated app and install it in FileMaker.
The Web Viewer presents the solution’s content as searchable cards and a detail panel. It reads and updates the existing FileMaker records, while the original layout remains available for attachments and for checking saved values. The interface shown in the screenshots is named Content Library.
This tutorial follows the Agent inside Genie, from inspecting the layout to installing the Web Viewer and its helper script. You can also develop this kind of interface with an external coding agent connected through Genie MCP.
1. Open the Claris starter solution
Open the Claris Content Management starter solution and select the Content Details layout. It gives Genie a reference for the fields and gives you a place to check the values saved through the Web Viewer.
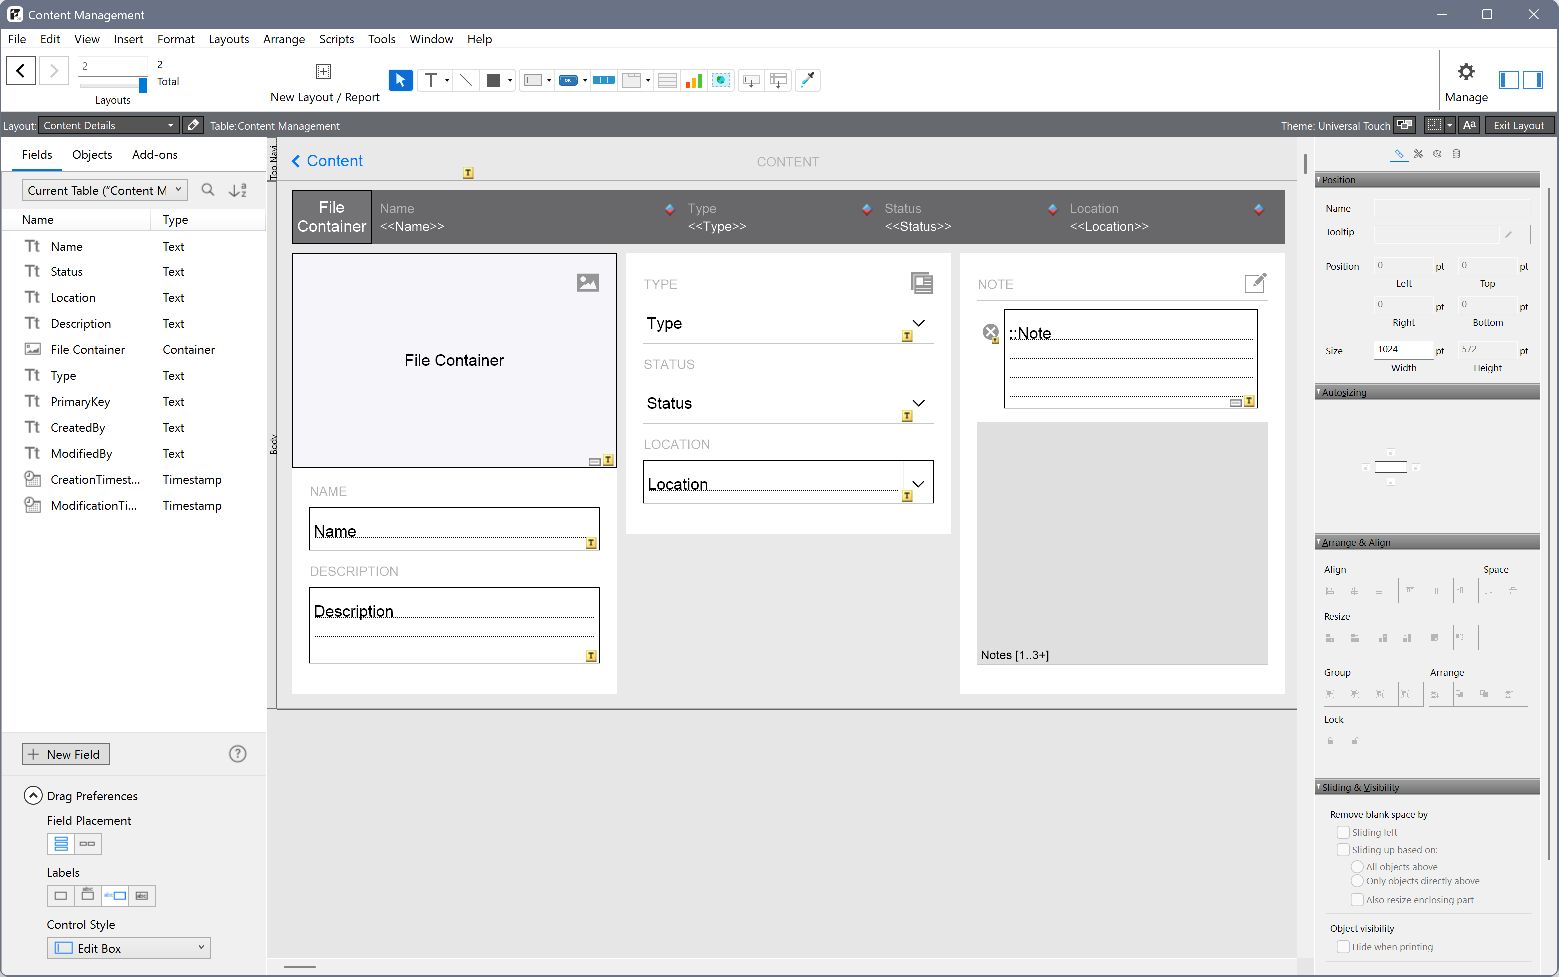
The starting point: the Content Details layout in the Claris starter solution.
Open Genie from the Script Workspace toolbar. Begin by asking it to inspect the layout before preparing any changes.
Ask Genie
Look at the Content Details layout in the Claris Content Management starter solution. I want to convert this layout into a Web Viewer interface, where I can browse cards and edit the content using the existing fields and records. First, tell me which fields you would use and what should stay in the original FileMaker layout. Do not change anything yet.
For this first version, only Name, Description, Type, Status and Location are editable. PrimaryKey identifies the record being saved. Attachments stay in the original layout, and notes are read-only.
2. Describe what the interface should do
Specify the actions: search cards, open an item, add content, edit details, save or cancel. Ask for clear feedback while data loads, when the list is empty and when an operation fails.
Genie needs to prepare two connected pieces: the Web Viewer interface and a FileMaker helper script that loads data and saves changes. The script must target the right record and send its result back to the right Web Viewer object.
Show the full conversion prompt
Convert the Content Details layout in the Claris Content Management starter solution into a Web Viewer interface. Use the existing tables, fields and records. Keep the original layouts unchanged. Use searchable cards on the left and a detail panel on the right. Include Add Content, Edit, Save Changes and Cancel. Read and write the real FileMaker records. Only Name, Description, Type, Status and Location should be editable. Use PrimaryKey to identify the record being saved. Leave attachments in the original FileMaker layout and notes read-only. Use a clean interface that works at about 1024 × 658, with status badges and clear empty, loading and error states. Name the helper Genie Content Library Tutorial - Dispatch and the Web Viewer object ContentLibraryTutorialWebViewer. Ask me whether to store the app in the file or use a Web Viewer calculation. Prepare the complete connected app for review in this chat, including the full helper and a copyable Web Viewer object. Do not install anything automatically.
This prompt uses the names in the steps below. A new generation may look different from the screenshots. The demo also needed follow-up requests to refine the storage choice and preserve the complete helper.
3. Choose where the interface lives
Genie asks “Store this app?” in the conversation. You have two choices:
- Yes, store the app in this file: save the interface with the file using the FileMaker 26 path shown here.
- No, use a Web Viewer calculation: keep the interface in the viewer’s calculation.
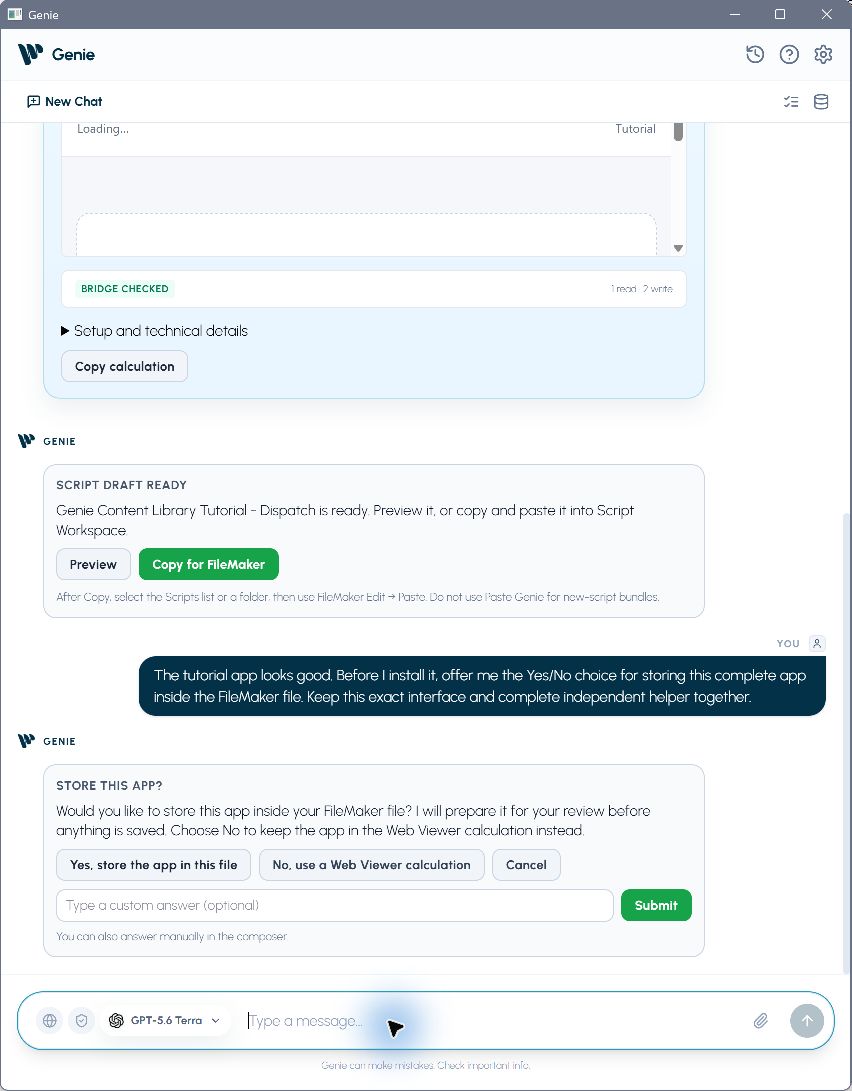
Choose the storage method in the conversation, before applying changes.
If Genie has already prepared a calculation-based version, ask it to offer the storage choice before installation. That is the follow-up shown in this capture.
Saving the interface and saving your data are separate operations. The interface is stored with the file; the solution’s data remains in ordinary FileMaker records.
Storing the app in the file requires FileMaker 26. For earlier FileMaker versions, choose the Web Viewer calculation.
4. Review the app and apply its storage
Choosing storage prepares a proposal for review. To apply it:
- Review the proposed app in the conversation.
- Click Apply stored app.
- Confirm with Yes in the FileMaker dialog.
- Wait for confirmation that the app was saved and checked.
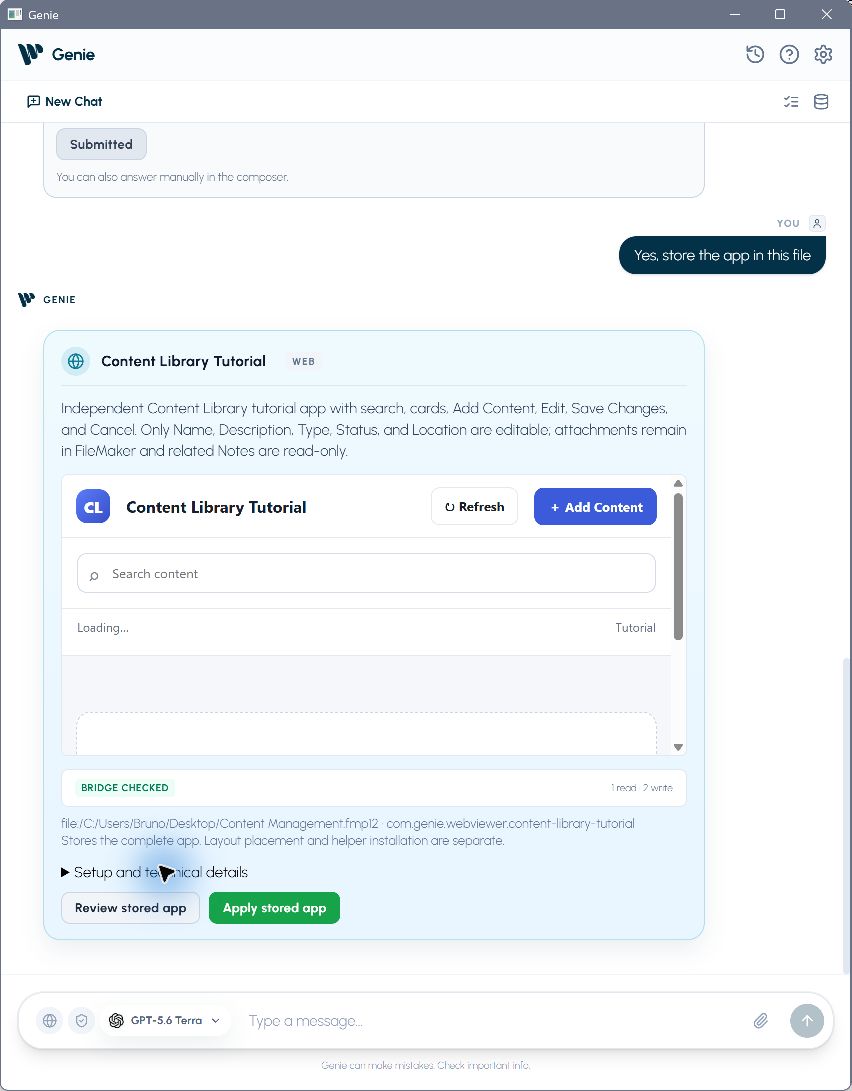
Review and apply the proposed storage directly from the conversation.
Once the interface is stored, the card exposes Copy Web Viewer Object. You still need to install the helper script and place that object on a layout.
5. Install the helper script in FileMaker
The helper connects the Web Viewer’s buttons to FileMaker. It loads the list, creates an item, saves edits and sends the result back to the interface.
- Find the Script Draft Ready card below the app. Click Preview to inspect the complete helper.
- Click Copy for FileMaker. The helper is also available under Setup and technical details → Related scripts.
- Open Scripts → Script Workspace in FileMaker.
- Select the Scripts list or a folder on the left, then choose Edit → Paste (Ctrl+V on Windows, Cmd+V on Mac).
- Confirm that Genie Content Library Tutorial - Dispatch appears as a separate script. Save it and close Script Workspace.
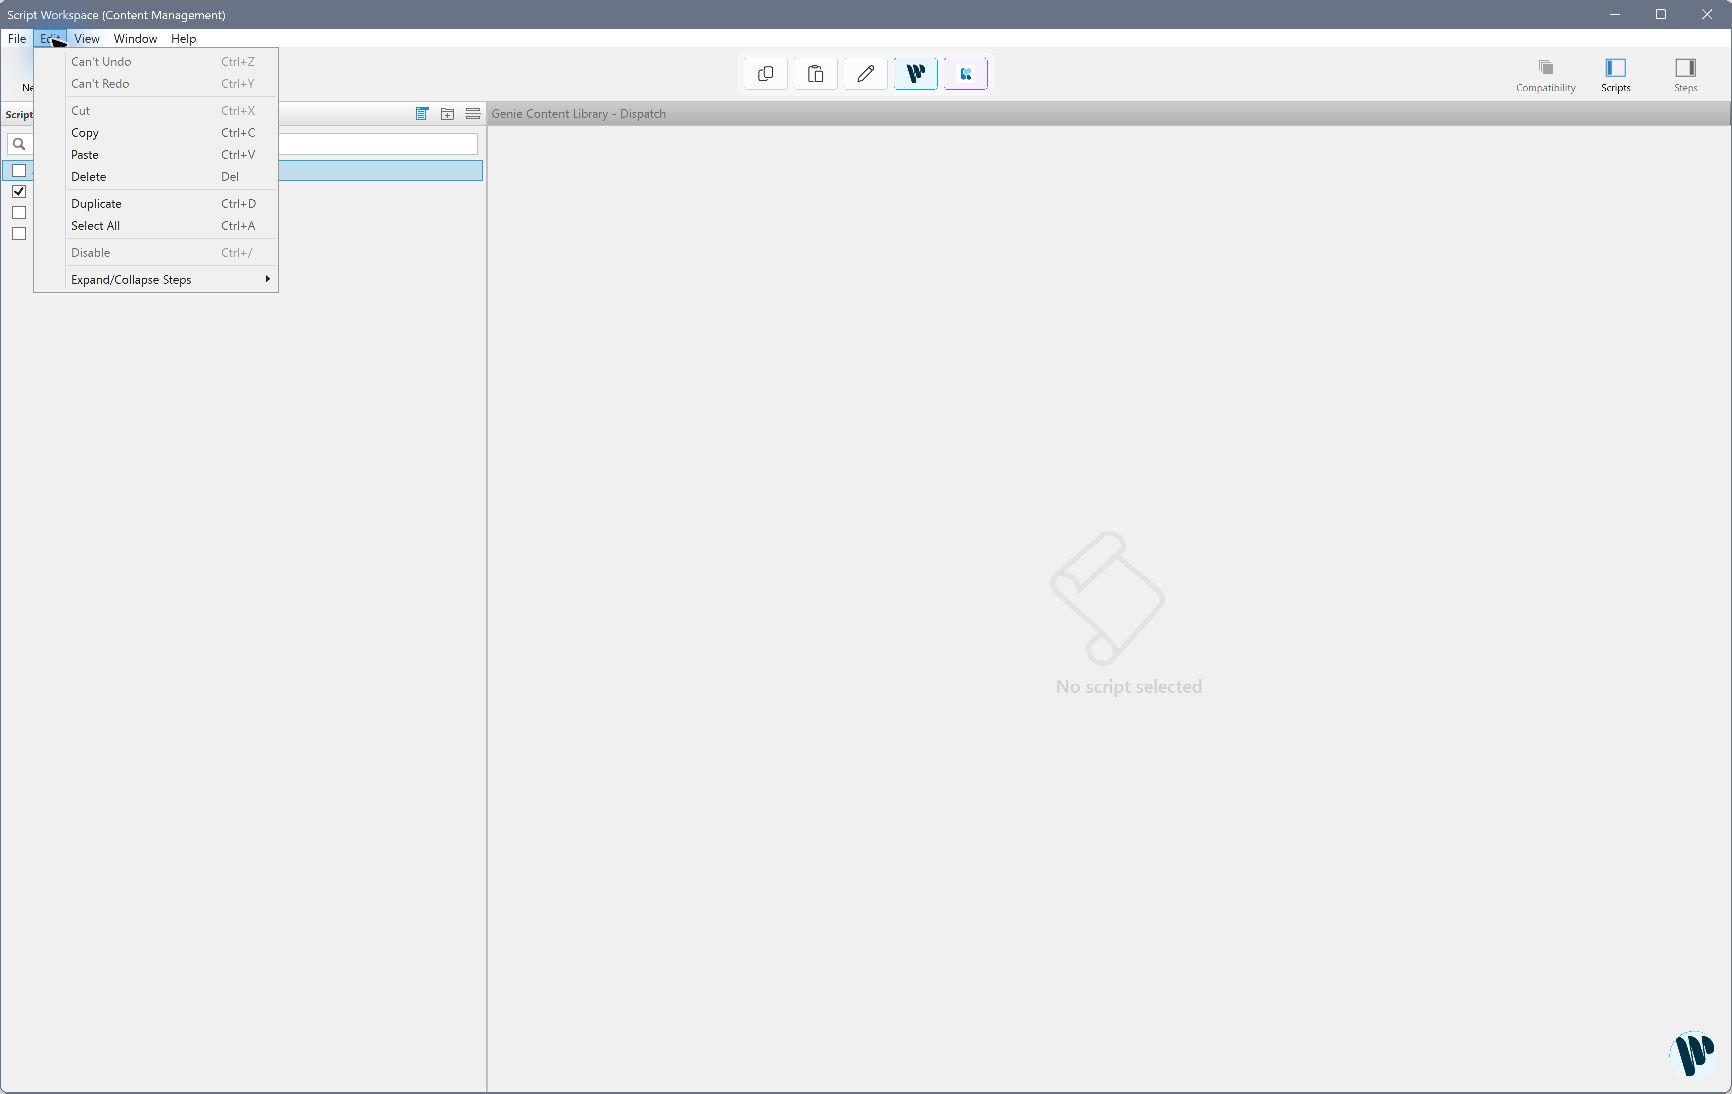
Paste into the Scripts list or a folder to create a separate script.
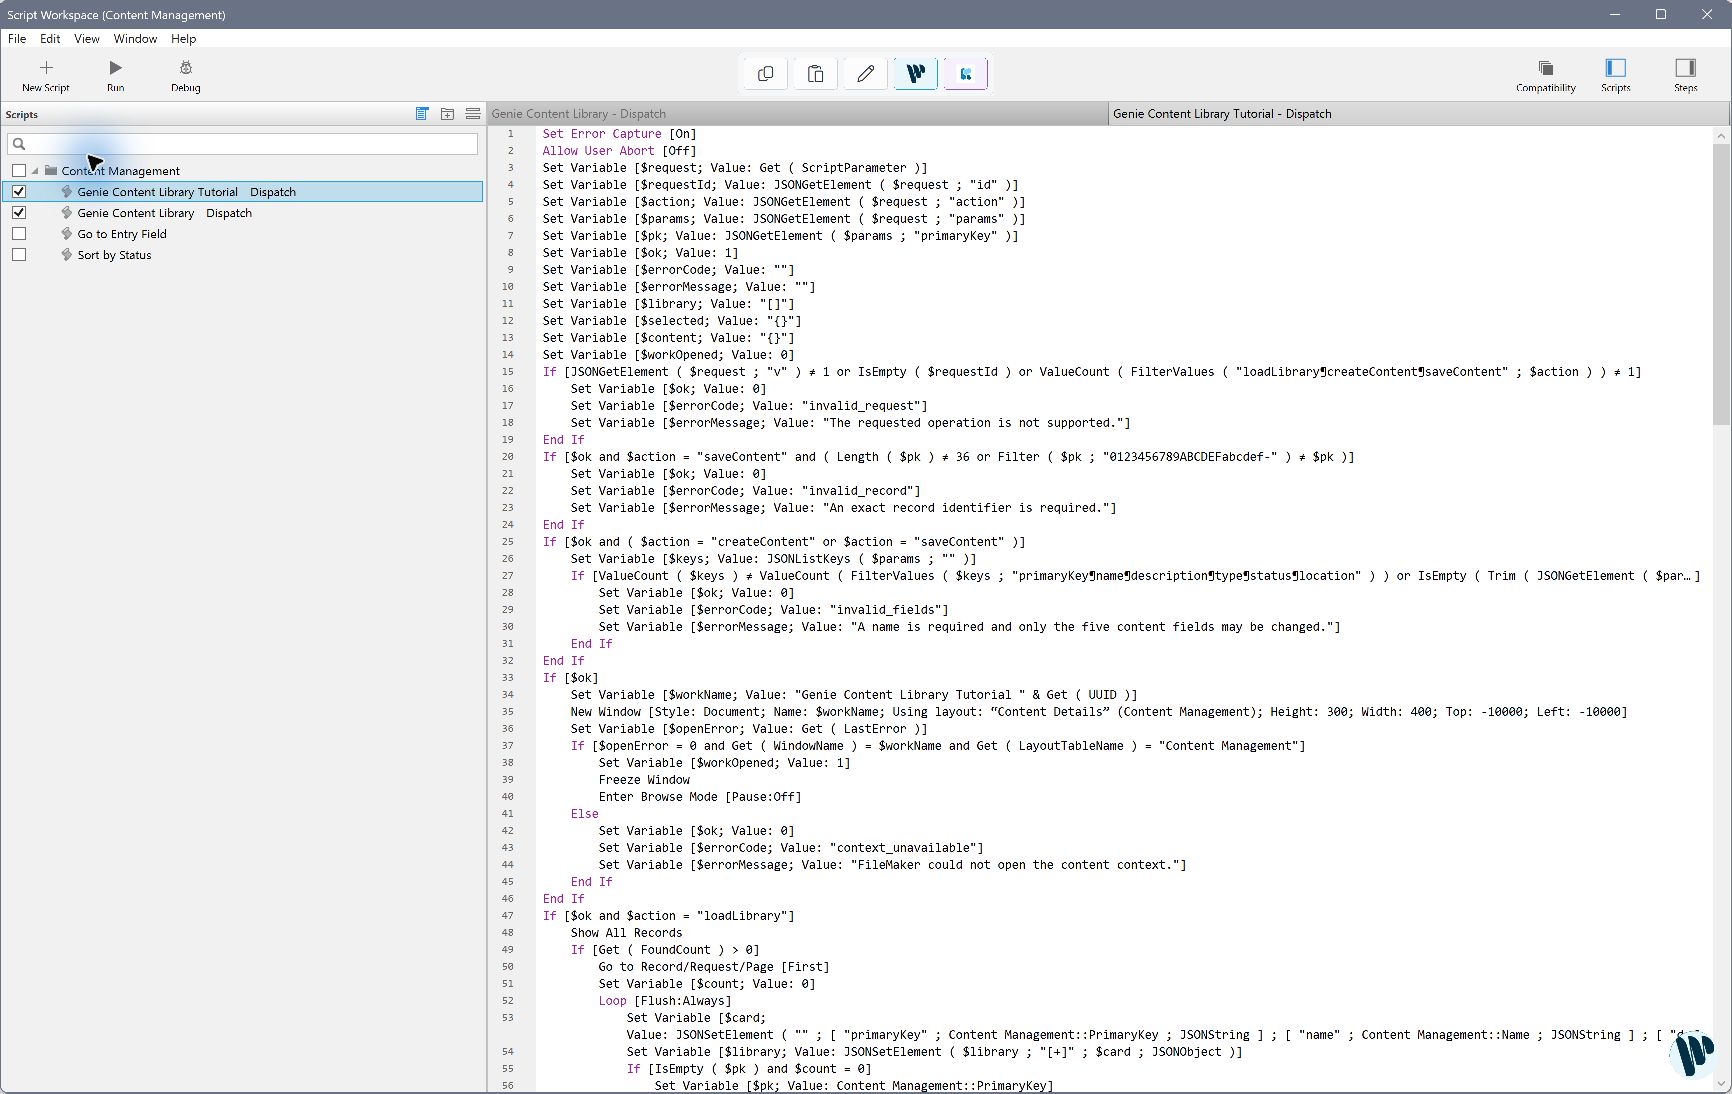
The complete helper appears alongside the existing scripts.
Select the list on the left, not a step inside another script. Use Edit → Paste for this new-script bundle, rather than Paste Genie.
The many If / End If blocks check requests, finds, record locks and saves. Error messages written inside those steps describe what the helper will report if an operation fails; they do not mean installation failed. Keep the complete script provided by Genie.
6. Place the Web Viewer on a new layout
- Create a Computer → Form layout using the Content Management table occurrence. Name it Content Library - Tutorial.
- On this new blank layout, remove the unused Top Navigation part so only the Body remains. Keep the original layouts.
- In Genie, click Copy Web Viewer Object. Return to the new layout in Layout mode and choose Edit → Paste.
- In the Inspector, set the viewer to 1024 × 658, with Left and Top both at 0.
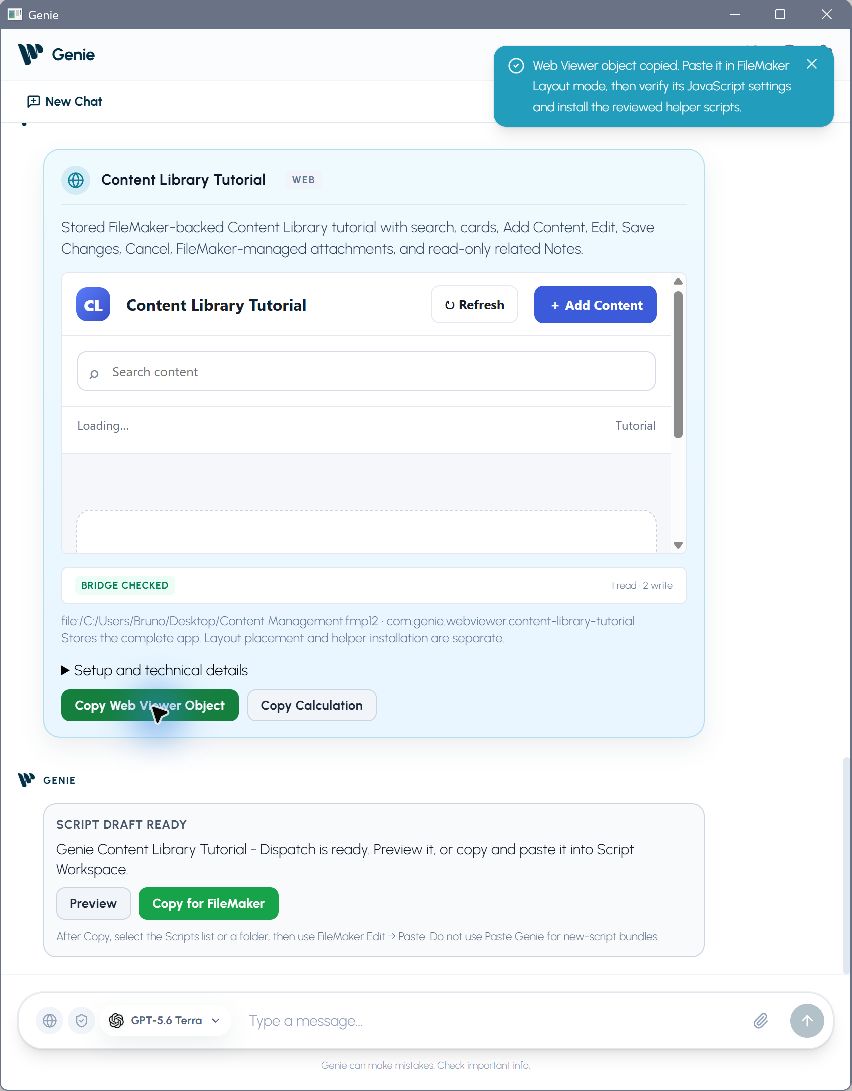
Copy the Web Viewer object from the connected app card.
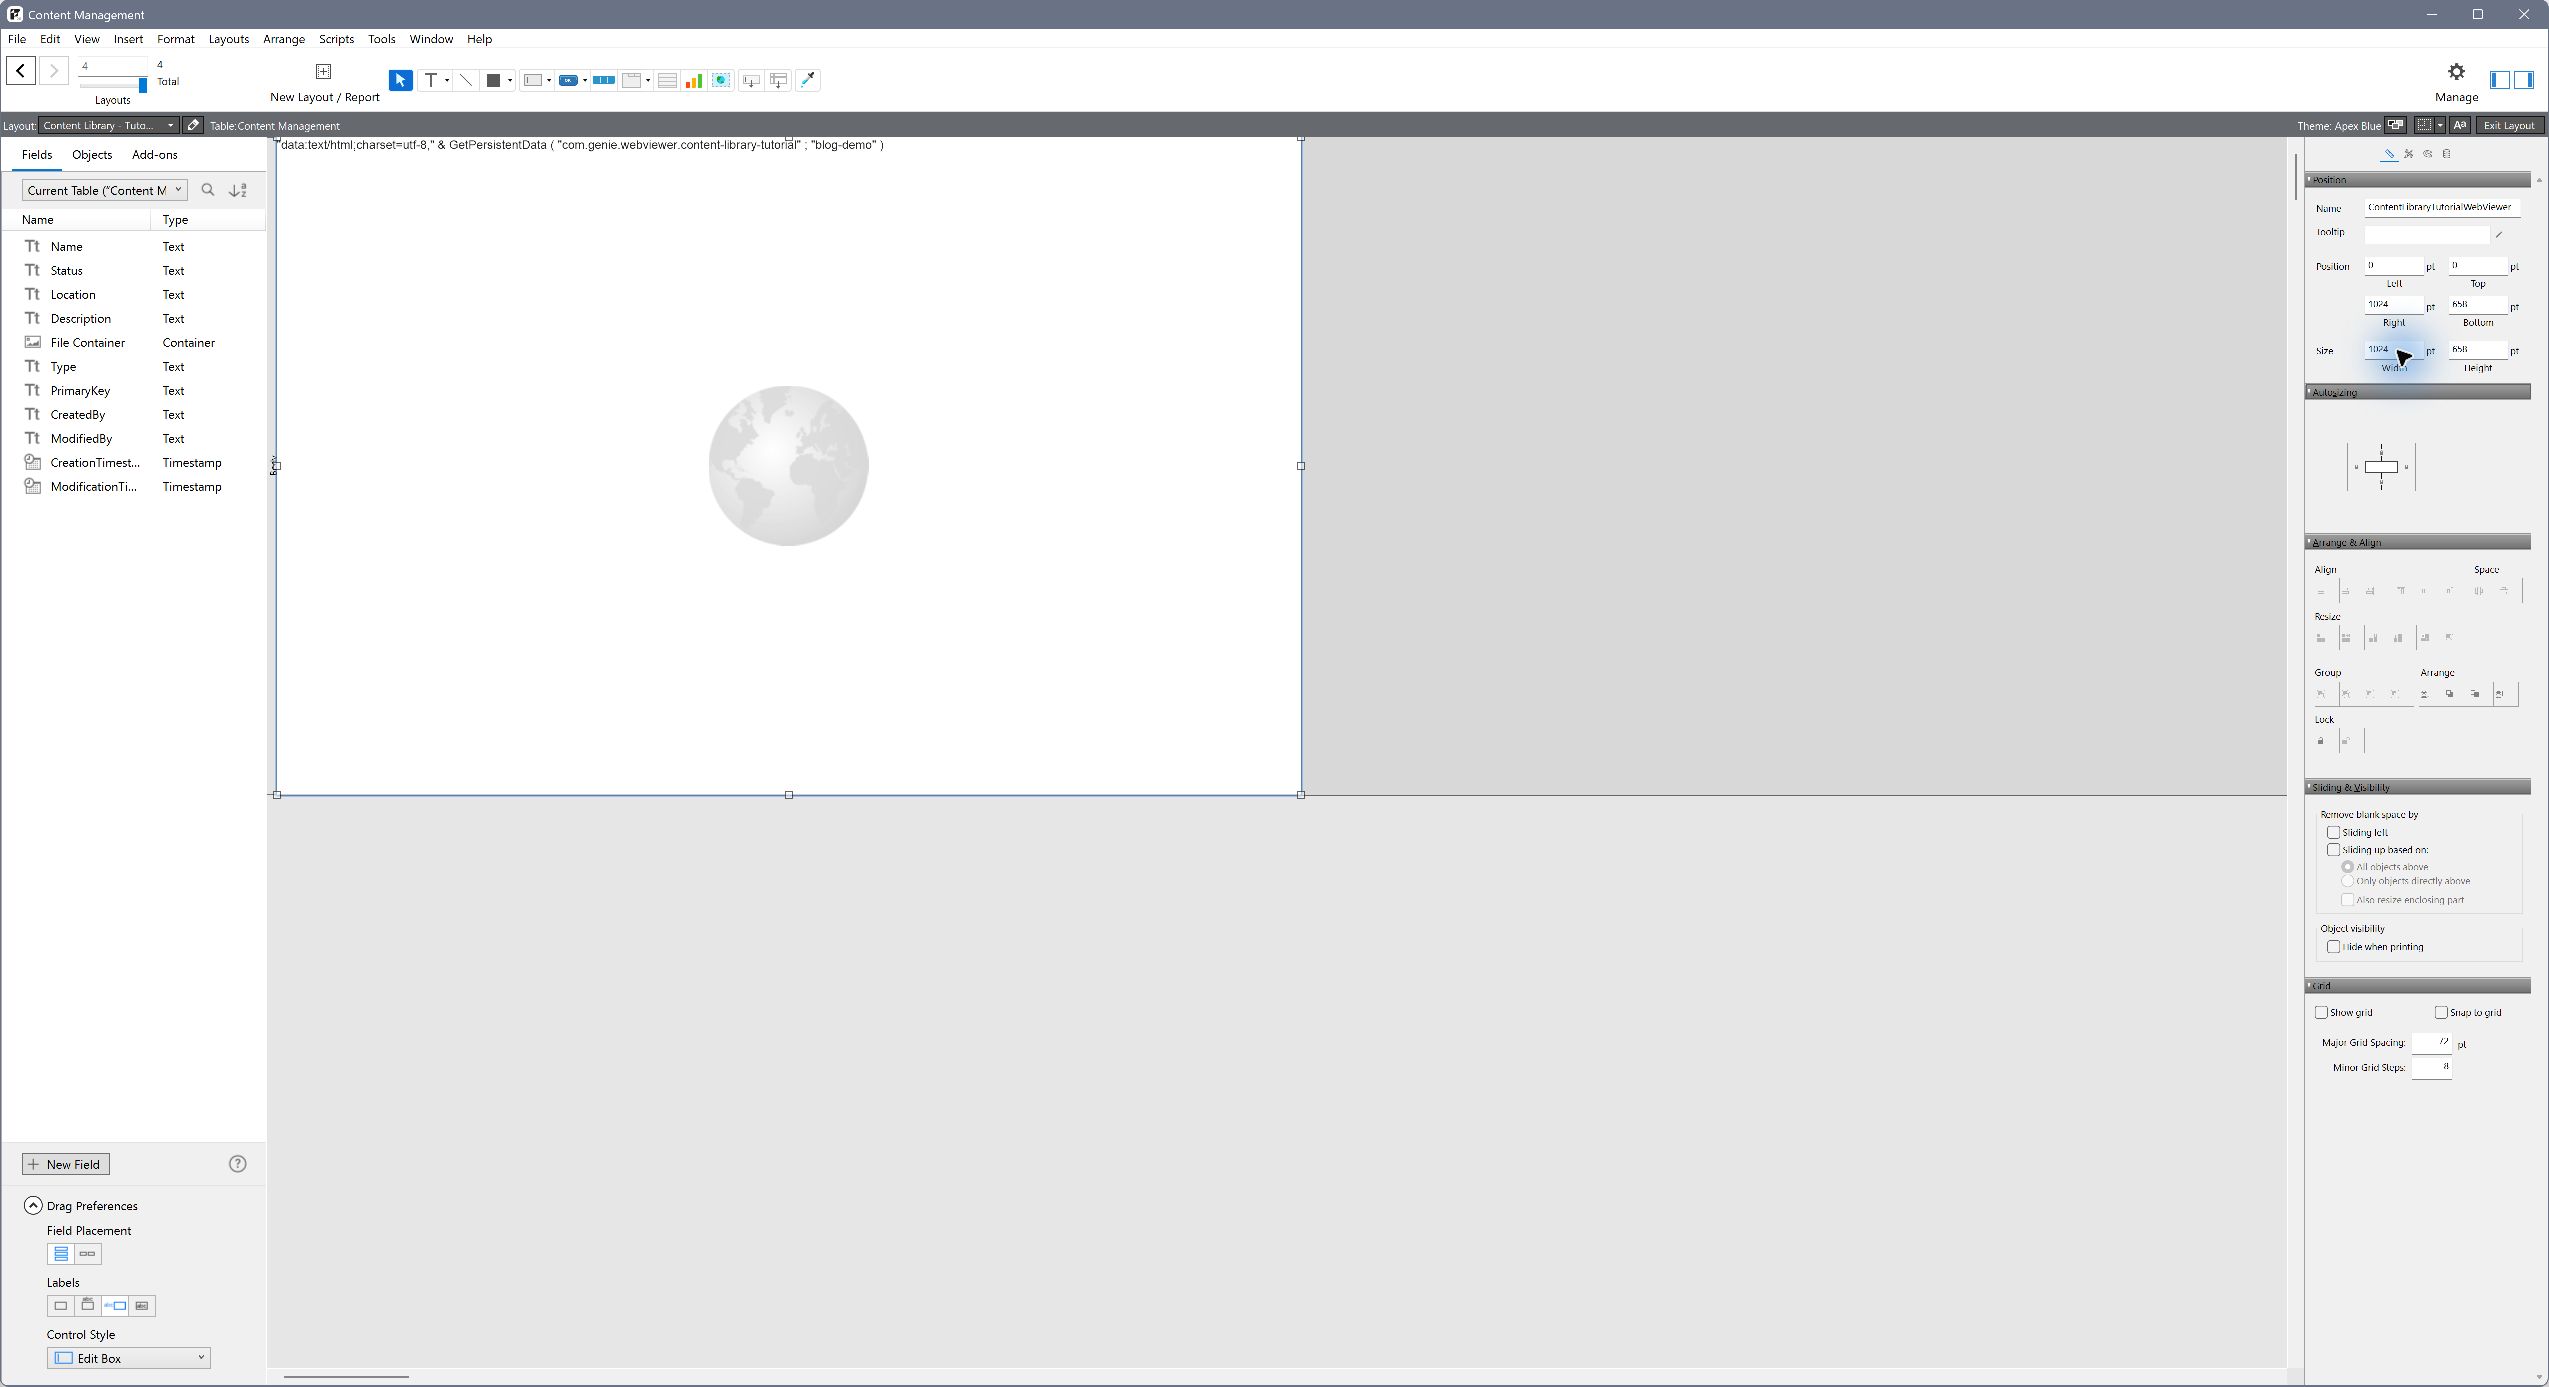
The object sits on a separate layout. Its name lets the helper send results back to it.
Keep the exact object name ContentLibraryTutorialWebViewer. If you use different names, the helper and object must still agree.
Double-click the Web Viewer. Its calculation is already filled in. Check that these three options are selected:
- Allow interaction with web viewer content
- Automatically encode URL
- Allow JavaScript to perform FileMaker scripts
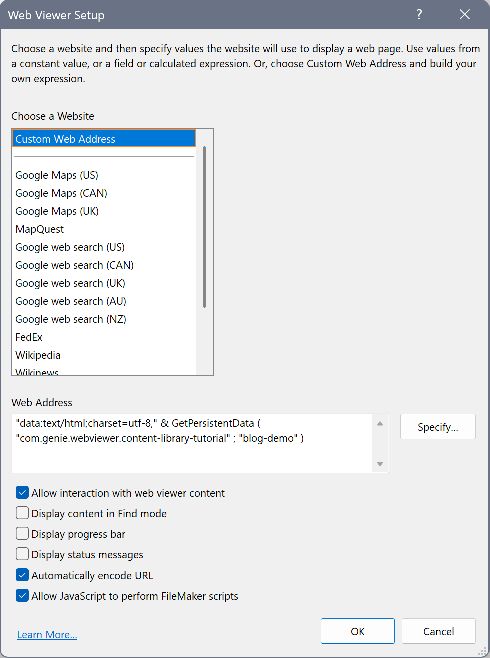
The calculation and permissions travel with the copied object.
Click OK, return to Browse mode and save the layout when FileMaker asks.
7. Add, search and edit real content
In Browse mode, the viewer loads the FileMaker records. The demo uses two fictional items: Alpine Studio — Brand Guide and Harvest Collection — Launch Brief. In a fresh file, create your items with Add Content.
- Search for Alpine to narrow the card list.
- Select the card, then click Edit.
- Change its status from Draft to Approved and click Save Changes.
- Make an unsaved description change, then click Cancel to check that the change is discarded.
- Try adding an item without a Name: a validation message should appear and the record count should stay unchanged.
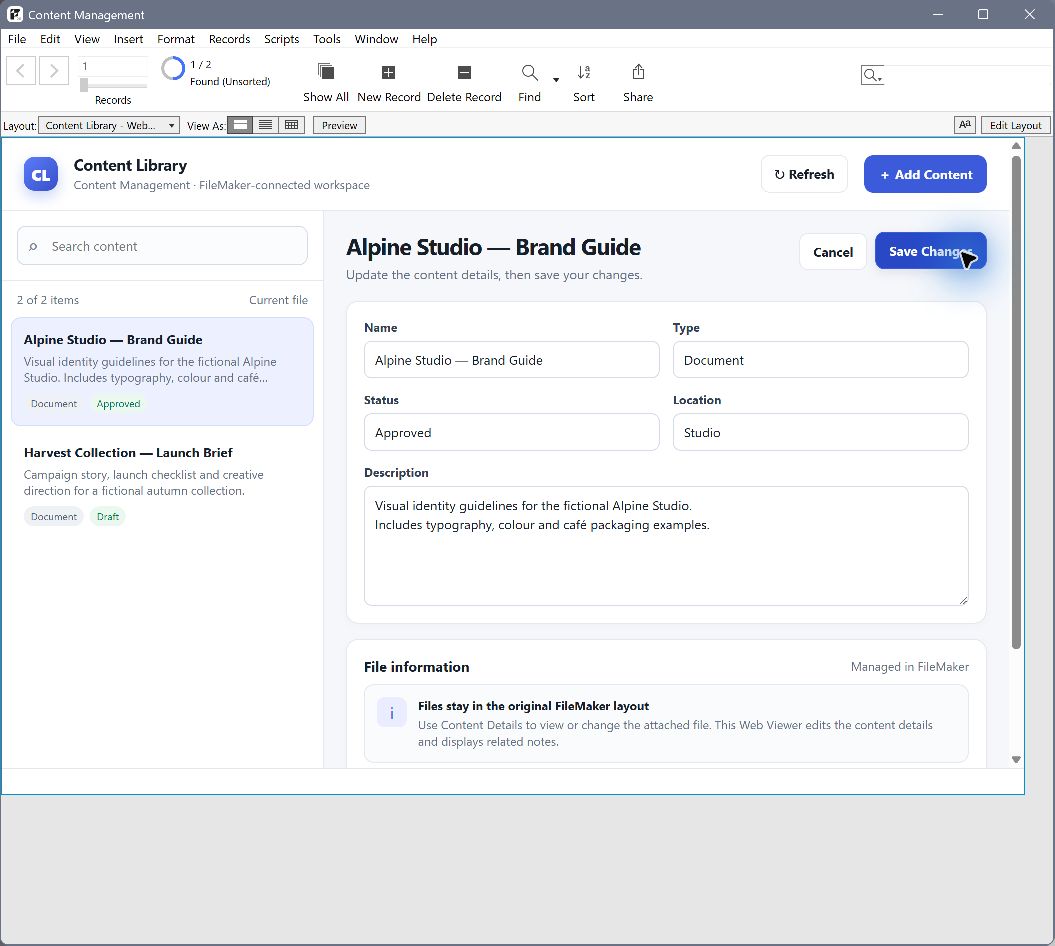
Edit the details, then choose Save Changes to save or Cancel to discard your changes.
The demo was also tested with a multiline description containing the word “café”. Checks like these help confirm that text reaches FileMaker intact.
This version covers reading, creating and editing records. Record deletion, attachment editing and note editing are outside this walkthrough.
8. Check the saved values in FileMaker
After saving through the Web Viewer, return to Content Details and open the same item. Compare its fields with the values you just saved.
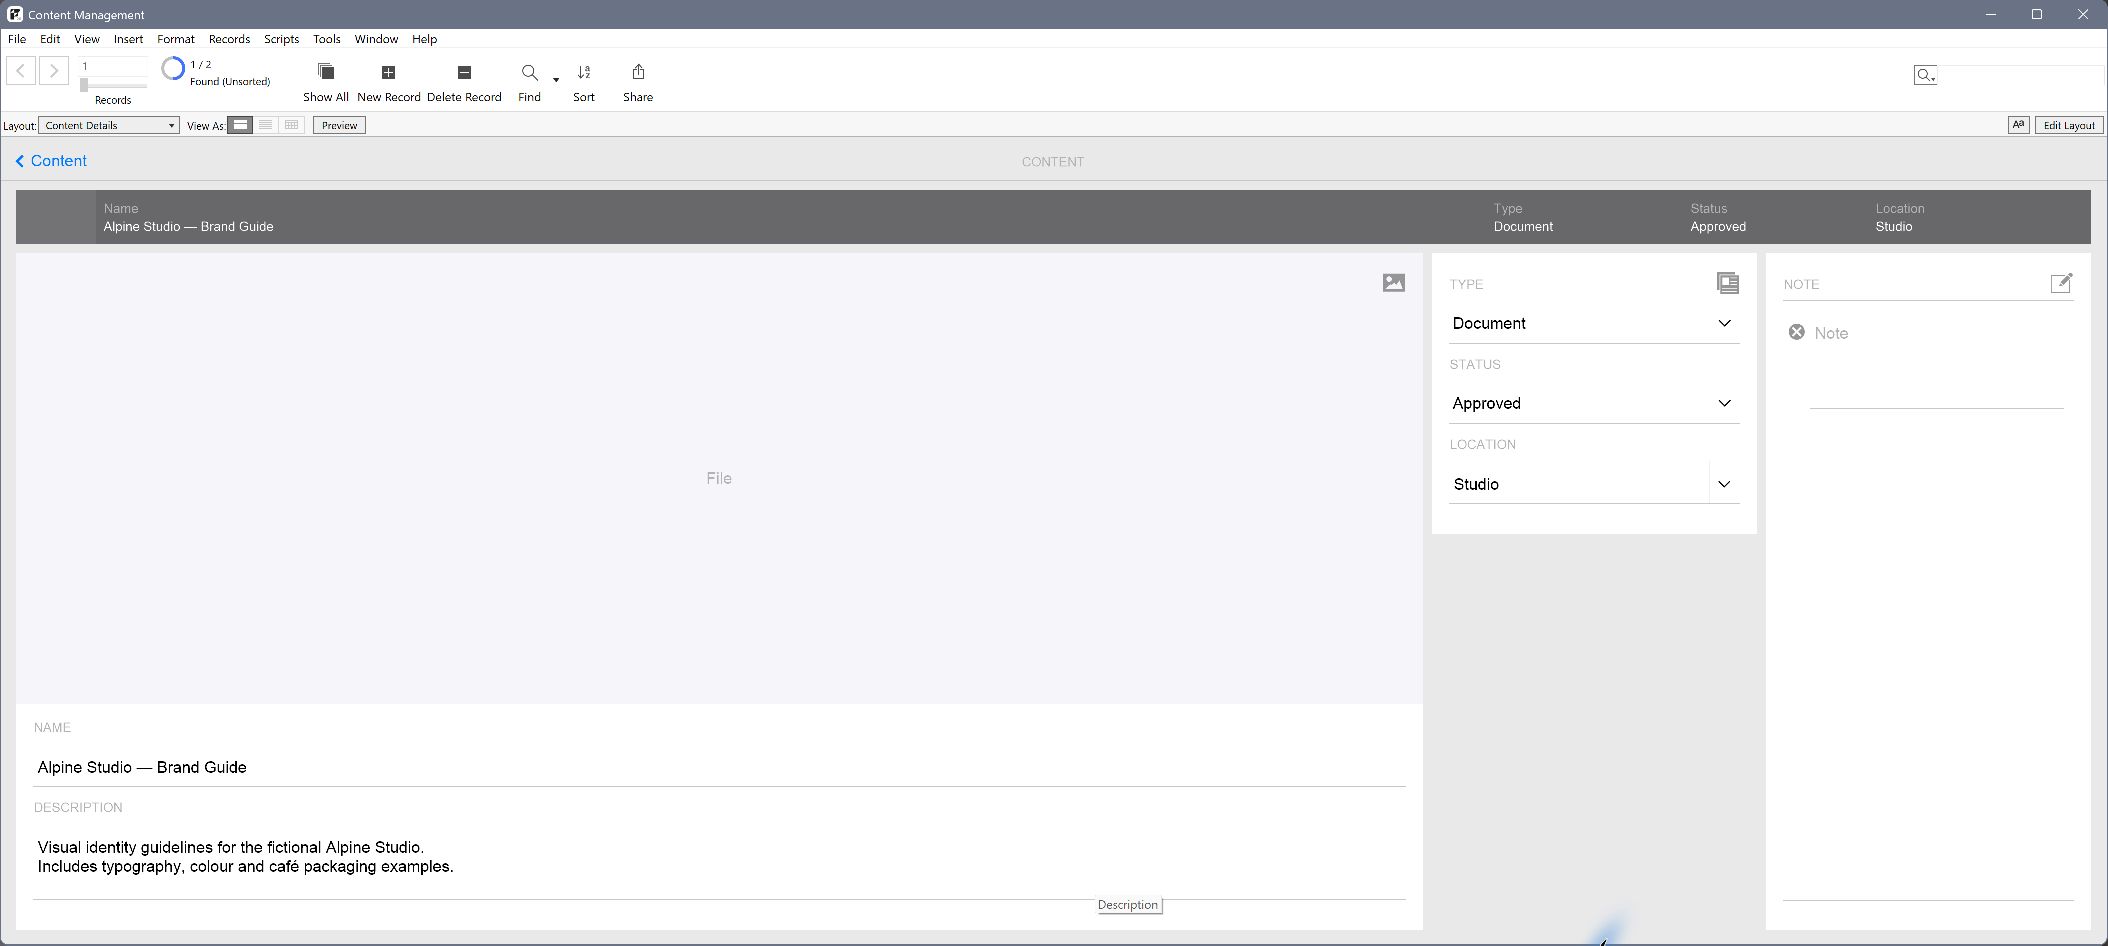
The original FileMaker layout lets you verify the values saved through the Web Viewer.
Close and reopen the file, then return to the Web Viewer. Check that the interface loads, the list contains the right items and your changes are still there. In the tested demo, both items returned and Alpine Studio still showed Approved.
The starter solution, now in a Web Viewer
The Claris Content Management starter solution supplies the layout and data. Genie helps convert that layout into a Web Viewer and connect it to the records through a FileMaker helper script. The same approach starts with an existing solution, adapts its interface and checks that each action saves the right values.