
Using LM Studio as a local LLM for FileMaker AI Development
A practical walkthrough of using LM Studio as a local model endpoint for FileMaker AI workflows, embeddings, semantic search, and local experimentation.
Using LM Studio as a local LLM for FileMaker AI Development
FileMaker AI Jun 19 Written By Bruno Pelletier
A different approach
I’ve come across several insightful articles and tutorials from talented FileMaker developers exploring how to integrate various types of AI to perform semantic search in FileMaker. Most of these approaches rely on models already supported by the FileMaker Server environment, while others leverage popular providers like OpenAI (ChatGPT) or Cohere.
I decided to try something a bit different—an approach that’s especially useful if you’re developing locally and interested in pushing the boundaries of local LLM integration.
By using LM Studio , you gain the flexibility to test specific models with your own data, potentially discovering one that truly fits your needs. Not all models are created equal—some outperform others in meaningful ways—which is why I chose LM Studio as a gateway for local experimentation and testing.
The basics
I won’t cover all the fundamentals of how semantic search works in FileMaker or explain every term you might encounter. Instead, I strongly recommend diving into Claris’s official documentation to build a solid foundation. A great place to start is by reviewing their resources on semantic search and experimenting with the supported models provided by Claris.
Here are two helpful links to get you started:
Claris FileMaker Pro Help - Perform Semantic Find:
https://help.claris.com/en/pro-help/content/perform-semantic-find.html
Claris Academy - AI Fundamentals :
https://community.claris.com/en/s/claris-academy
Once you’re familiar with the terminology and core concepts of AI integration in FileMaker, let’s dive into this experiment!
Prerequisites
Before we begin, you’ll need to install LM Studio on your machine. If you have a dedicated local development server, I highly recommend installing it there. LM Studio allows you to run queries over your local network without issue—and as you’ll soon see, some models can be quite resource-intensive.
For this example, we’ll be installing LM Studio locally on an ARM-based MacBook Pro , which offers more than enough power to test embeddings and perform queries.
Download LM Studio:
Additionally, make sure you have the latest version of FileMaker Pro installed. At the time of writing, I’m using version 21.1.1.41 for this demonstration.
LM Studio - Basic Setup
Once LM Studio is successfully installed, go ahead and launch the application. You’ll be greeted with the main dashboard, which should look something like this:
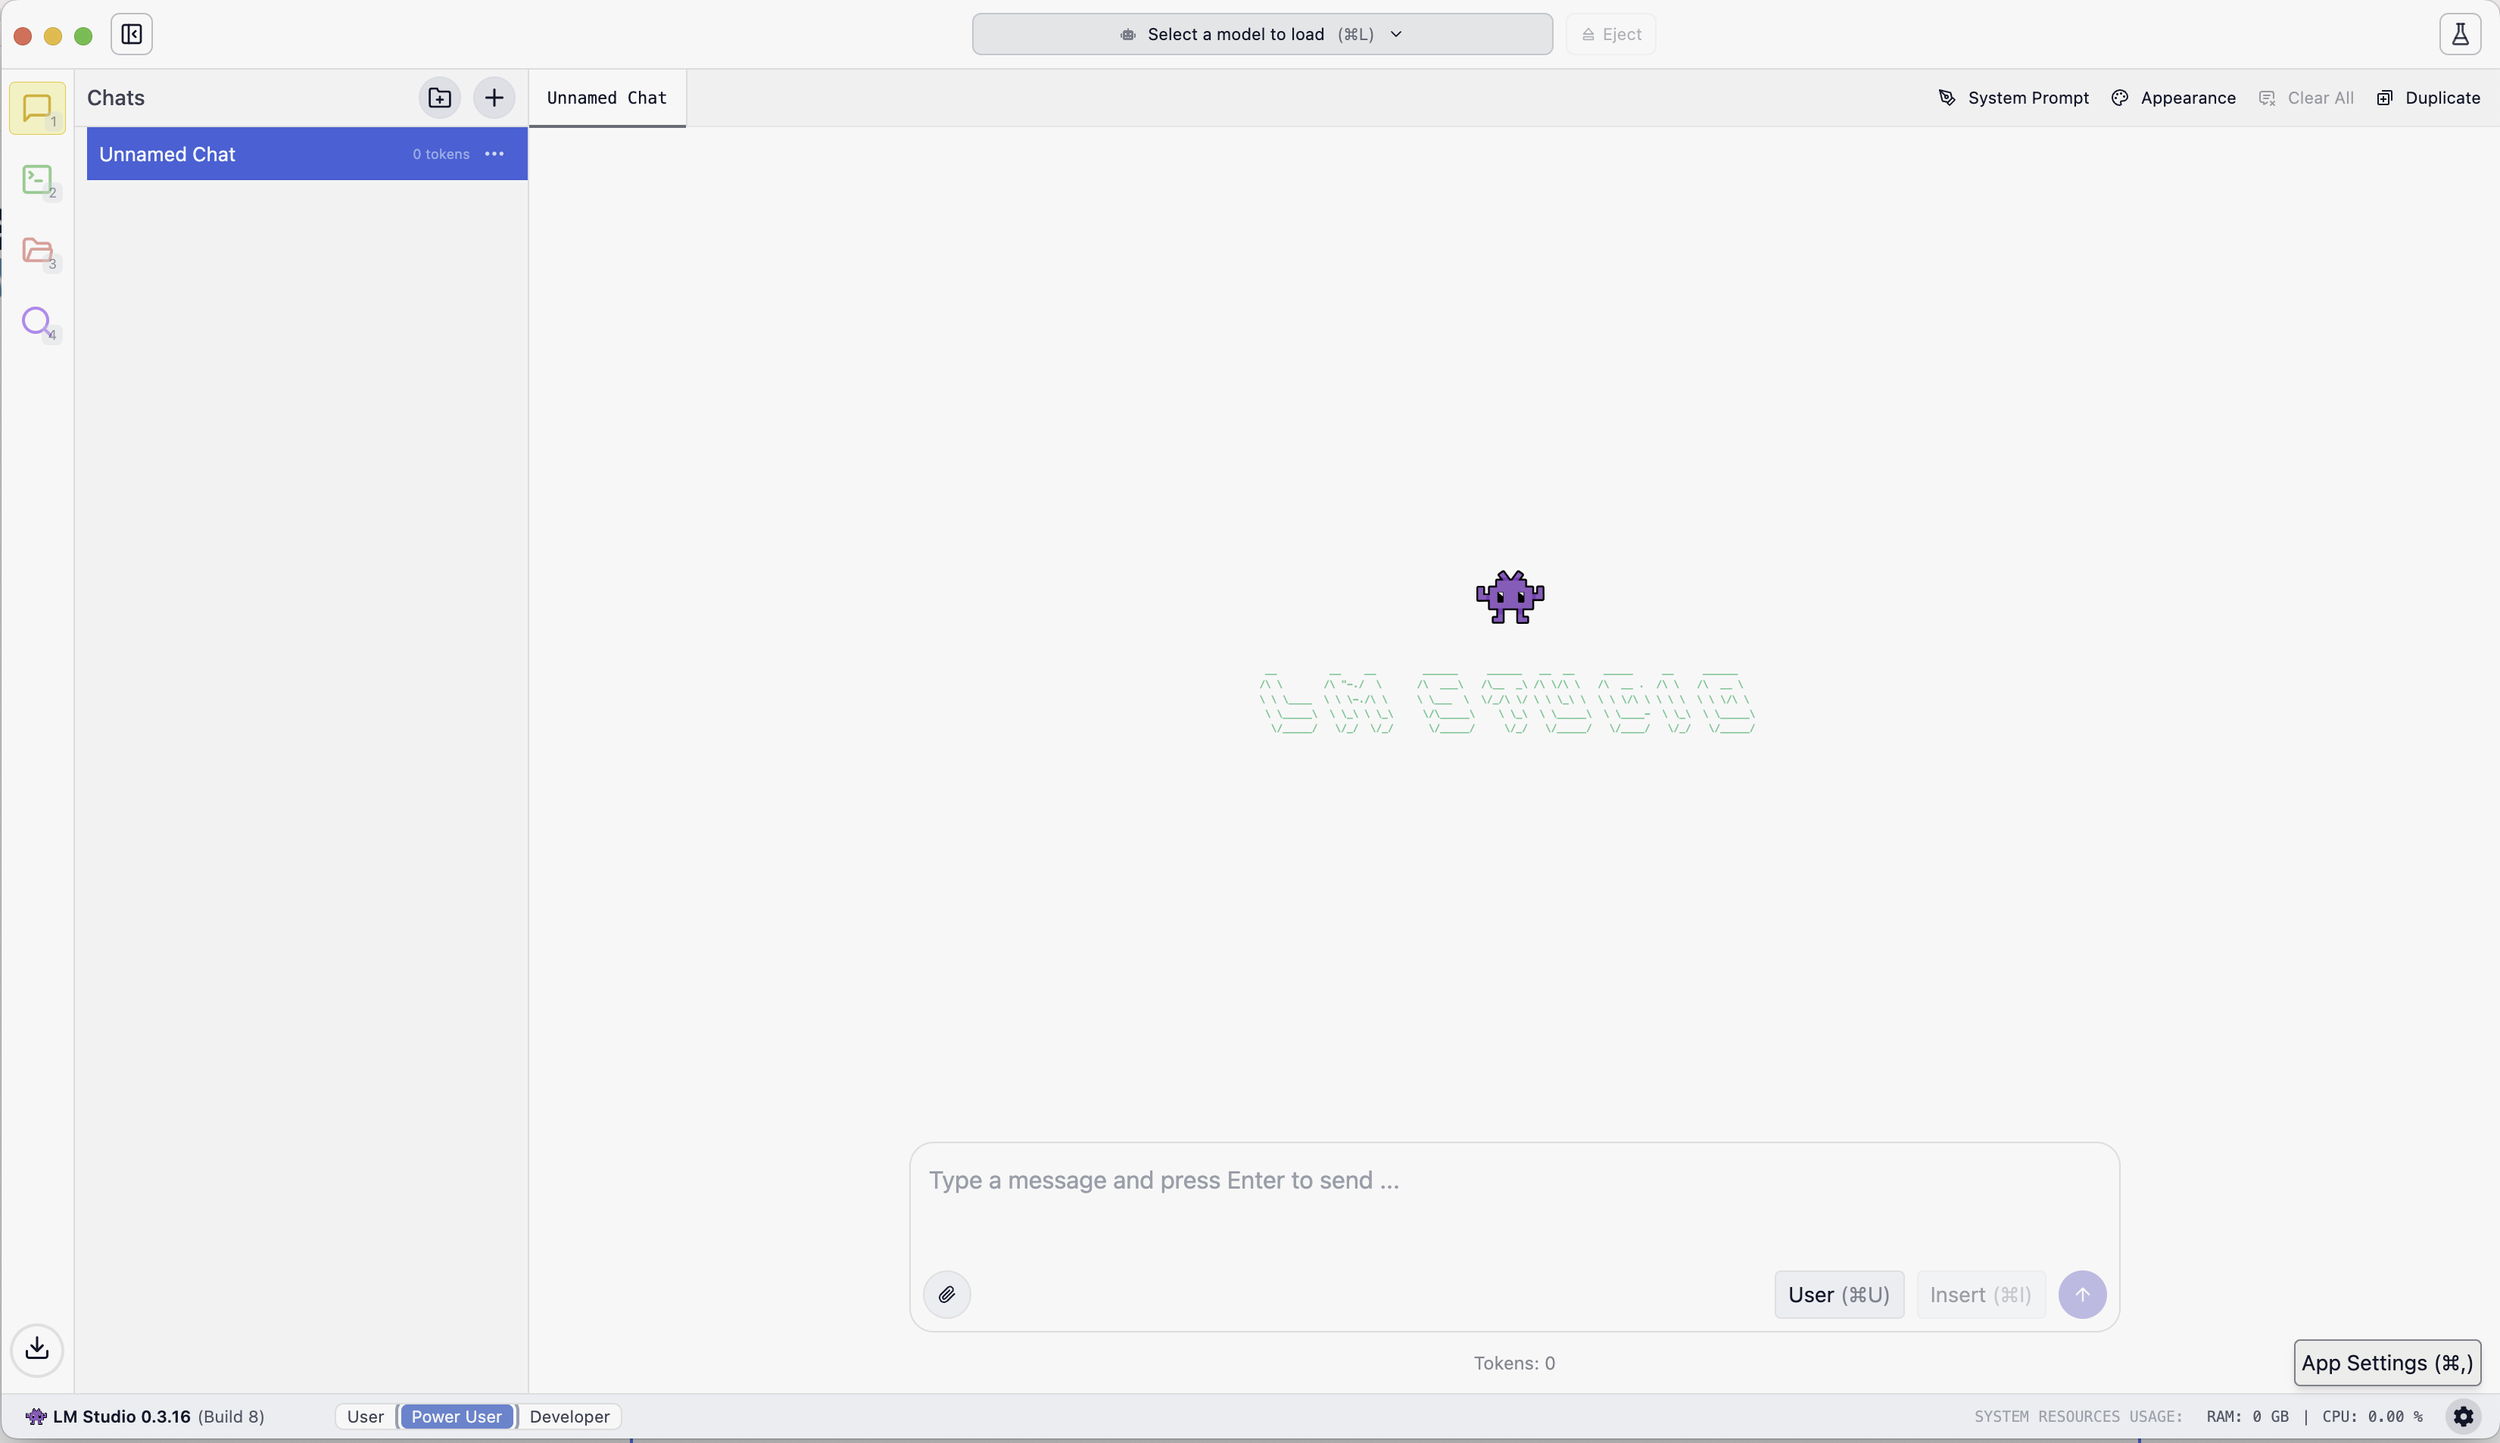
LMStudio launch screen
The first thing you’ll want to do is enable the developer interface to access advanced features and logs. To do this, click on “Developer” in the bottom-left corner of the screen. This will unlock the necessary tools you’ll need for local testing.

Set LMStudio to Developer mode.
Next, click on the Developer section to open the interface where you can view available endpoints, inspect logs, and manage your loaded models.
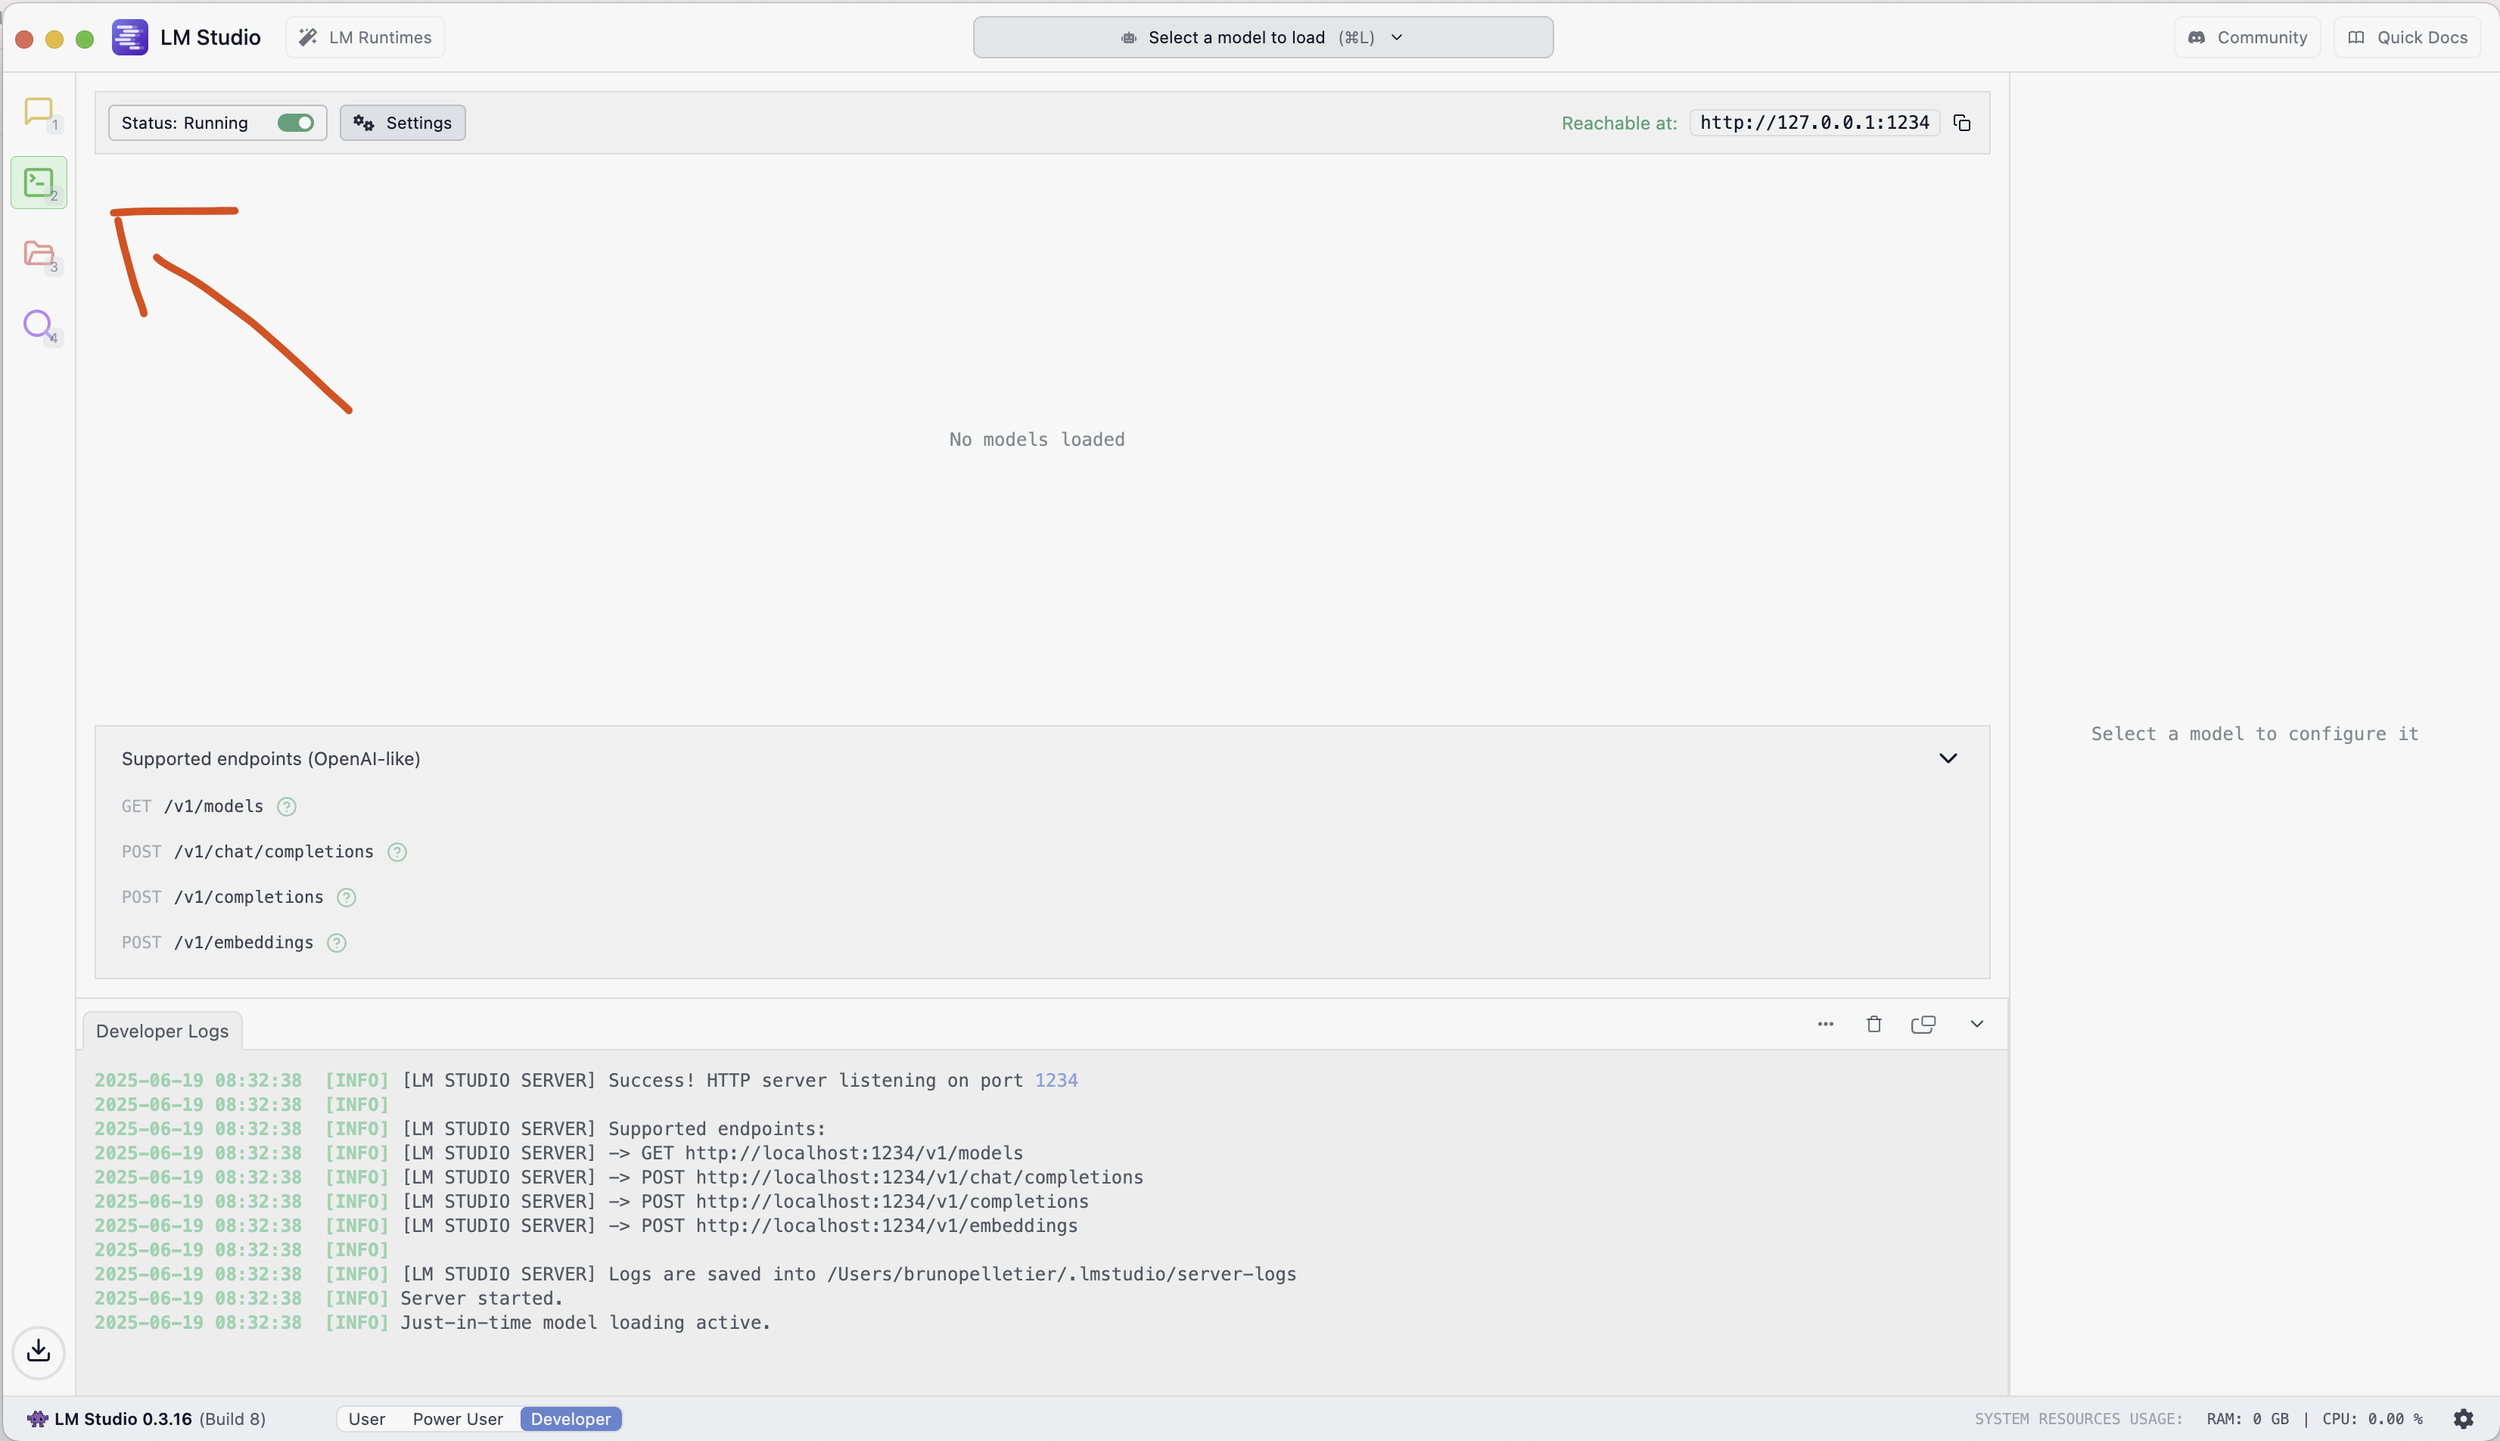
Developer tab
Downloading Models
Now that the basics are configured, we can start loading models into LM Studio for testing. It’s important to note that depending on the language of the text you plan to embed, you may want to choose a multilingual model . For our example, we’ll be using text-embedding-nomic-embed-text-v1.5, which is light and efficient.
Keep in mind: the more tokens a model can handle, the larger the query—but also the more demanding it becomes in terms of performance and system resources. It’s a double-edged sword worth considering based on your use case.
To begin installing models, click on “LM Runtimes” in the upper-left corner of the LM Studio window. This will open a search interface where you can browse and select available models.

LM Runtimes button
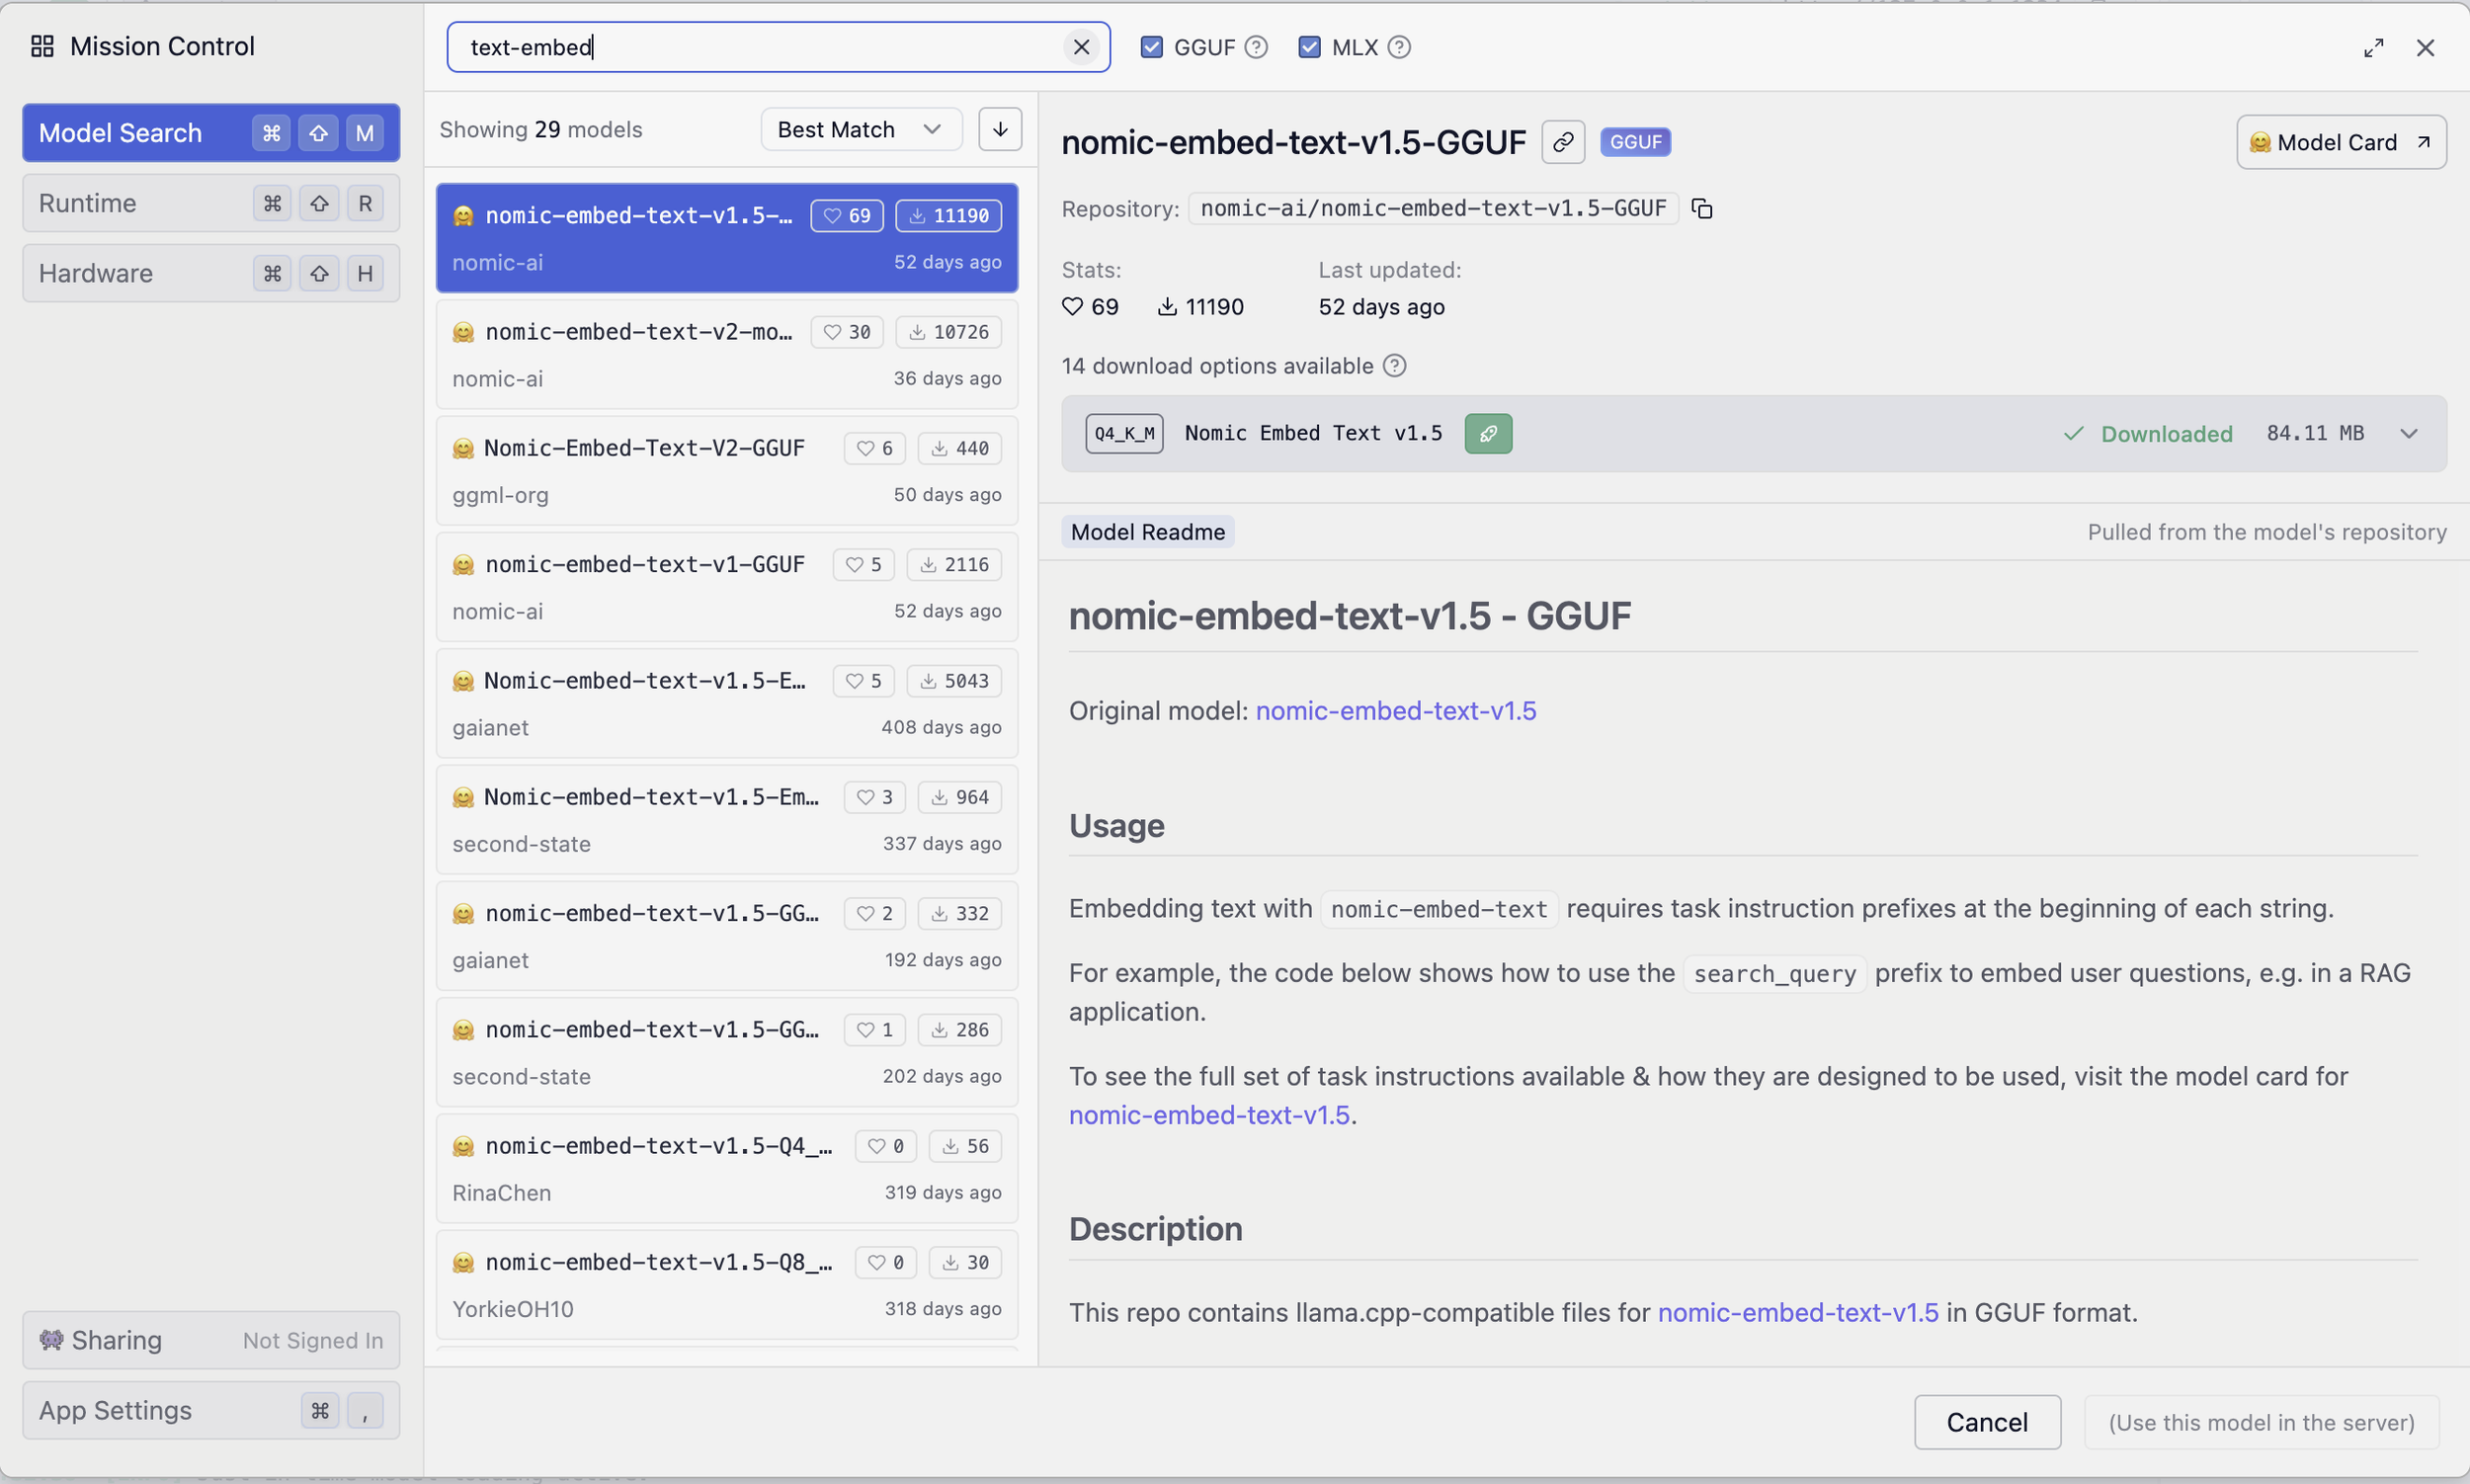
Model download selection
Once you’ve downloaded the model you want to use, you can either click “Use this model in the server” or simply close the window. Then, from the Developer window, click on “Select a model to load” to choose from the models you’ve downloaded. This step makes the selected model available for use on your local server.

The window will look like this once a model is loaded
Initial FileMaker Database setup
For this demonstration, I’m using a database based on the Inventory starter solution provided by FileMaker Pro.
If you’d like to follow along with the same setup, you can download a copy with pre-populated data and fields from the link in the Conclusion section below. Otherwise, you can build it yourself by following the steps outlined here.
To start, I created a list of about 10 products, each with a name, description, price, and image. I used fire pits from Amazon as sample data—mainly because that’s what I’ve been browsing lately. For each product, I copied the title, price, detailed description, and an image.
We’ll customize the layout and add the necessary fields for semantic search integration later in the tutorial, once the product data has been entered.
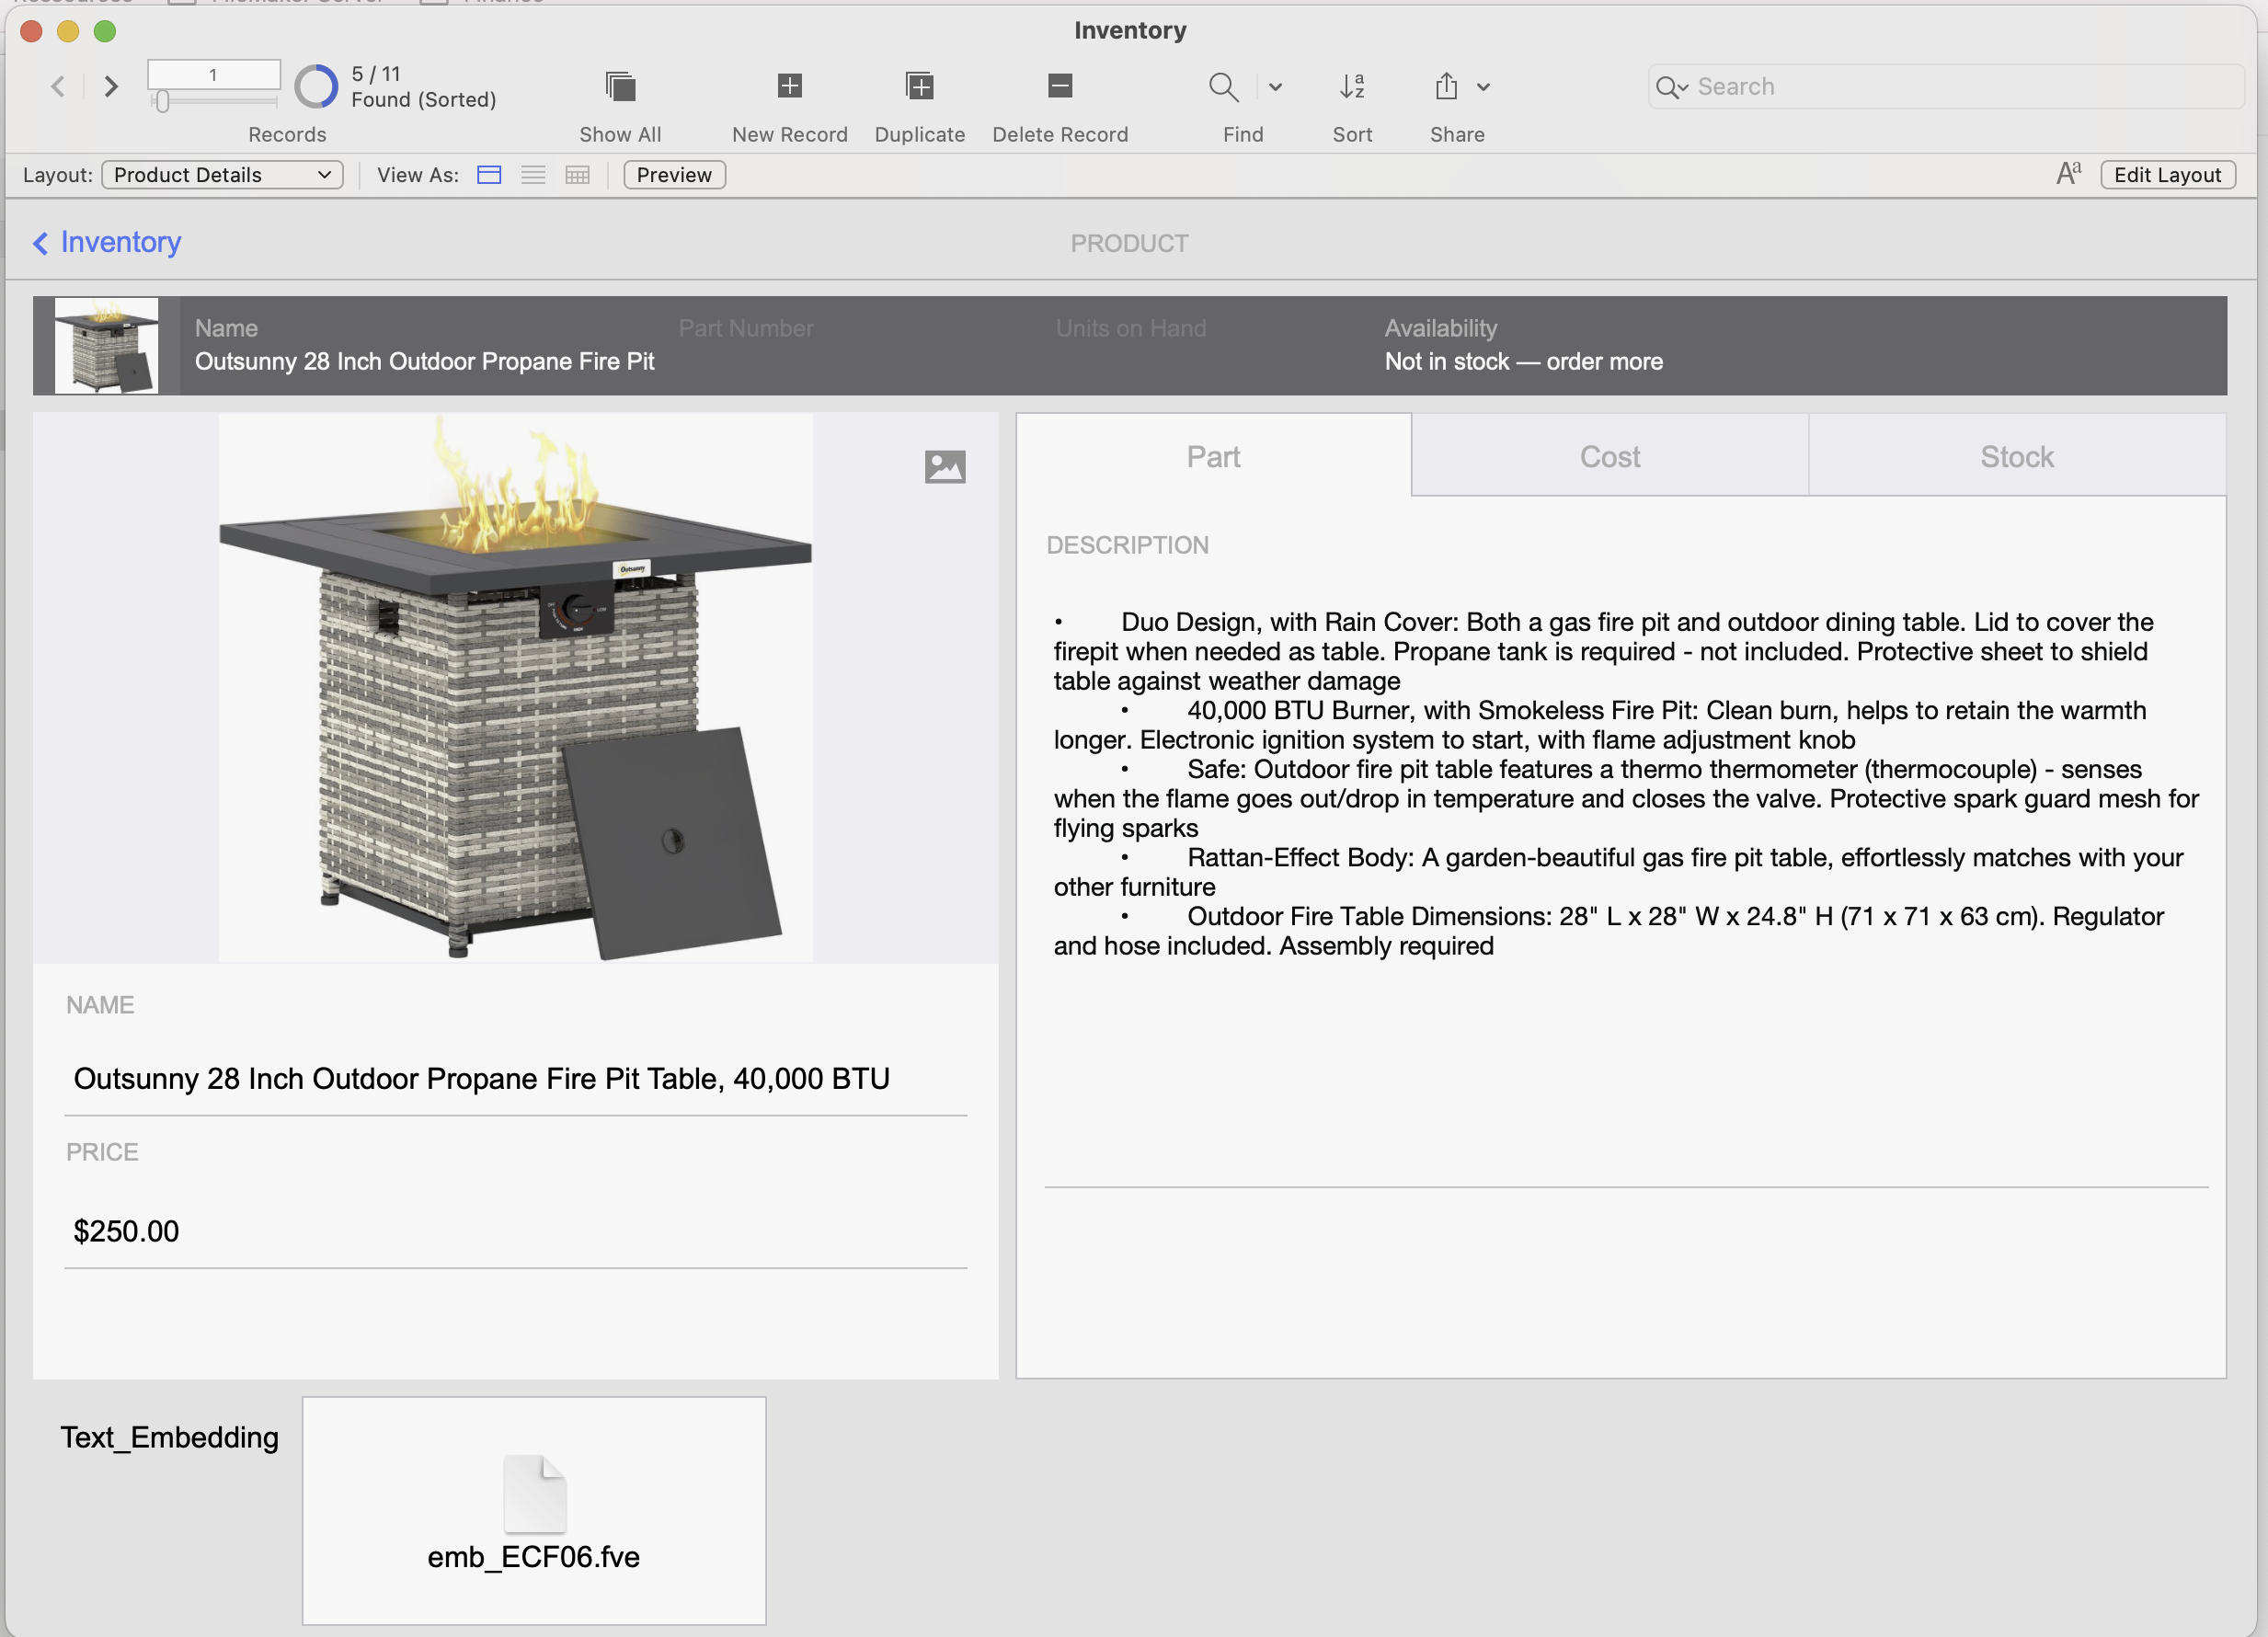
The inventory database starting file
I created 11 product records, each with a name, price, and a description copied directly from Amazon. I also modified both the List and Detail layouts to quickly display the information I need during testing.
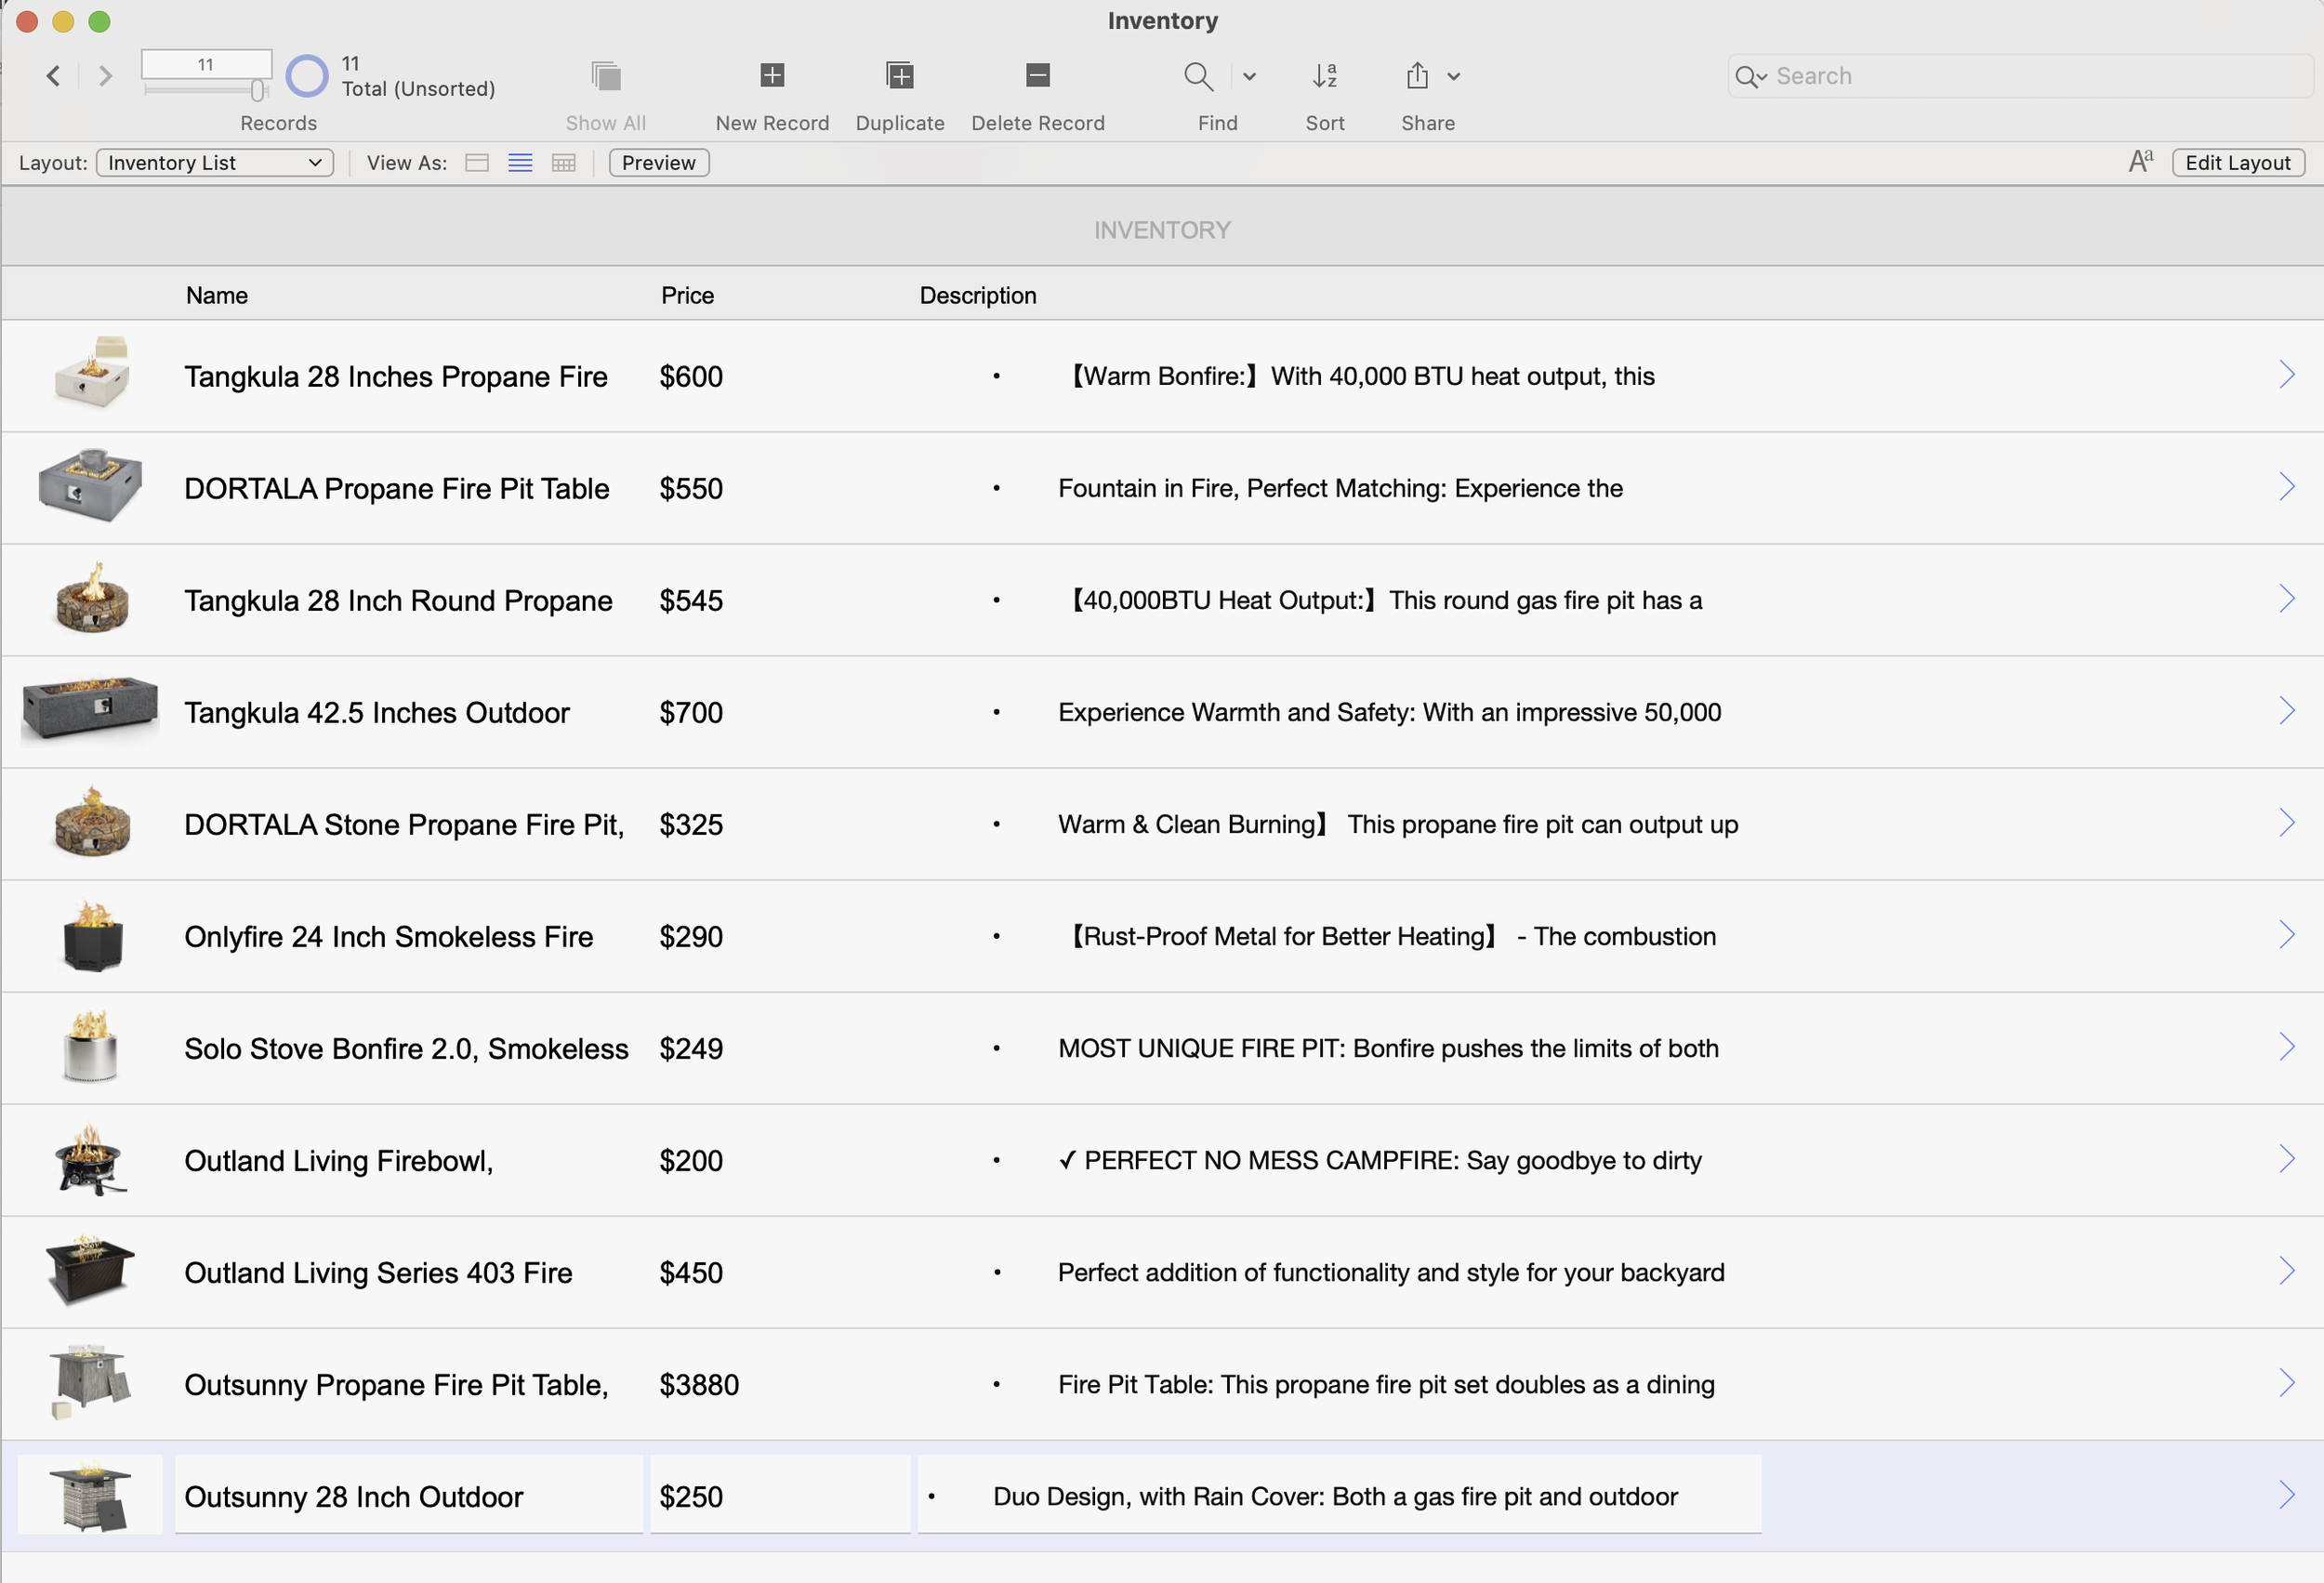
List of fire pits that we will embed using our LLM model
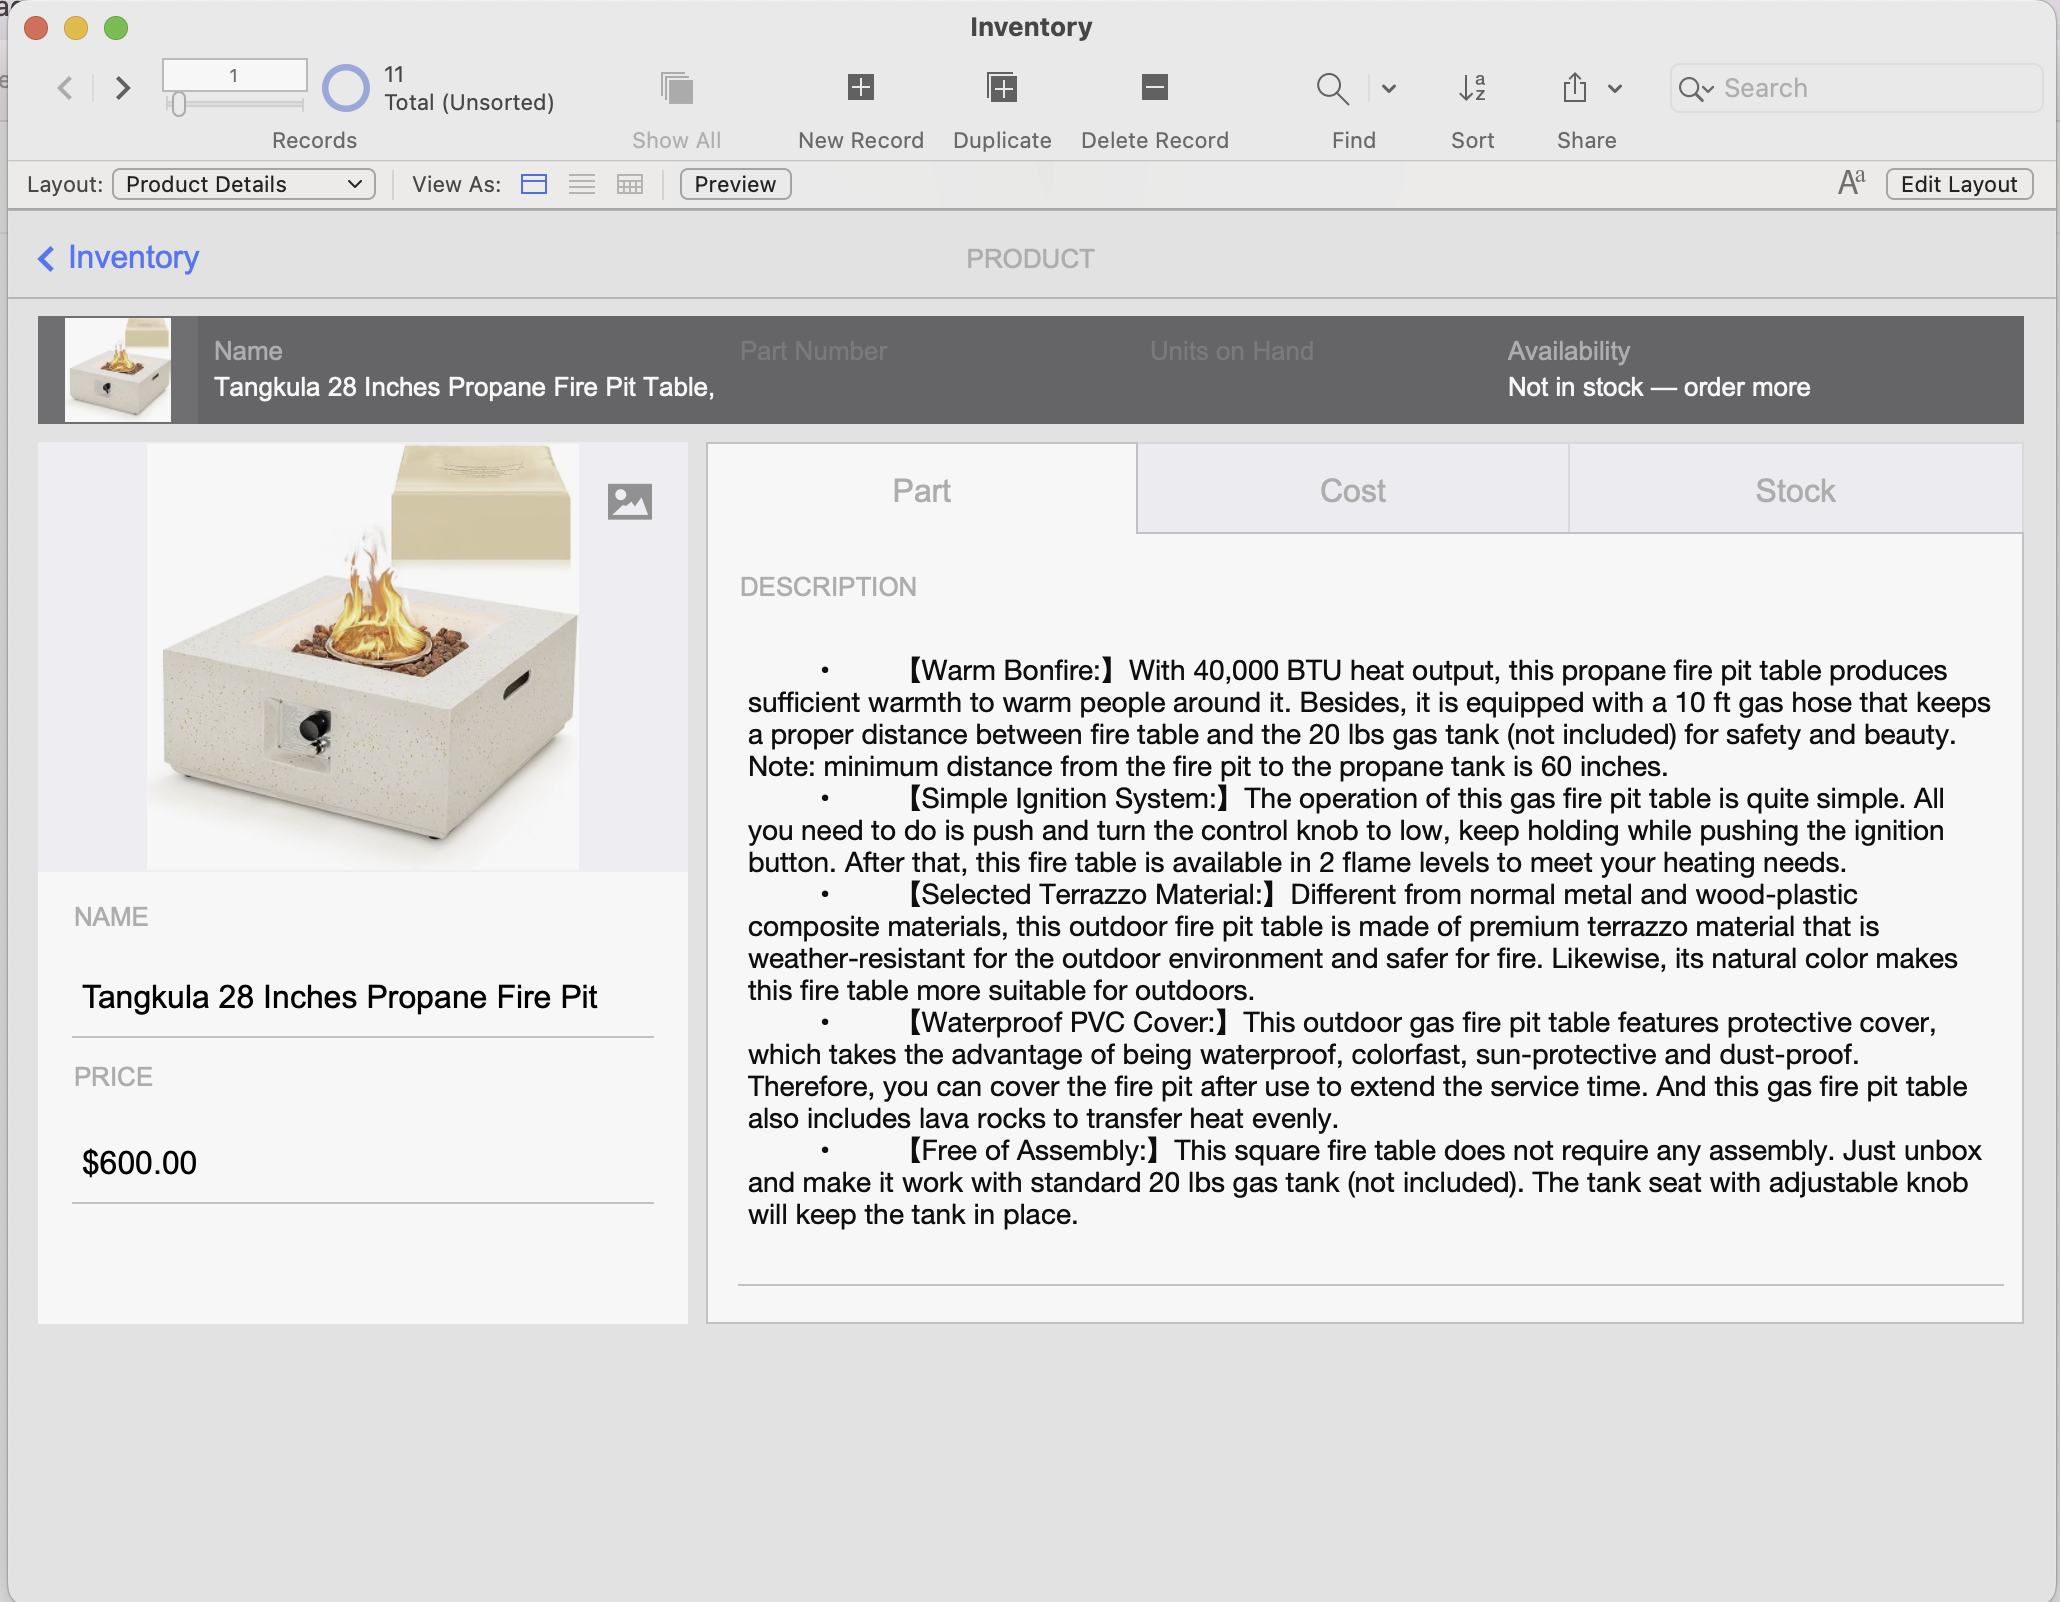
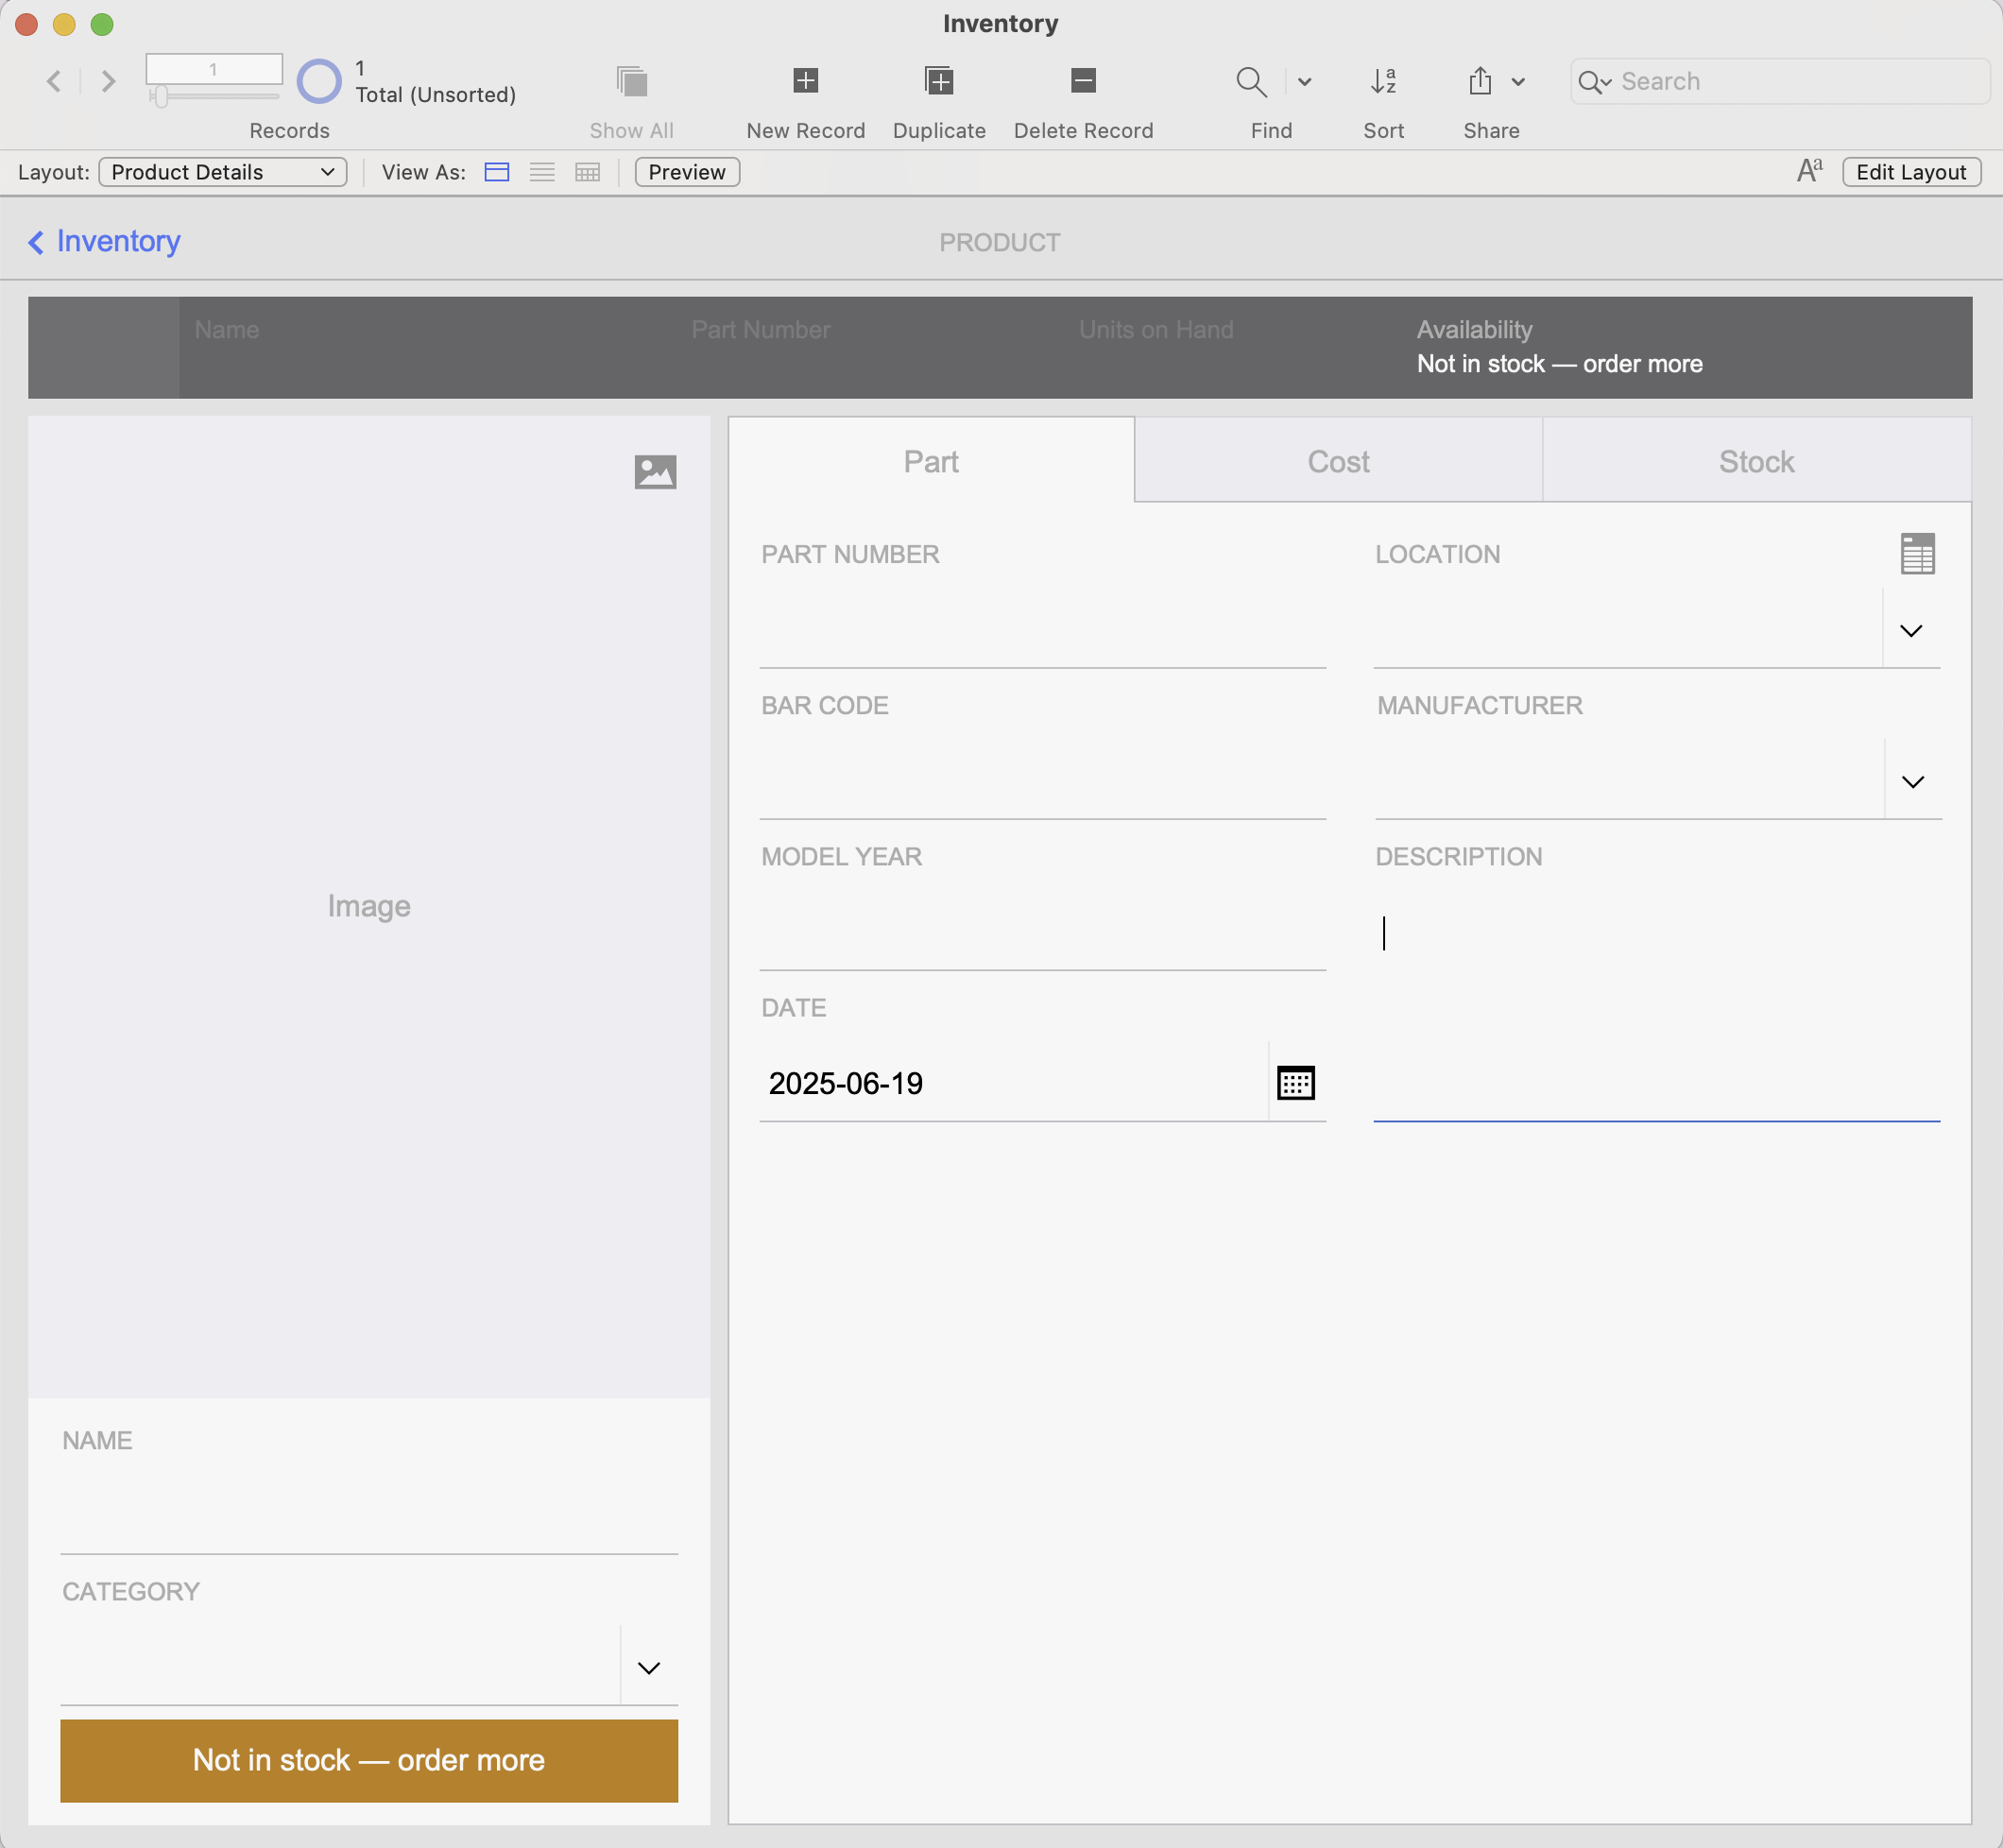
Modified detail view with our necessary information
Creating the necessary fields for our Embed
To begin the embedding process, we’ll create two new fields in our database to support semantic search:
Text_Embedding (Container) – This field will store the embedding data generated from each product’s description.
Search_g (Text, Global) – A global field that we’ll later use to define the match threshold during searches.
These fields will form the foundation of our local semantic search workflow in FileMaker.
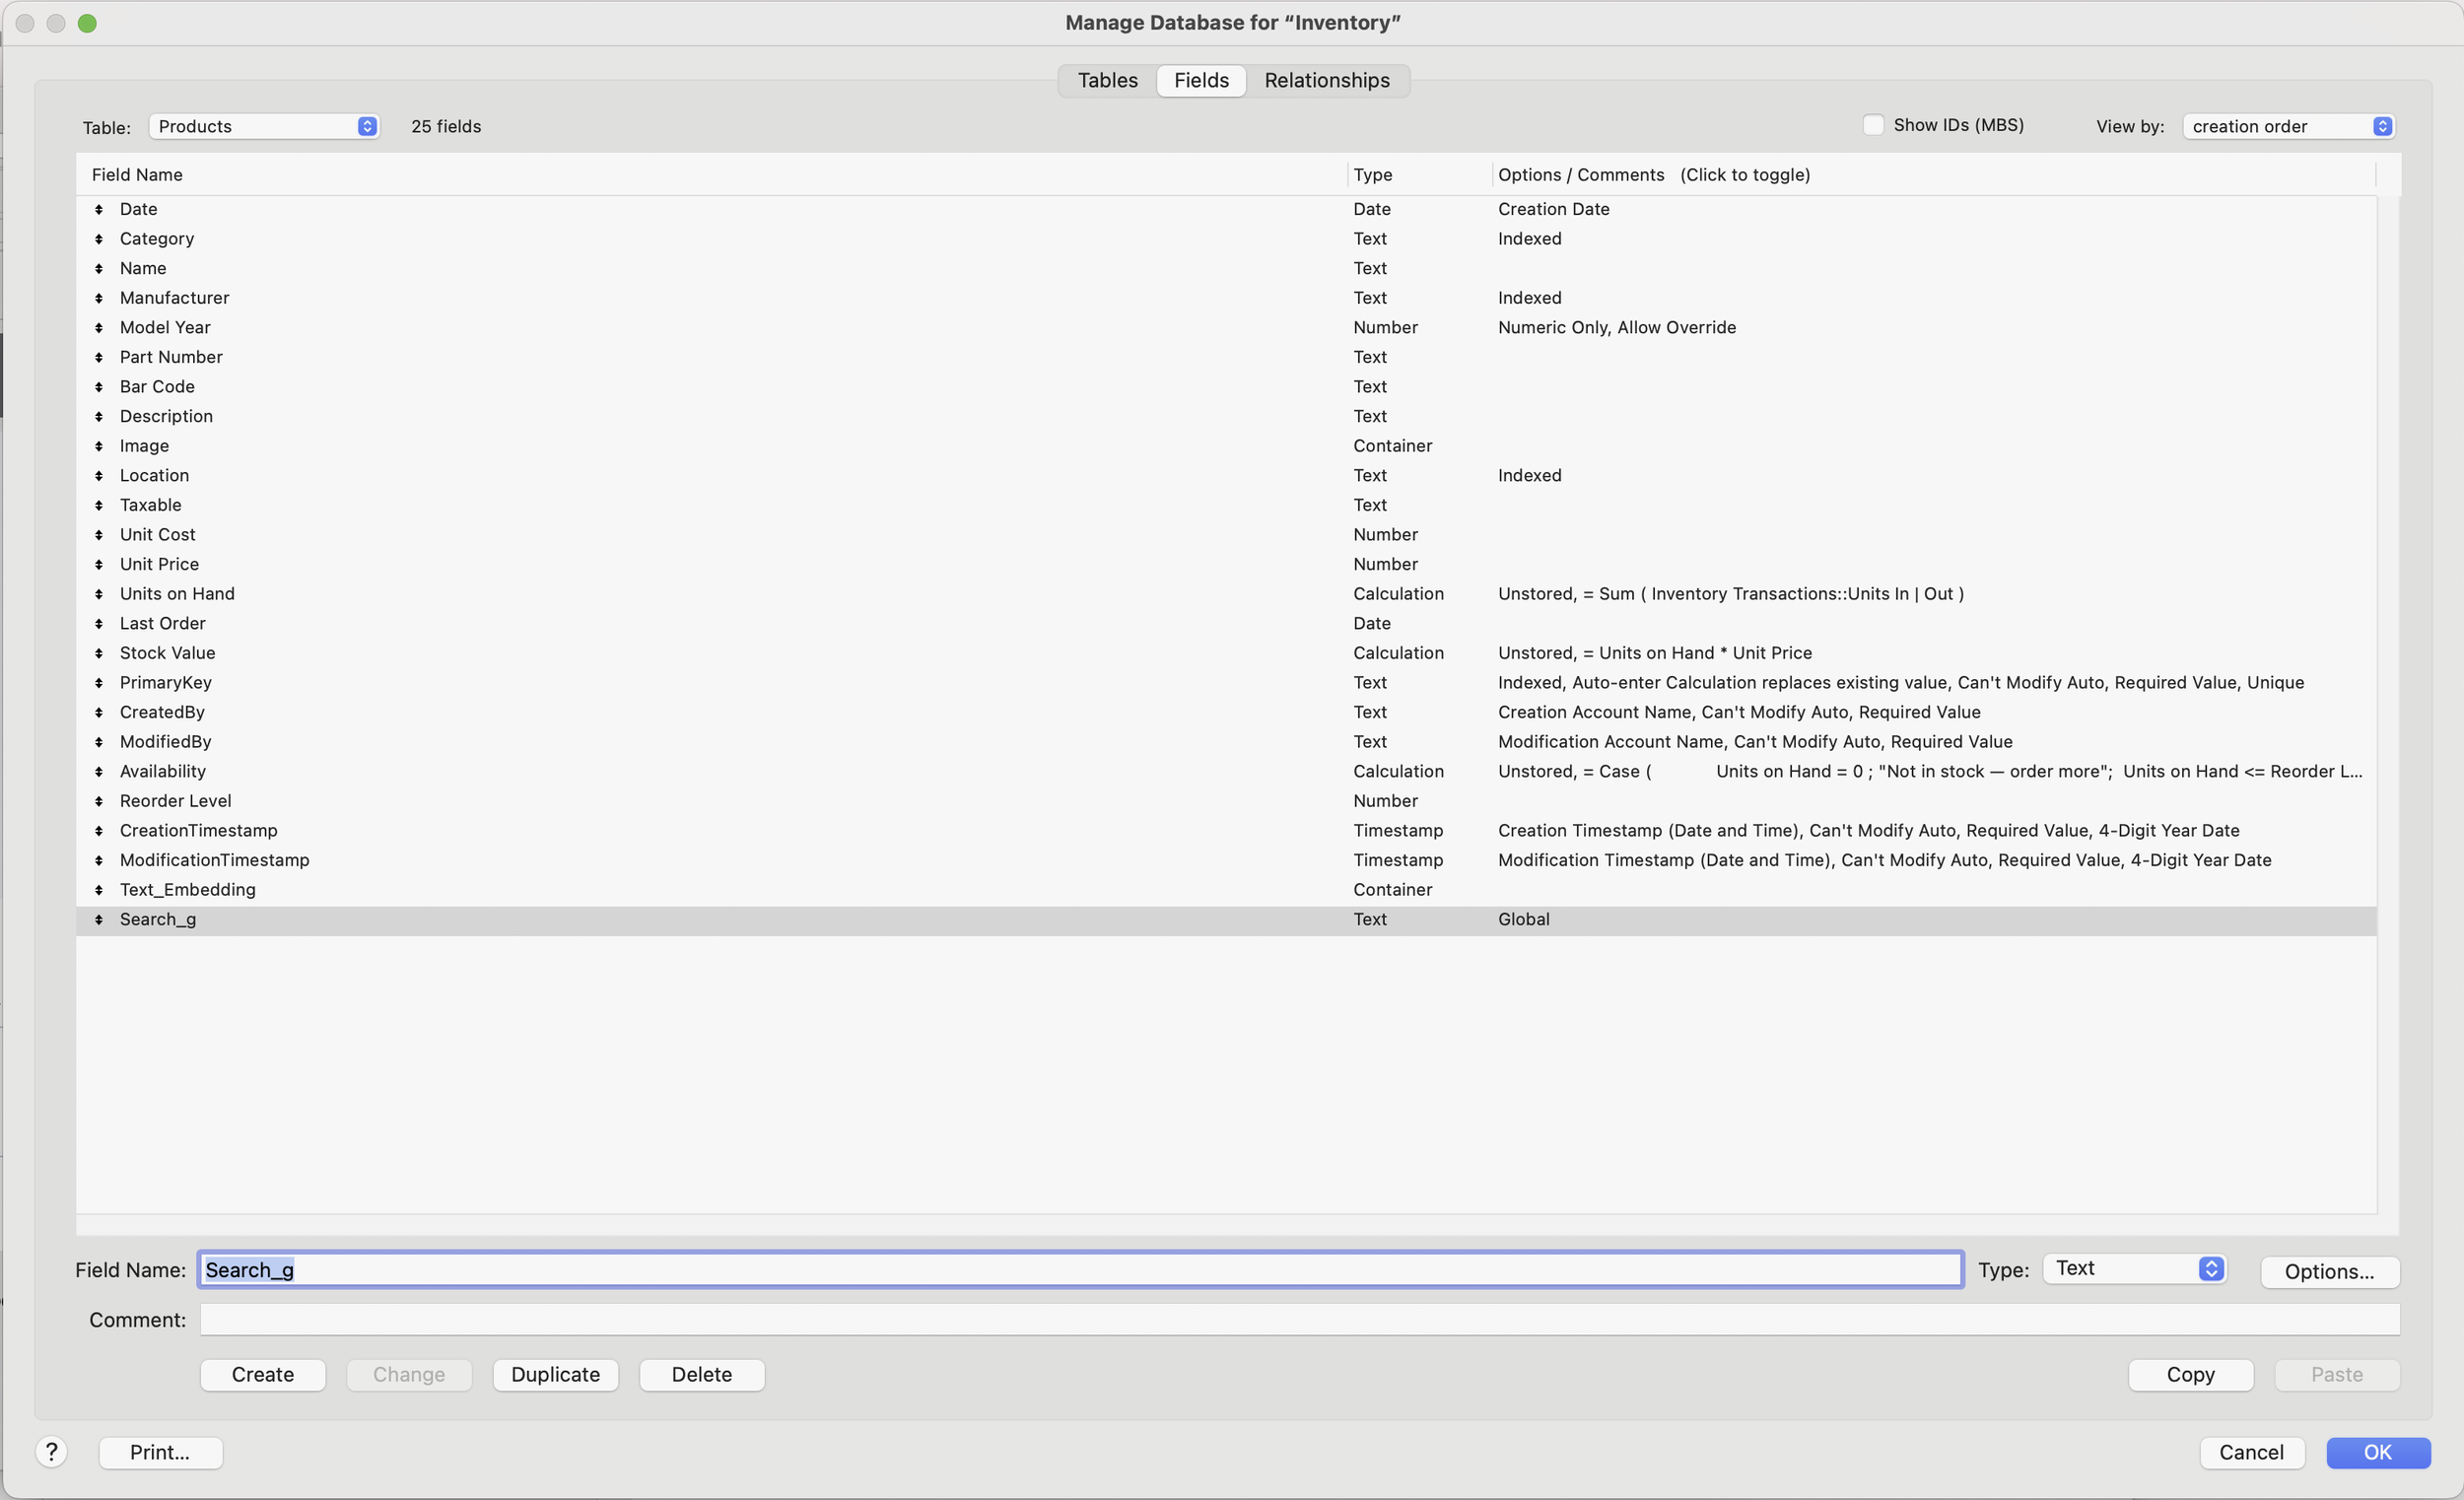
Our new fields
Creating the necessary scripts
Now that our file is set up, we can begin creating the scripts needed to perform embeddings and run semantic searches.
Script 1: Configure AI Account
Our first script is used to configure the AI account settings. It must be run before any AI-related script steps or functions are executed. You can either run this script at file startup or call it manually before making any AI requests.
The script will look something like this:
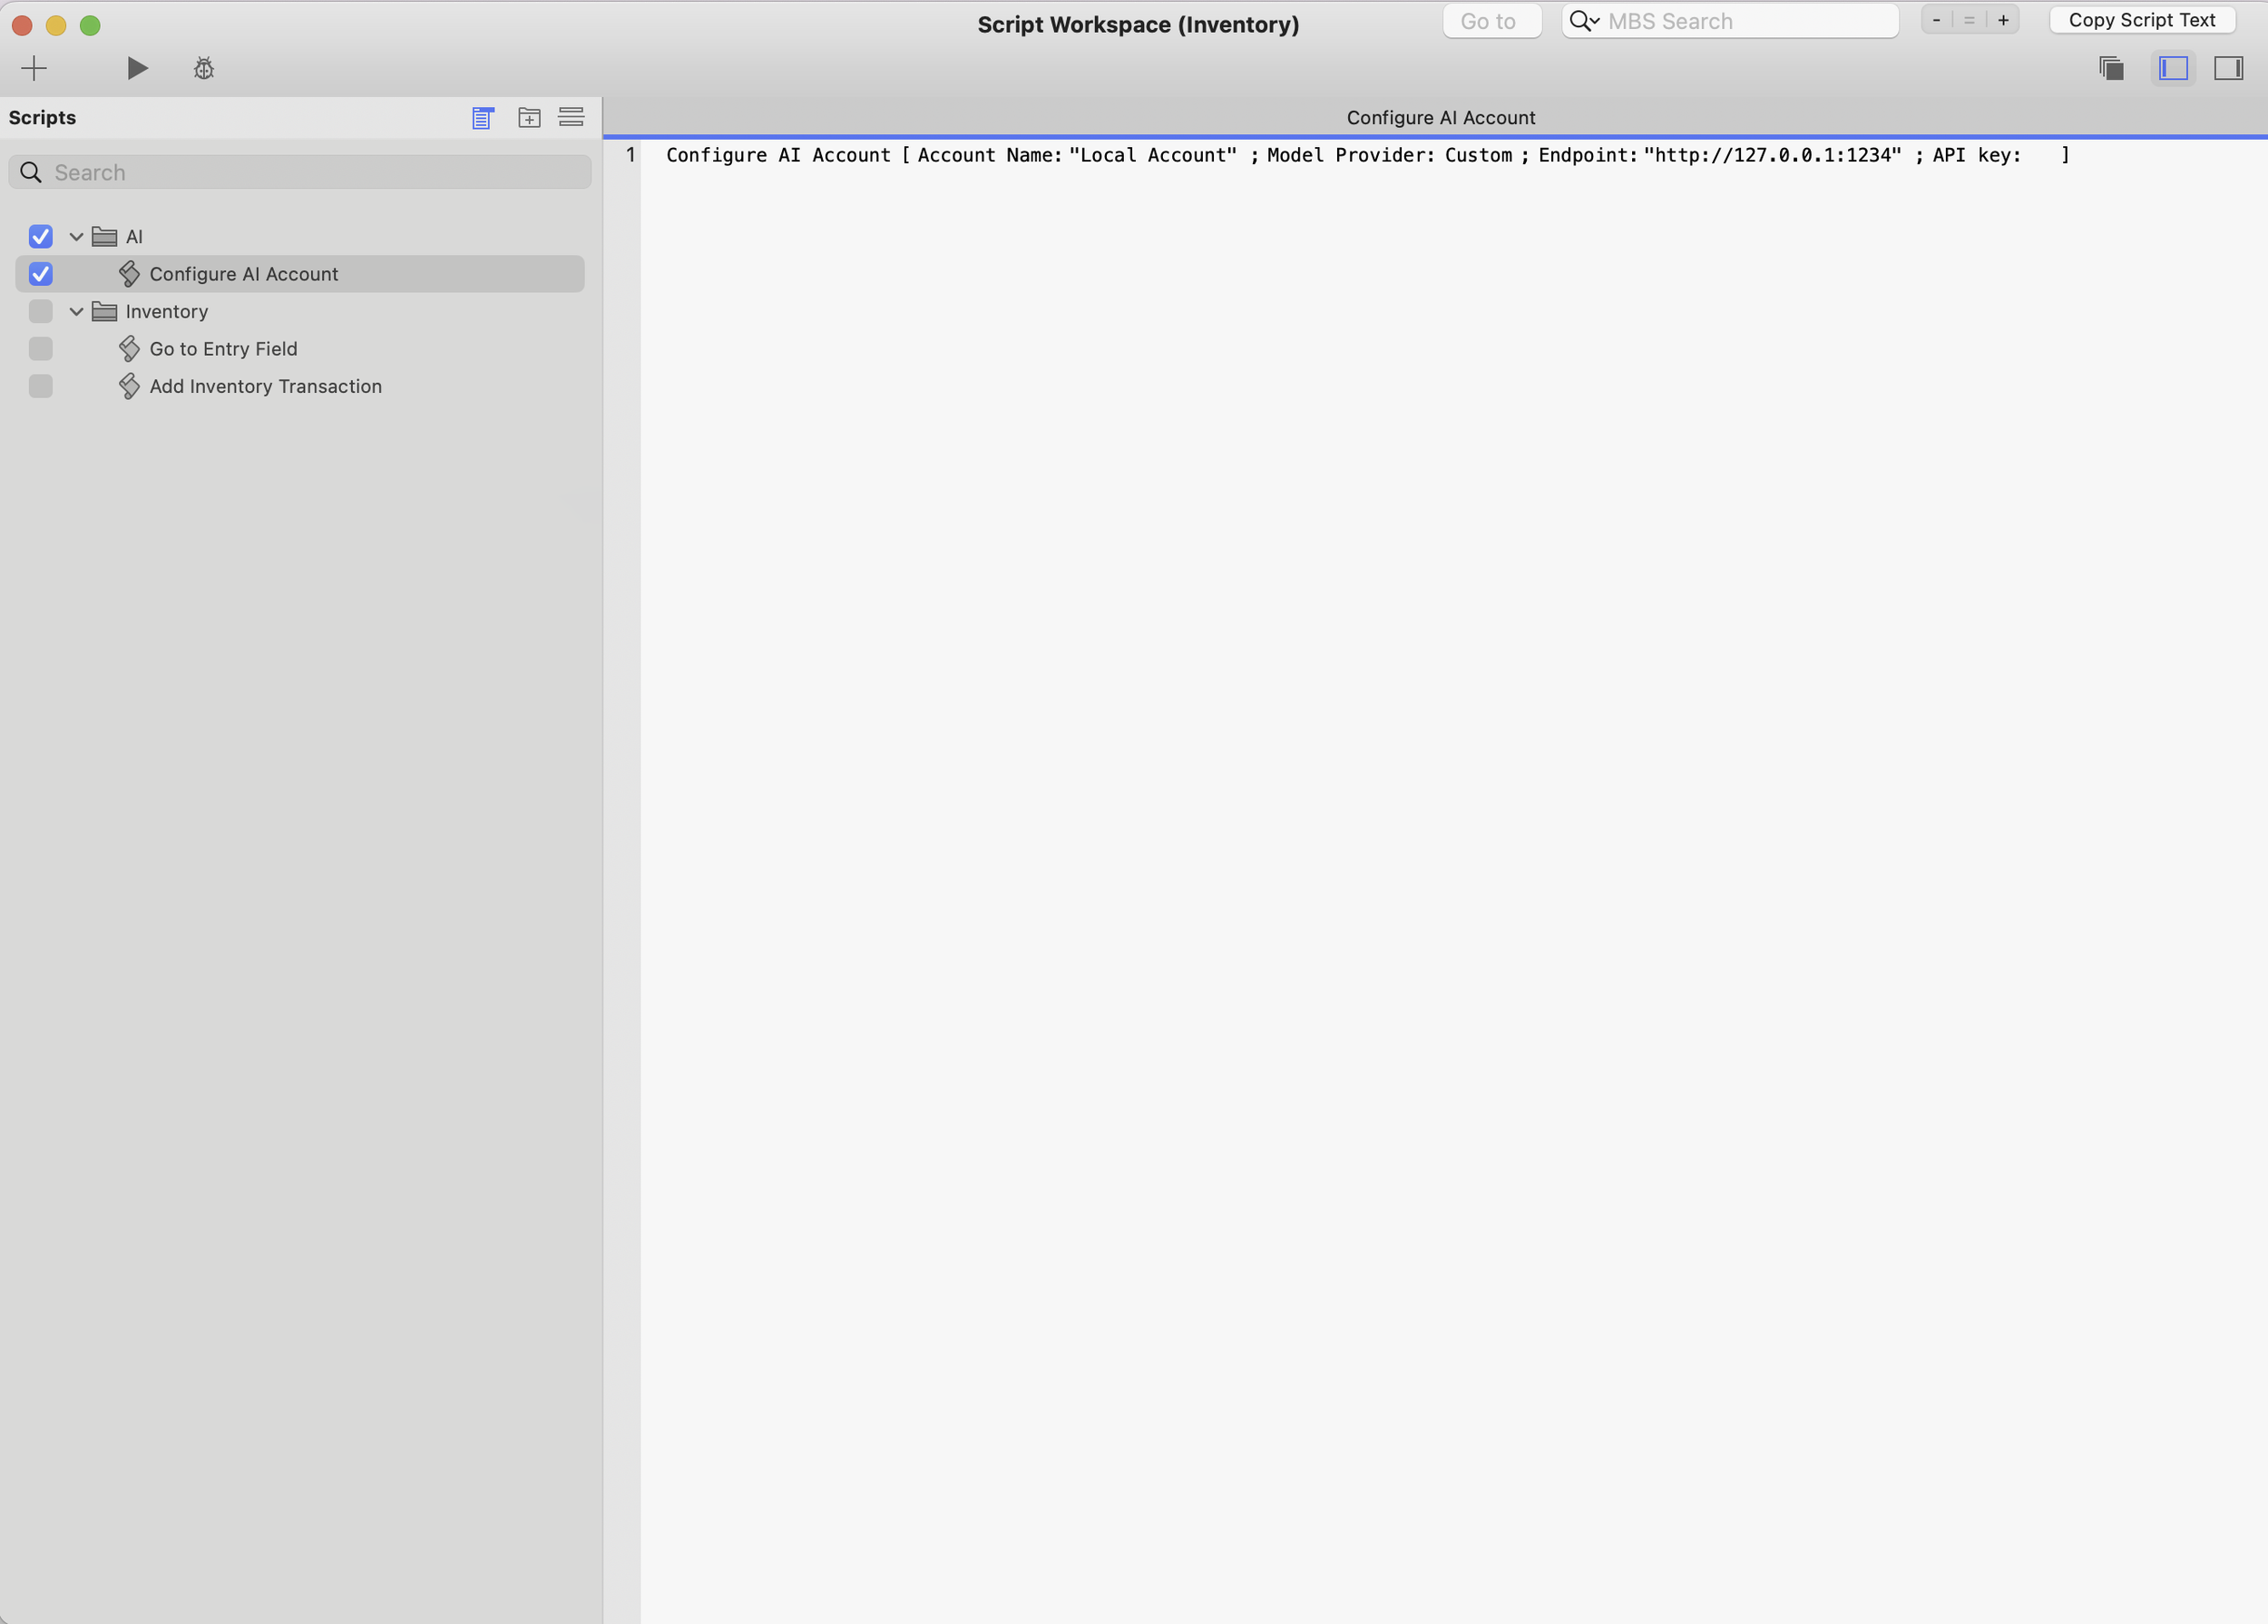
Configure AI Account script
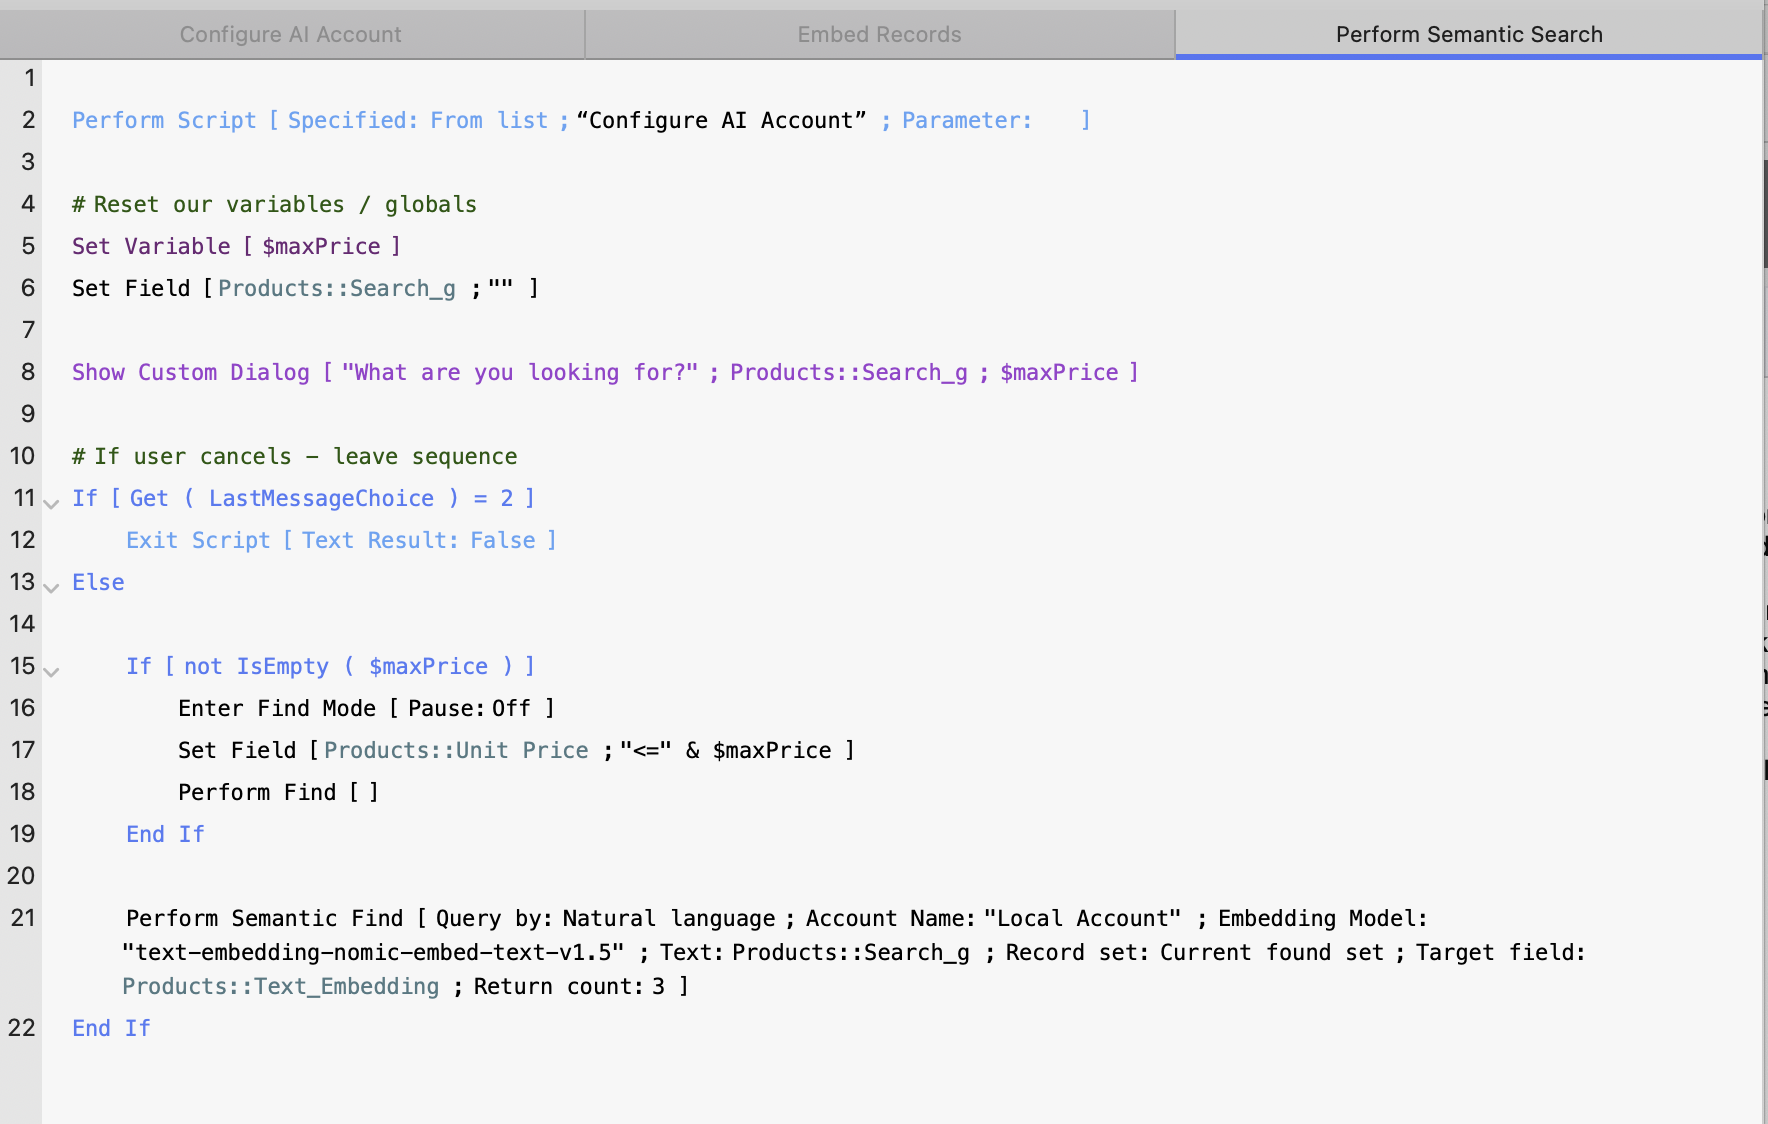
Script 2 : Embed Records
The second script we’ll create is used to generate embeddings for the current found set of records.
It’s important to ensure the model name is spelled exactly as it appears in LM Studio. Any mismatch will cause FileMaker to return an error when attempting to embed the field content.
Also, be sure to call the “Configure AI Account” script at the beginning of this script to ensure your account is properly configured and ready for use.
If you’re using the same model we loaded earlier, your script will look something like this:

Embed Records script - configured with our local embed model
Now that everything is set up, I recommend running the script in the FileMaker Script Debugger so you can monitor the process in real time. With only a small number of records, the script should execute fairly quickly—even while running your LLM locally on a MacBook.
As the script runs, you’ll notice your Text_Embedding container field being populated with . fve files. You should also see corresponding request logs appear in LM Studio , confirming that the embedding requests are being processed correctly.
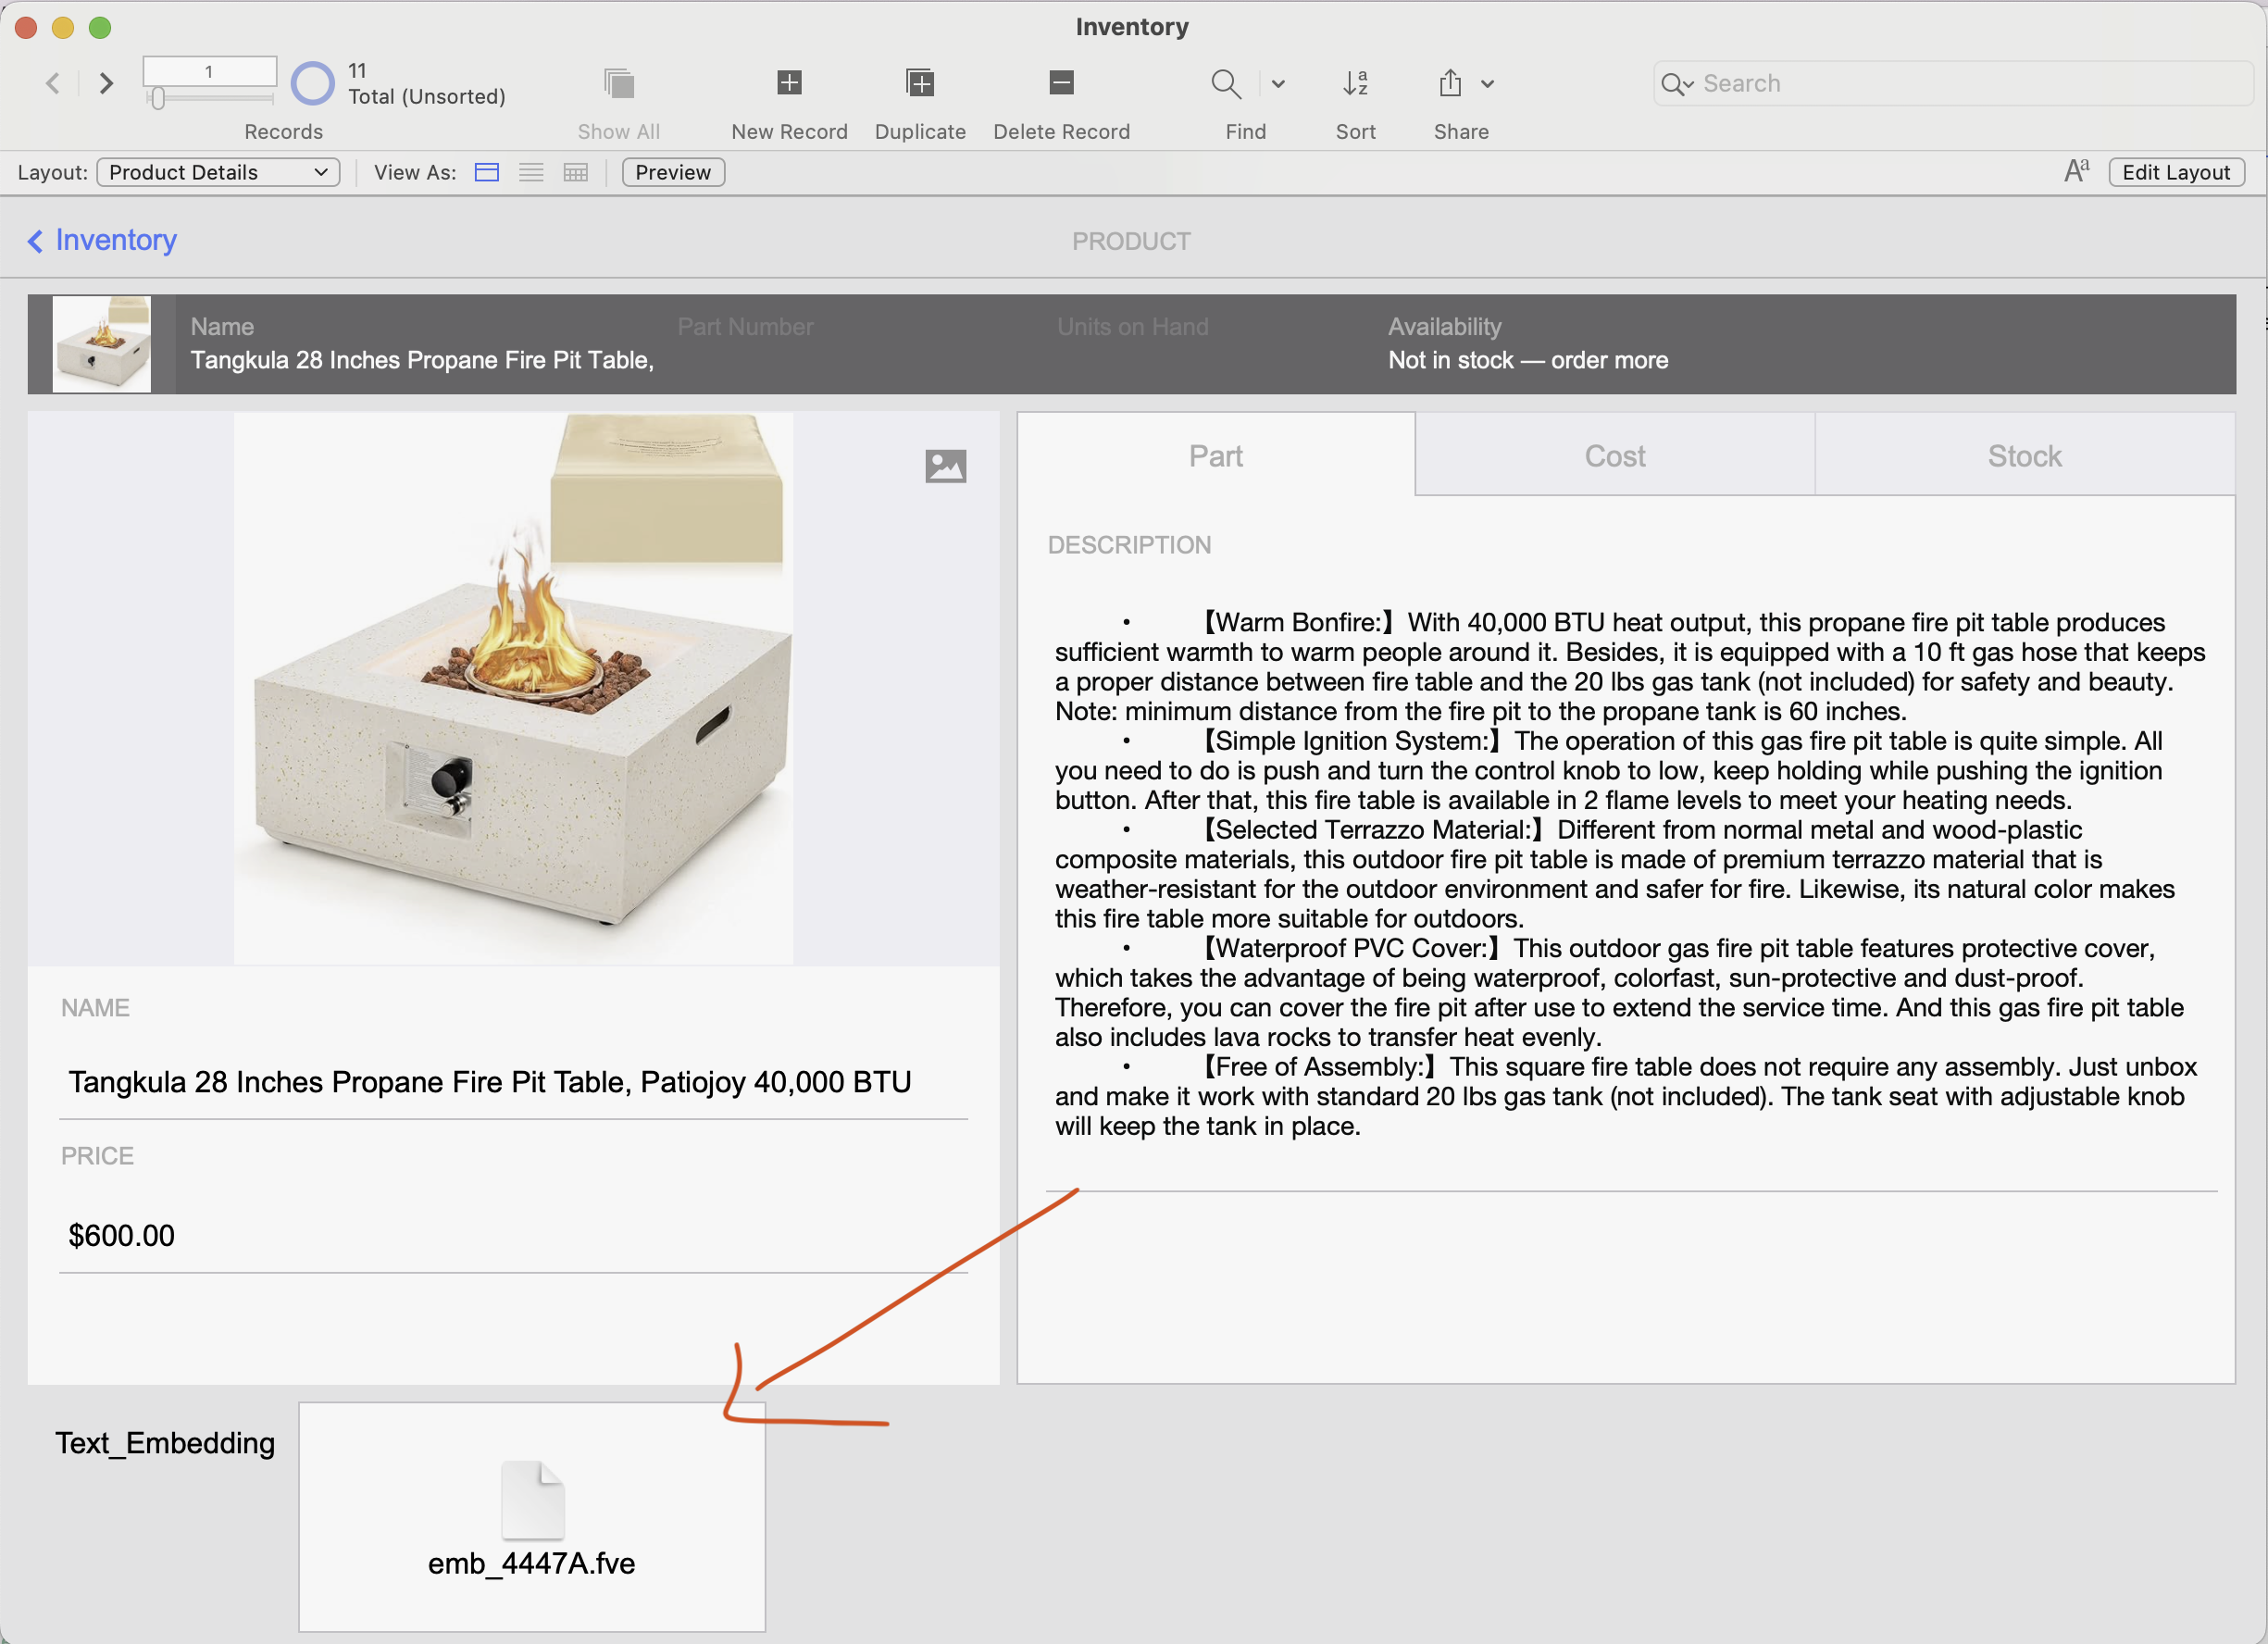
Embedding file inserted into the container
Script 3 : Performing a Semantic Search
Now that we’ve successfully embedded our fire pit descriptions, we can configure a semantic search to help us find the most relevant results. As with the previous scripts, this one will begin by calling the “Configure AI Account” script to ensure everything is properly initialized.
This script will:
Prompt the user with a dialog to input a search query.
Save the query into the global field Search_g.
Perform a semantic find using the query and return matching results.
Since our database currently contains only 11 product records, we’ll limit the found set to the top 5 matches to ensure we retrieve only the most relevant results.
Let’s dive into the script:
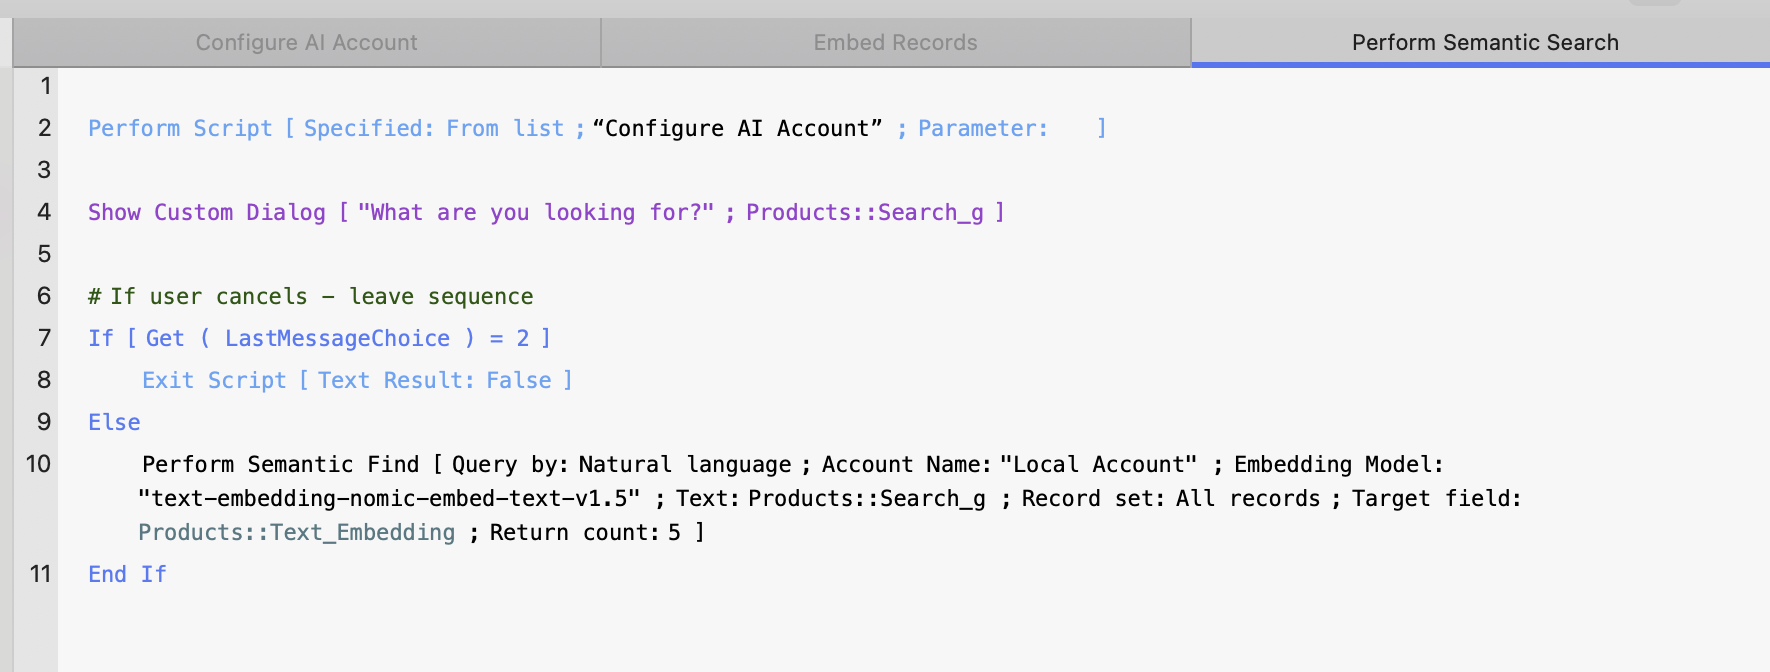
Perform Semantic Search script
Now you can run the script, enter a question when prompted, and review the results returned by the semantic search:
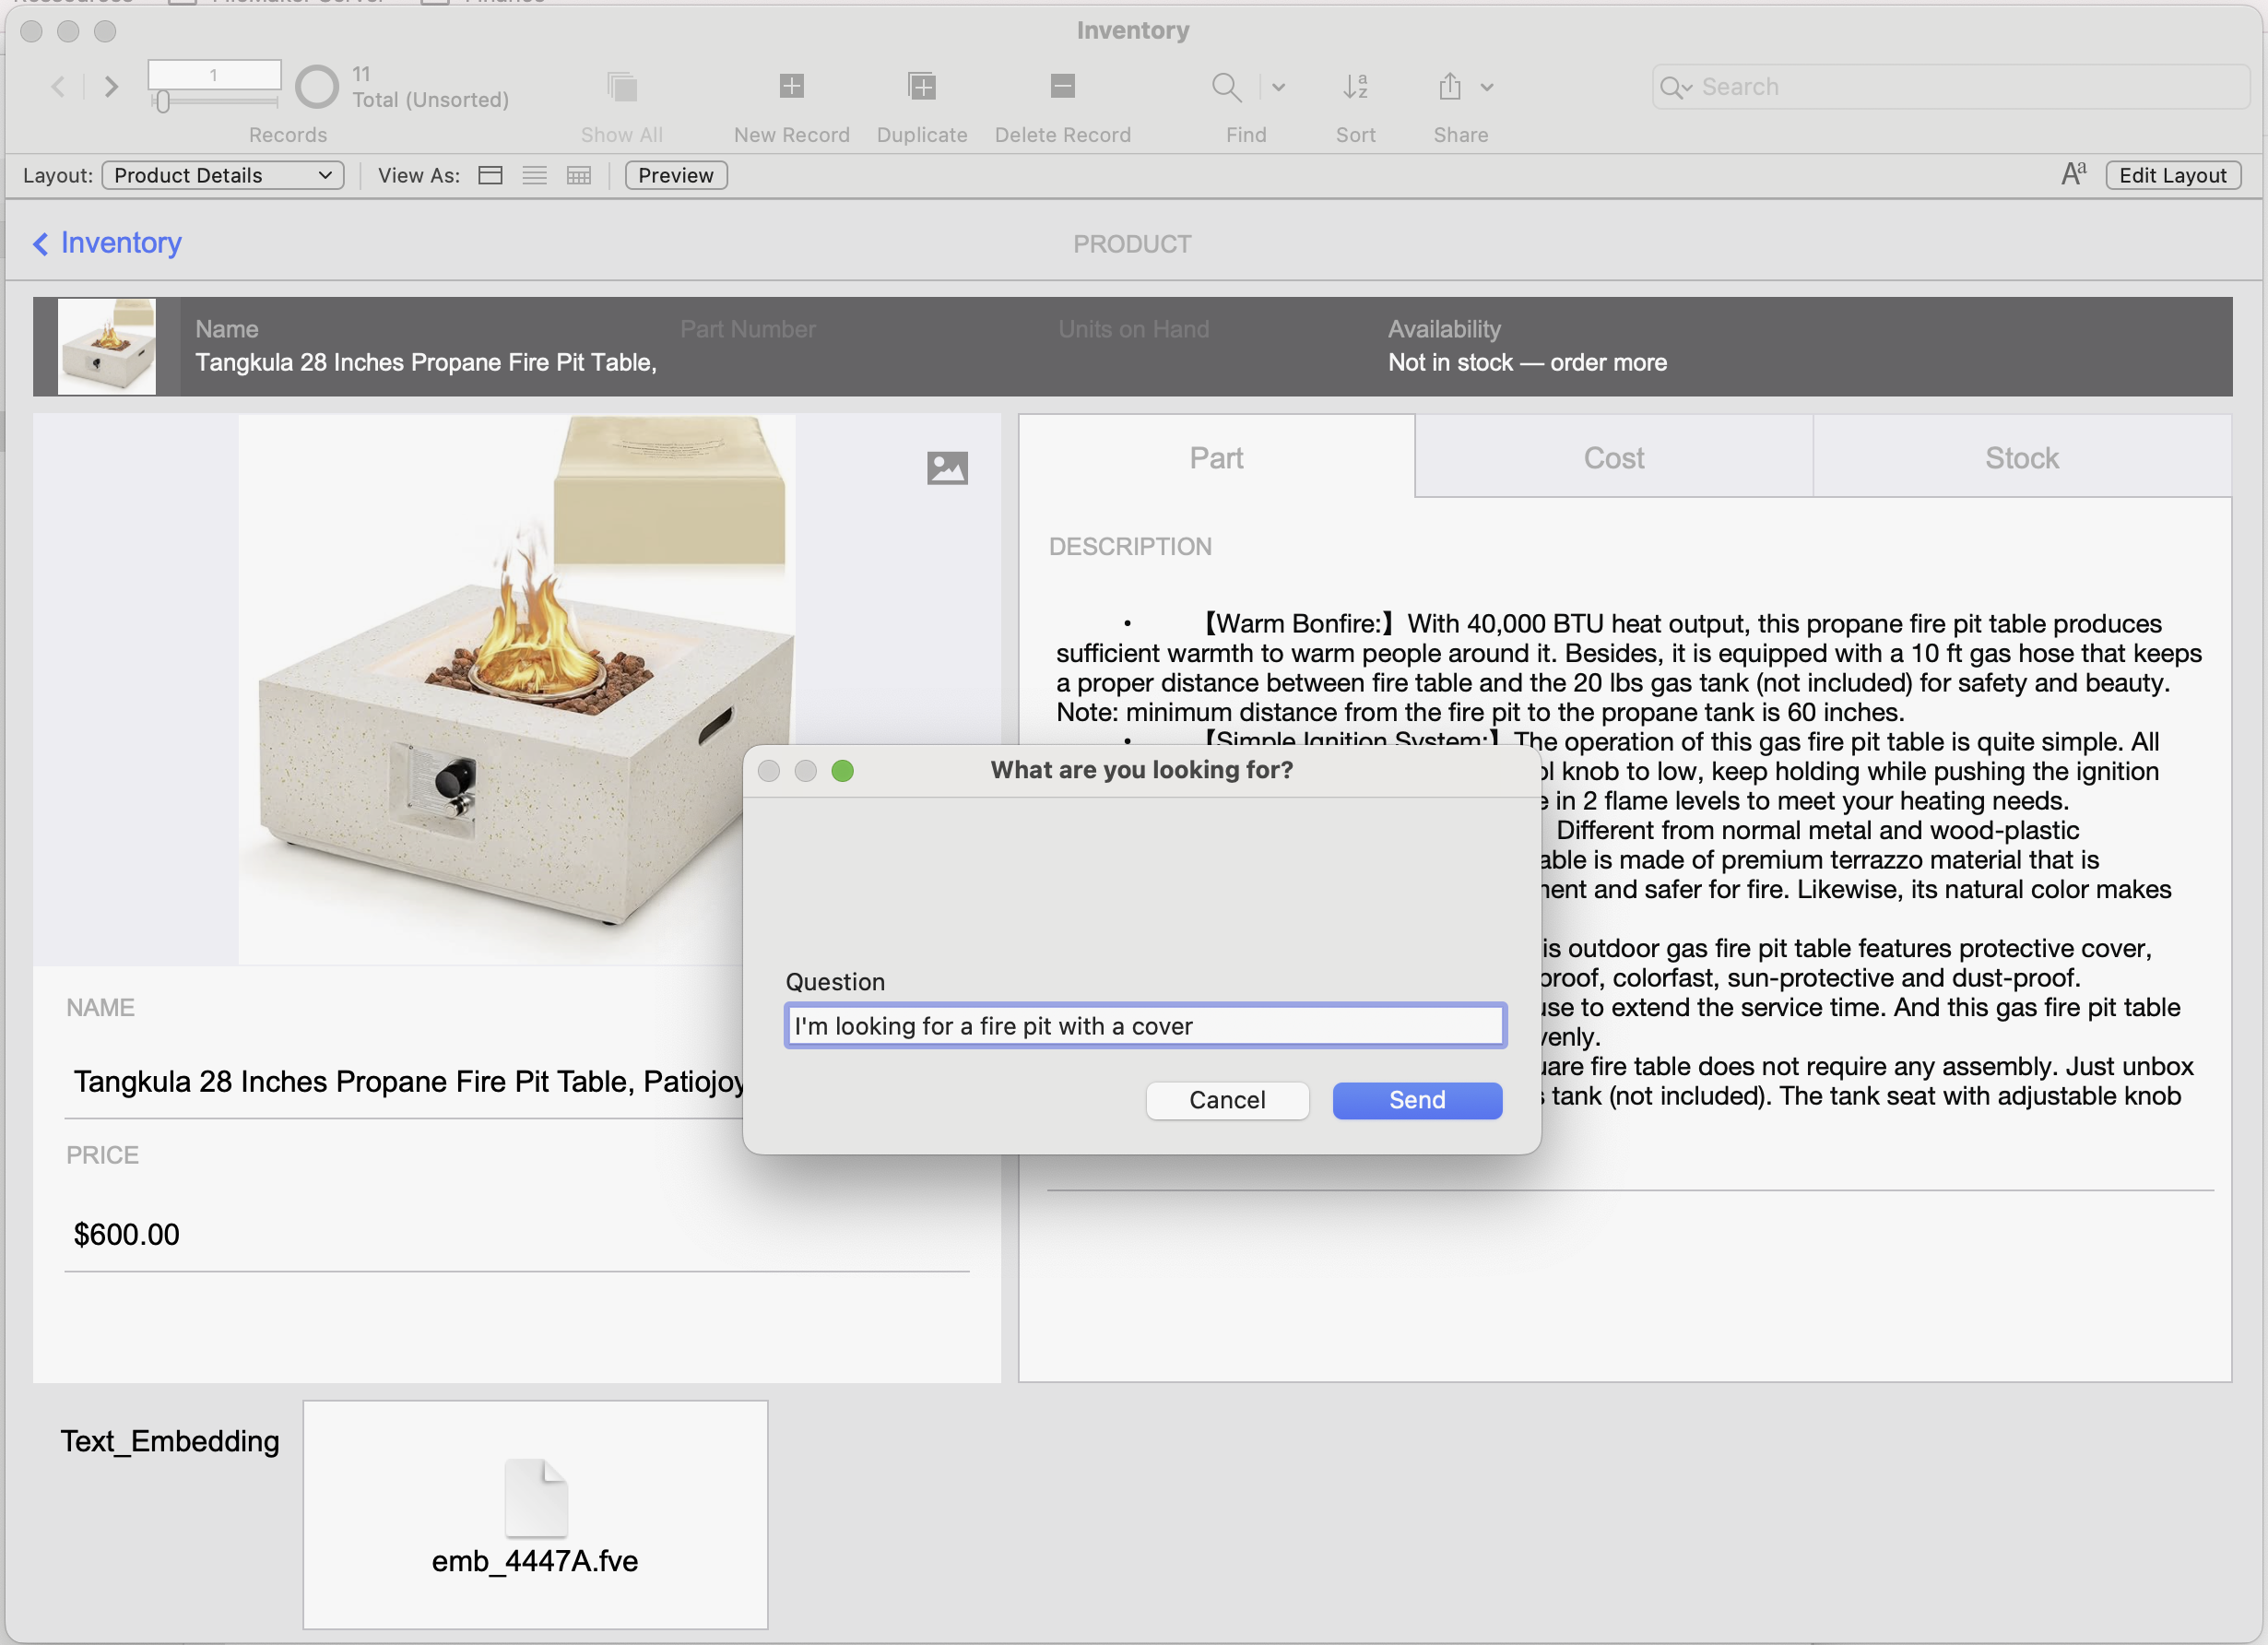
Prompt for request
Returned foundset of 5 - sorted by cosine similarity

LM Studio Developer Logs – Here, we can see the embedding request being sent and the server responding successfully.
Hybrid Search
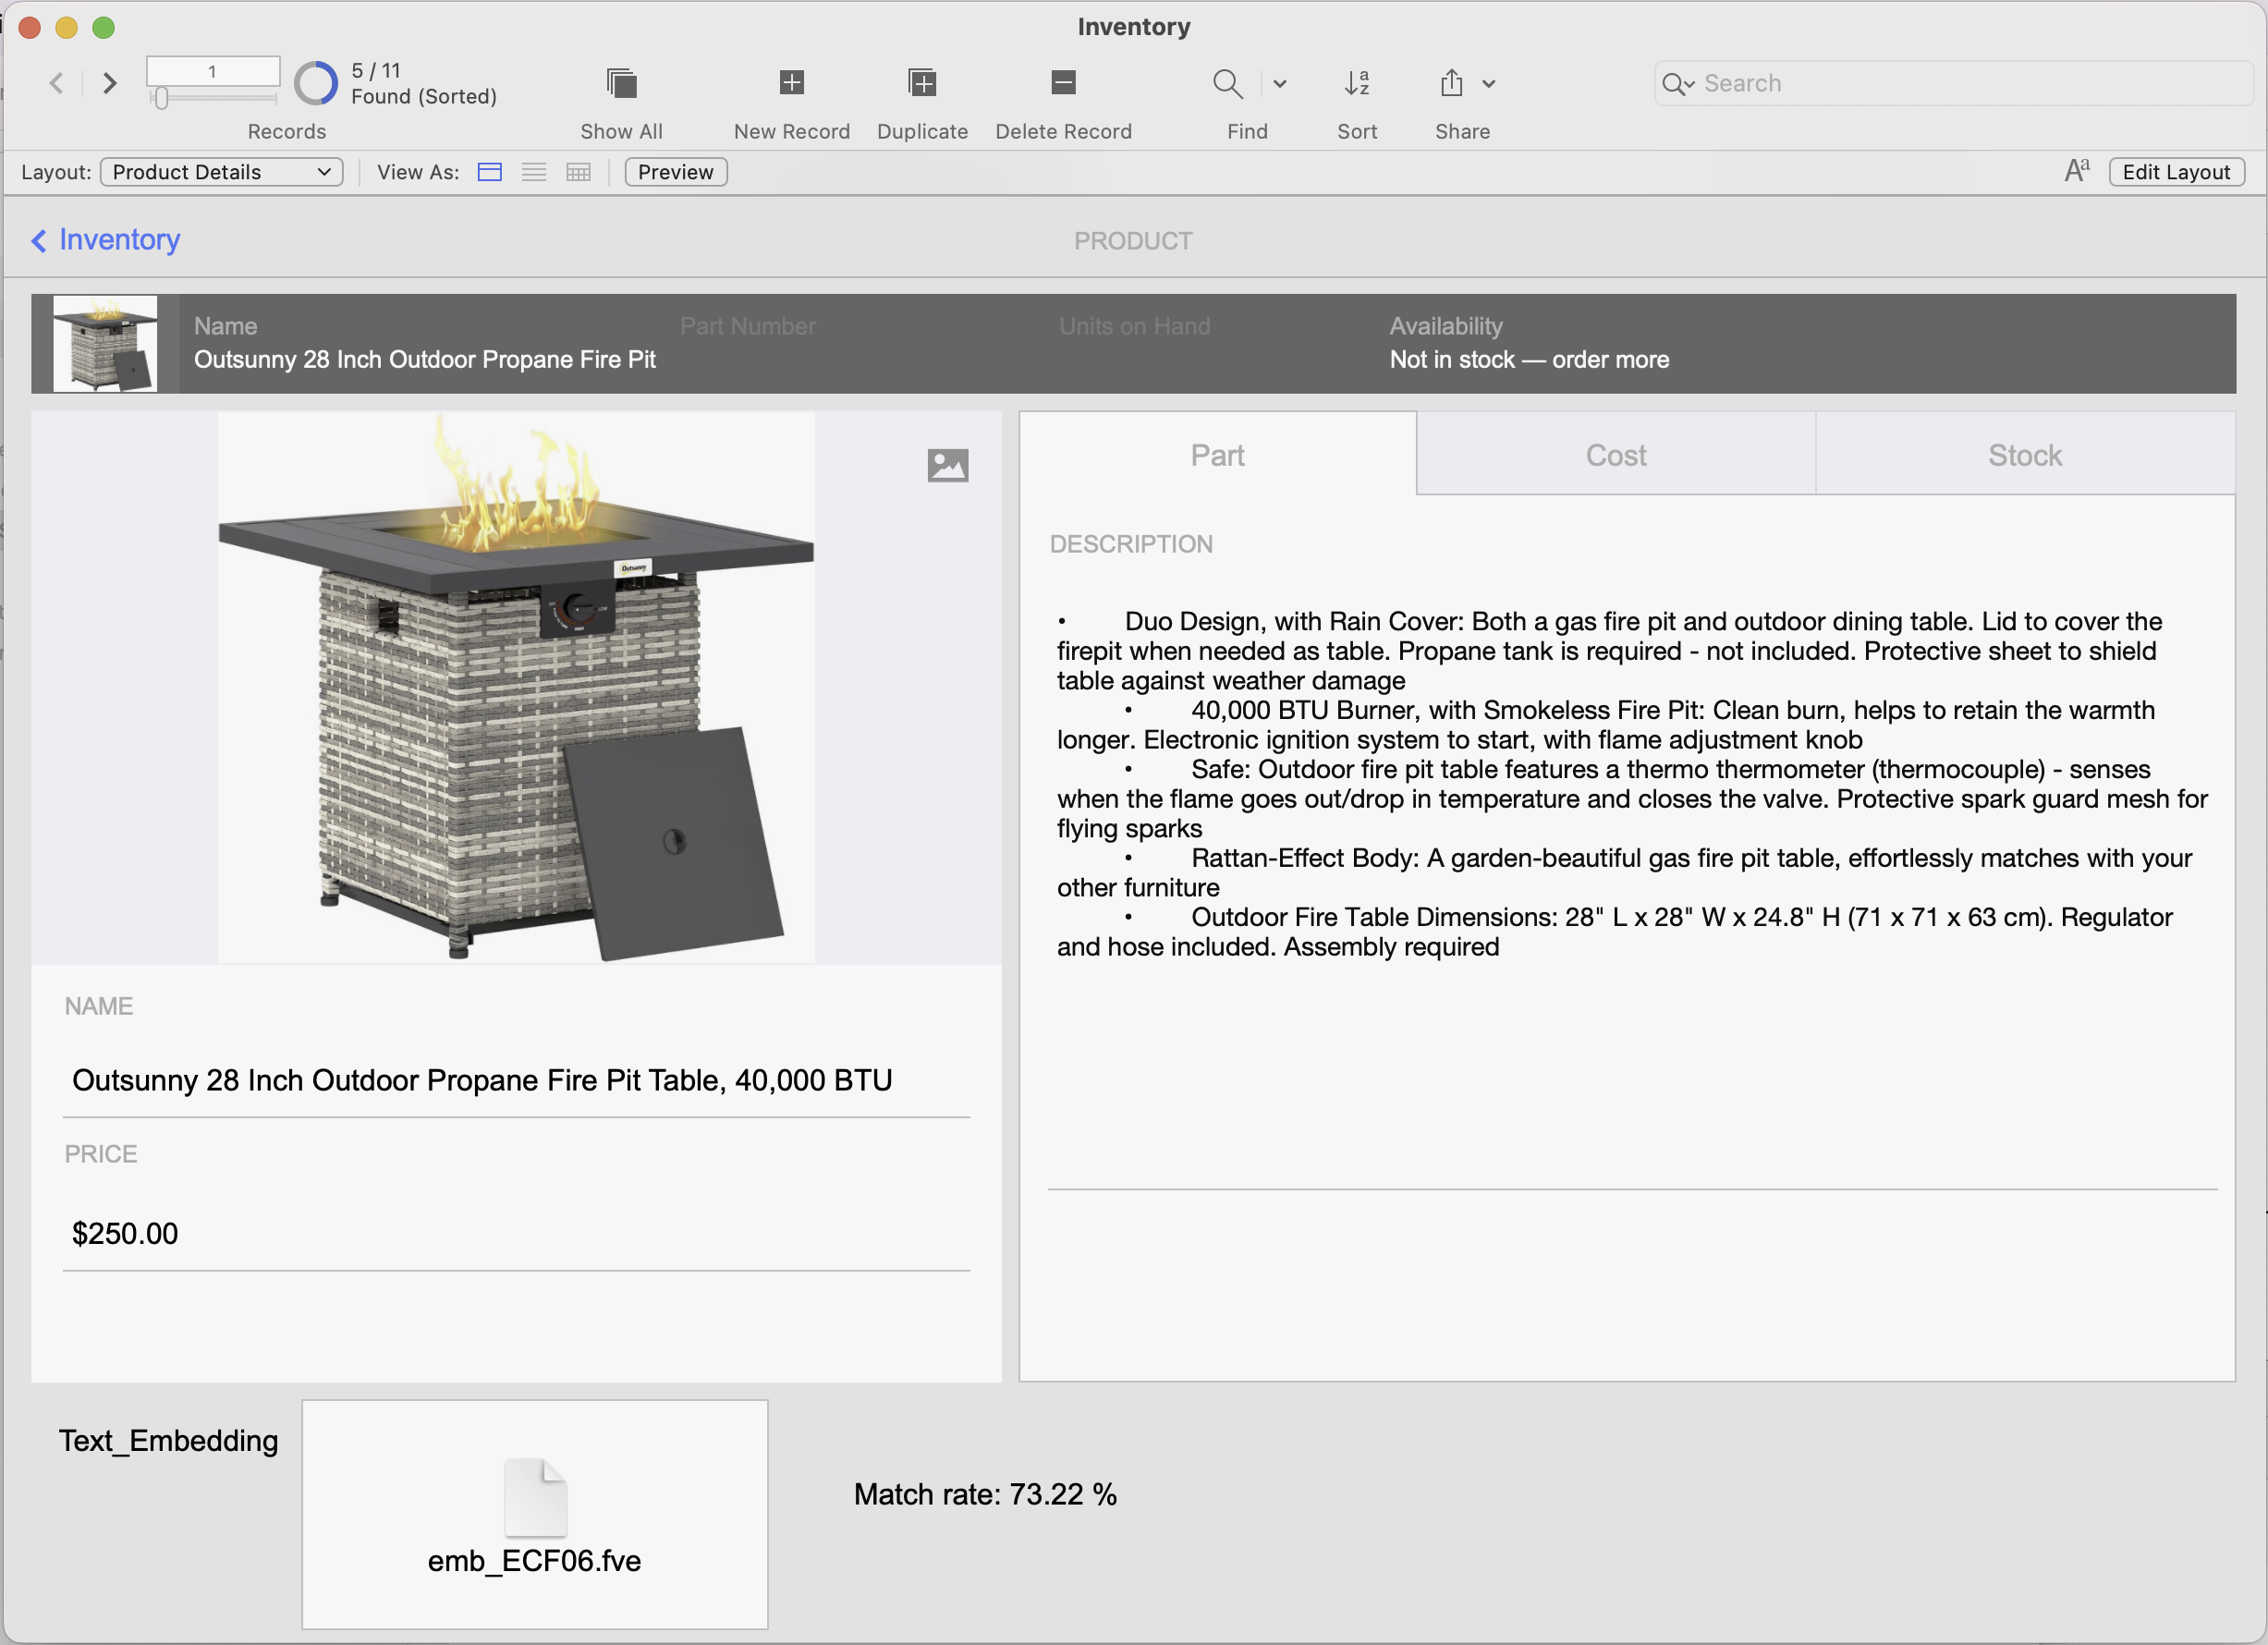
Now that we have a working setup to generate embeddings and perform semantic searches, let’s enhance the process by introducing an additional layer of filtering to make results more precise.
We’ll also display a match percentage on the layout, giving a visual indicator of the cosine similarity between the query and each result—helping users better understand the relevance of the matches.
Script changes - Semantic Search
We’ll modify our existing semantic search script to include an extra input prompt: a maximum price for the fire pit. This allows us to pre-filter the product list before running the semantic match, combining traditional search logic with semantic intelligence—a hybrid approach.
Since we’re still working with a small dataset, we’ll reduce the result count to 3 records to keep the focus on the most relevant matches.
Your updated script will now look like this:
Updated Semantic Search Script - Now includes pre-filtering based on a user-defined maximum price before running the semantic match.
Adding a matching percentage
To display a match percentage alongside our semantic search results, we’ll leverage several of FileMaker’s built-in AI functions: CosineSimilarity, GetEmbedding, and a layout calculation . These allow us to compute the semantic similarity between the user’s query and each product description directly in the interface.
For more information on each function, refer to the following resources:
CosineSimilarity: https://help.claris.com/en/pro-help/content/cosinesimilarity.html
GetEmbedding: https://help.claris.com/en/pro-help/content/getembedding.html
Layout Calculations: https://support.claris.com/s/article/Working-with-layout-calculations?language=en_US
The layout calculation we’ll add will return a value ranging from –1 to 1 :
1 indicates a strong match,
0 indicates no similarity,
–1 indicates semantic dissimilarity.

Formula to calculate the cosine similarity between the search query and each result.
Since we want to display this as a percentage, we’ll enhance the calculation to make it more visually intuitive.

Modified formula to display a more user-friendly percentage on the layout.
The result:
Whatever it is, the way you tell your story online can make all the difference.
Hybrid Search Test
Let’s now run our enhanced hybrid search and see the results it returns:

The request
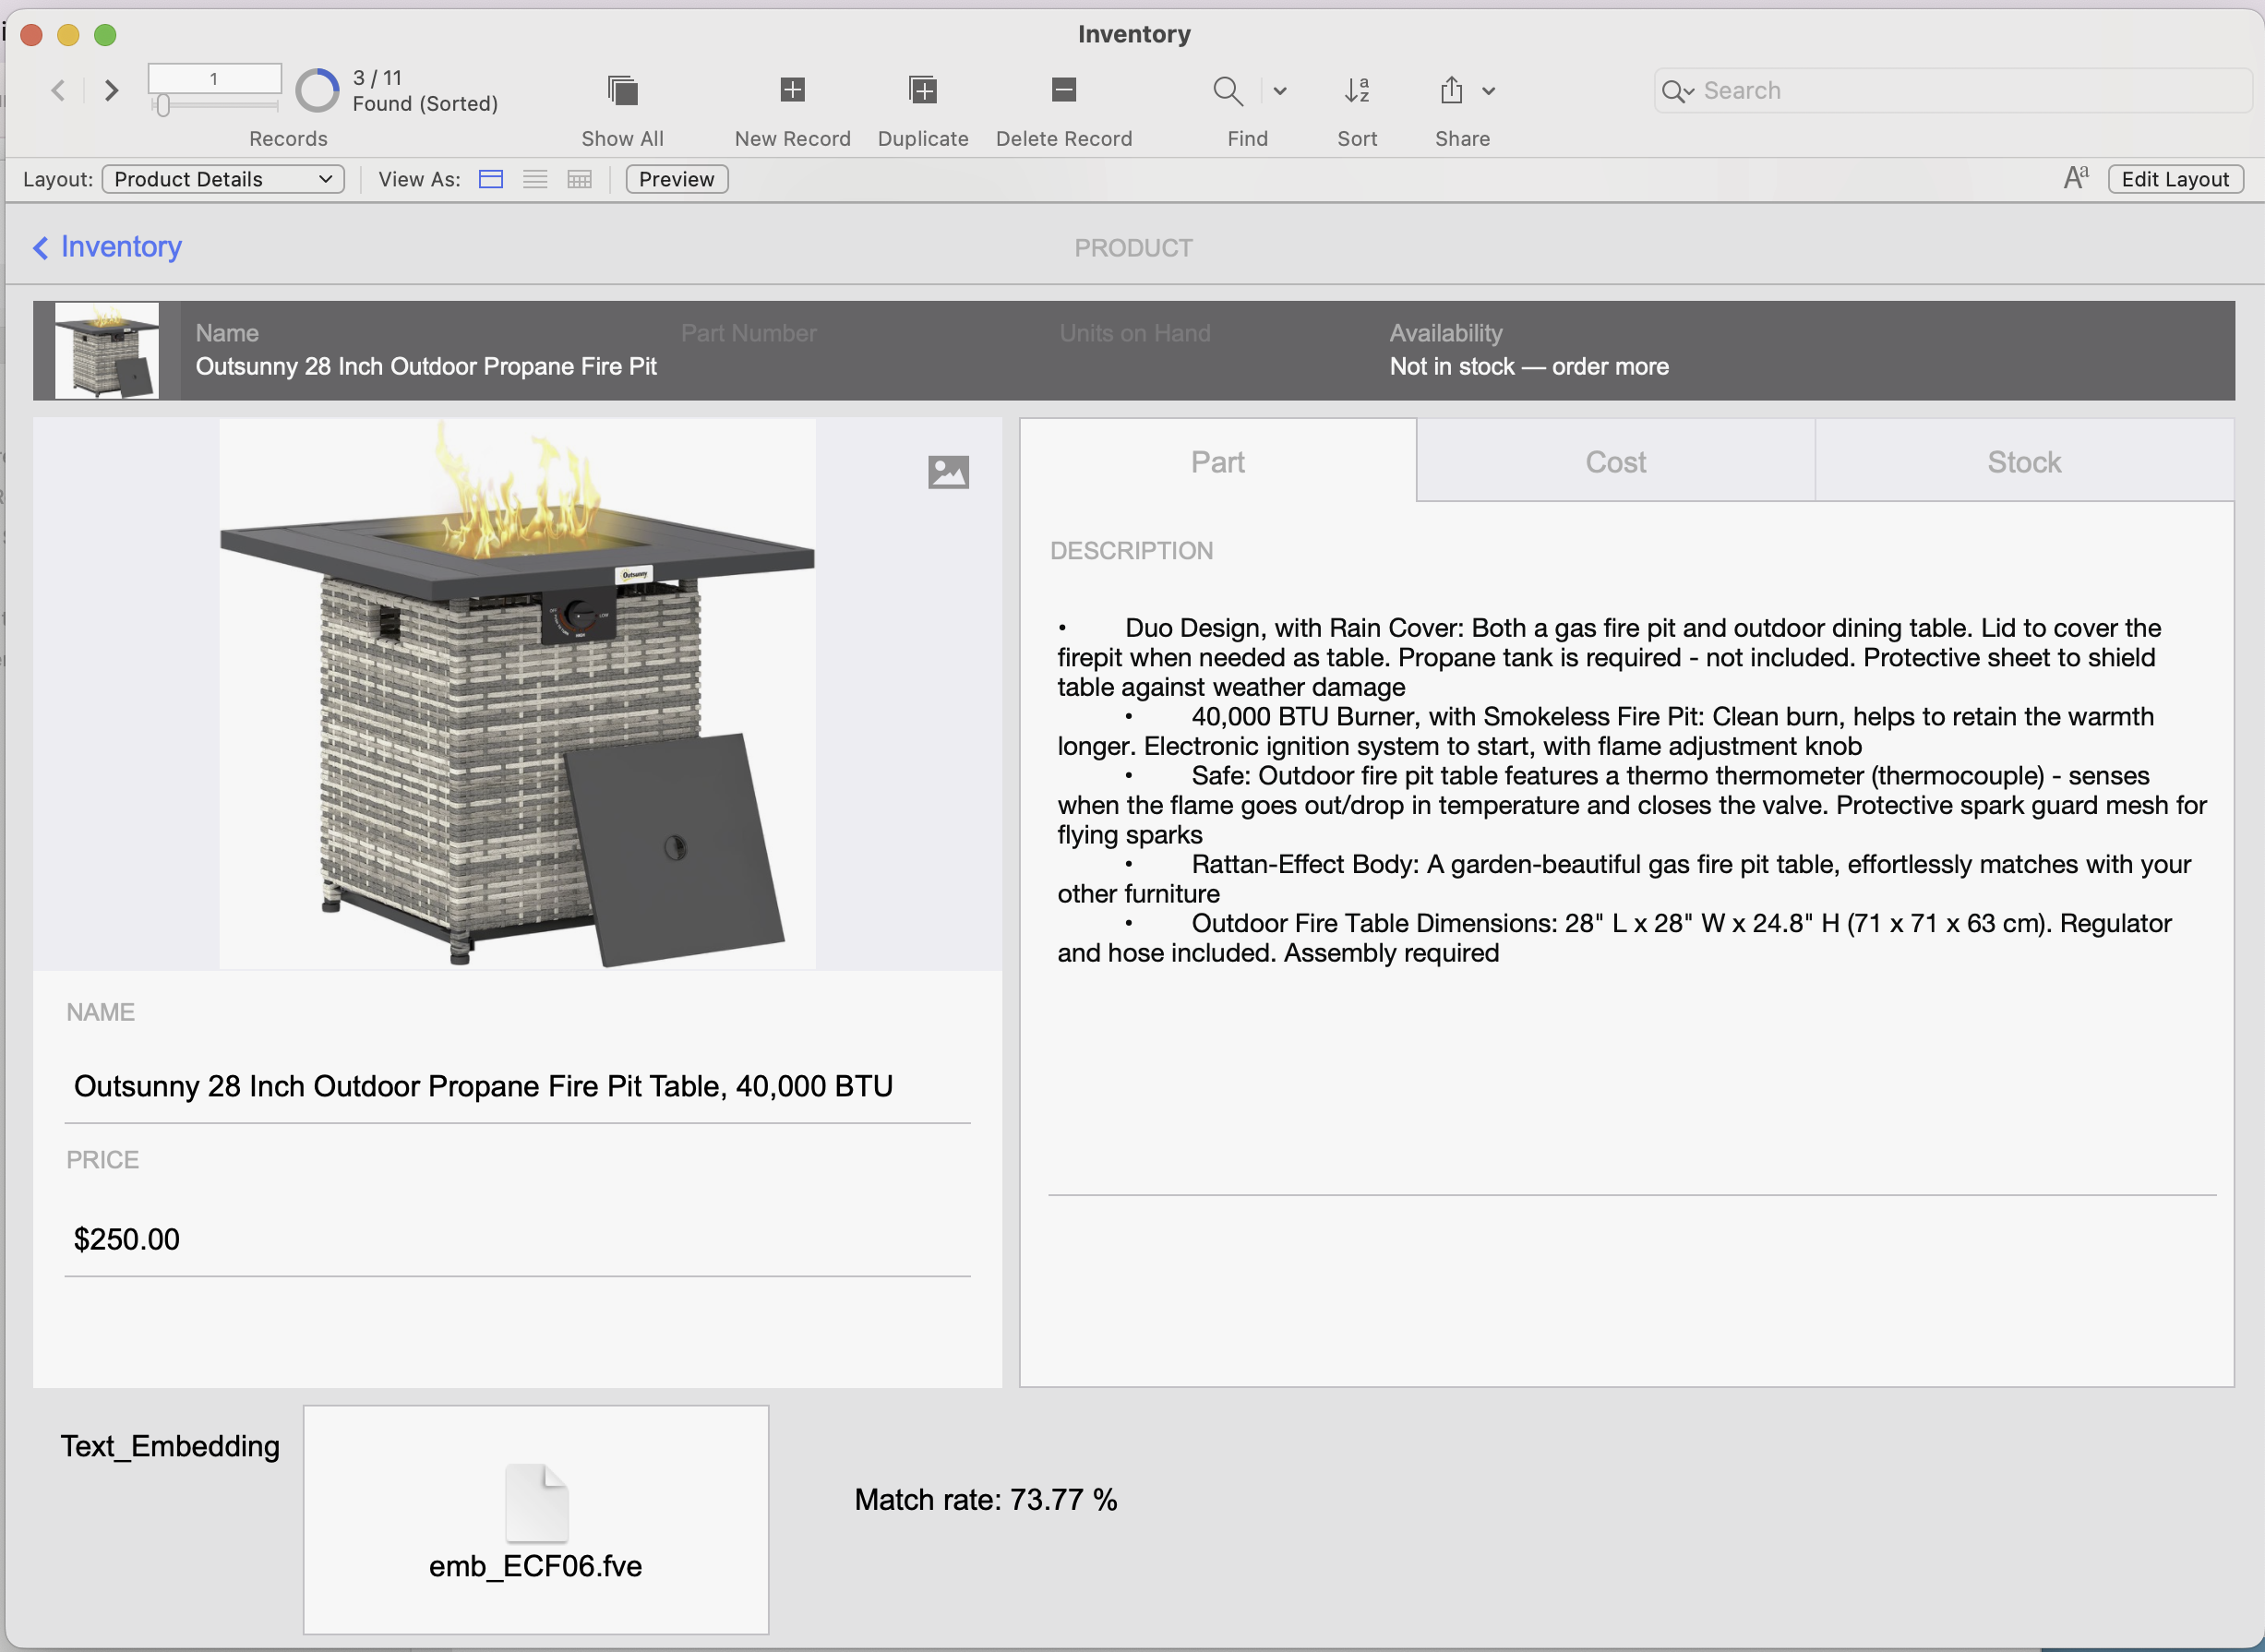
The Result and Matching Rate – The top matching records are displayed, along with their semantic similarity scores shown as percentages.
Pushing it a step further
To wrap up this example, let’s take things a step further by using another LLM model to summarize product descriptions —as if a salesperson were explaining them. This lets us quickly capture the key features of each fire pit without having to read the entire product description.
When running LM Studio, you’re not limited to embeddings—you can also interact with models conversationally , just like you would with ChatGPT. For this part of the demo, we’ve downloaded and loaded the model: gemma-3-4b .
Make sure this model is downloaded and loaded into LM Studio so it’s available to respond to requests. We’ll then create a cURL-based script in FileMaker to send prompts to the model and receive summaries in return.
Script: Ask LLM
For this script, we don’t need to run the Configure AI Account script, since we’ll be using the Insert from URL script step with custom cURL parameters .
LM Studio makes this easy—you can click the cURL button next to the model to view an example payload.
In our case, we’ll build a JSON payload that includes:
Clear instructions for the model (e.g., summarize like a salesperson),
The product description as the input,
A token limit of 4096 , which is the default for the gemma-3-4b model .
This will allow the model to return a clean, focused summary based on the original product description.
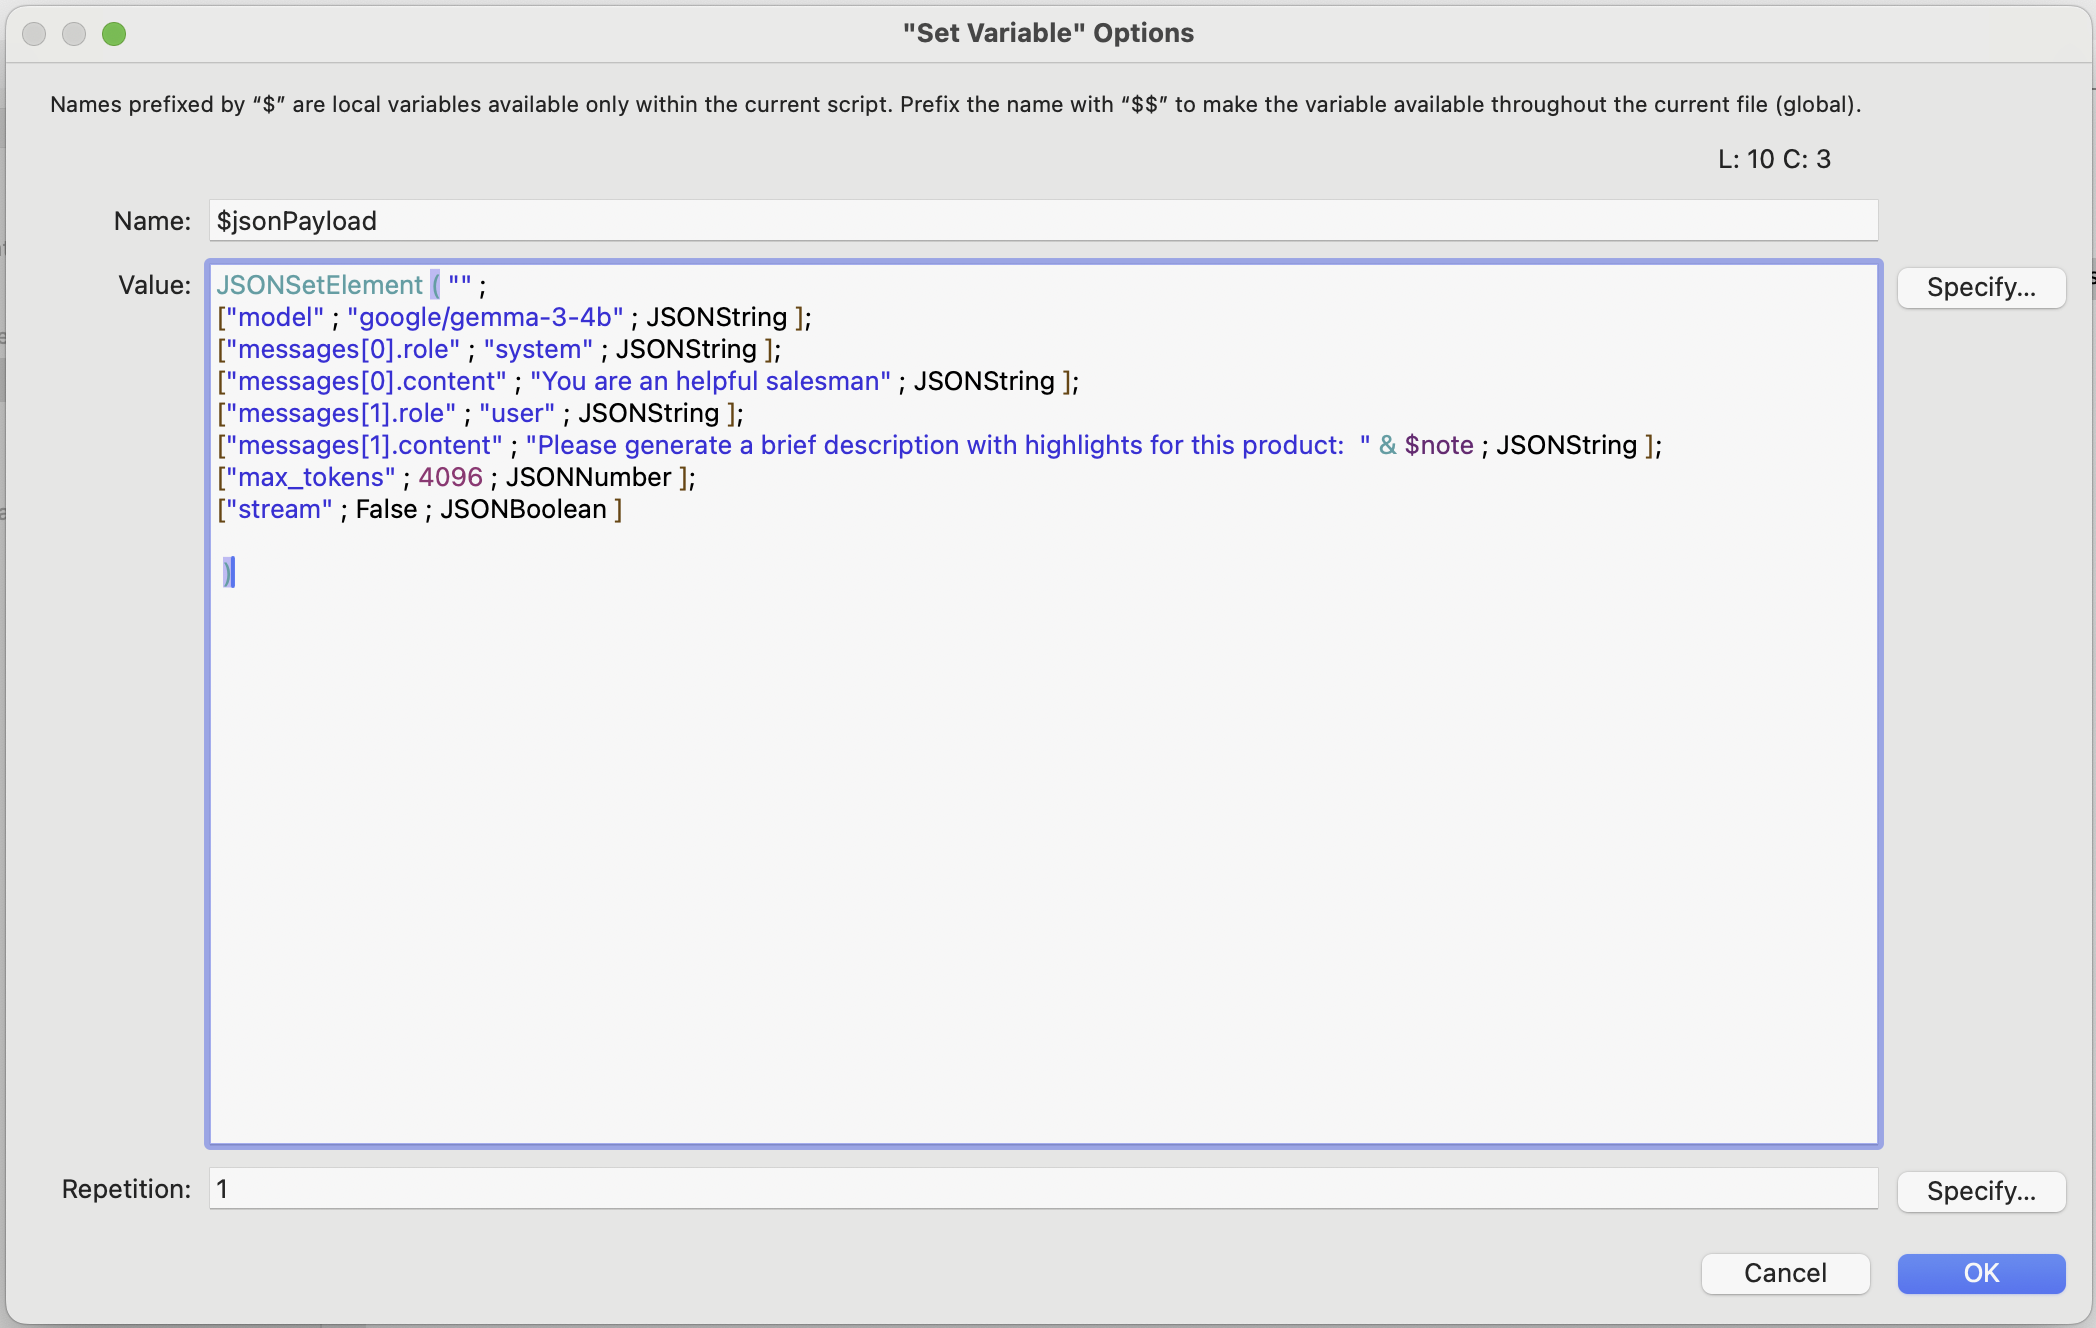
The JSON payload we’ll send to our local LLM, including instructions, input, and token limit.
The rest of the script is straightforward: we set the target URL and send the payload using Insert from URL. We then display two dialogs—one with a full debug output of the response, and another showing just the model’s summarized reply.
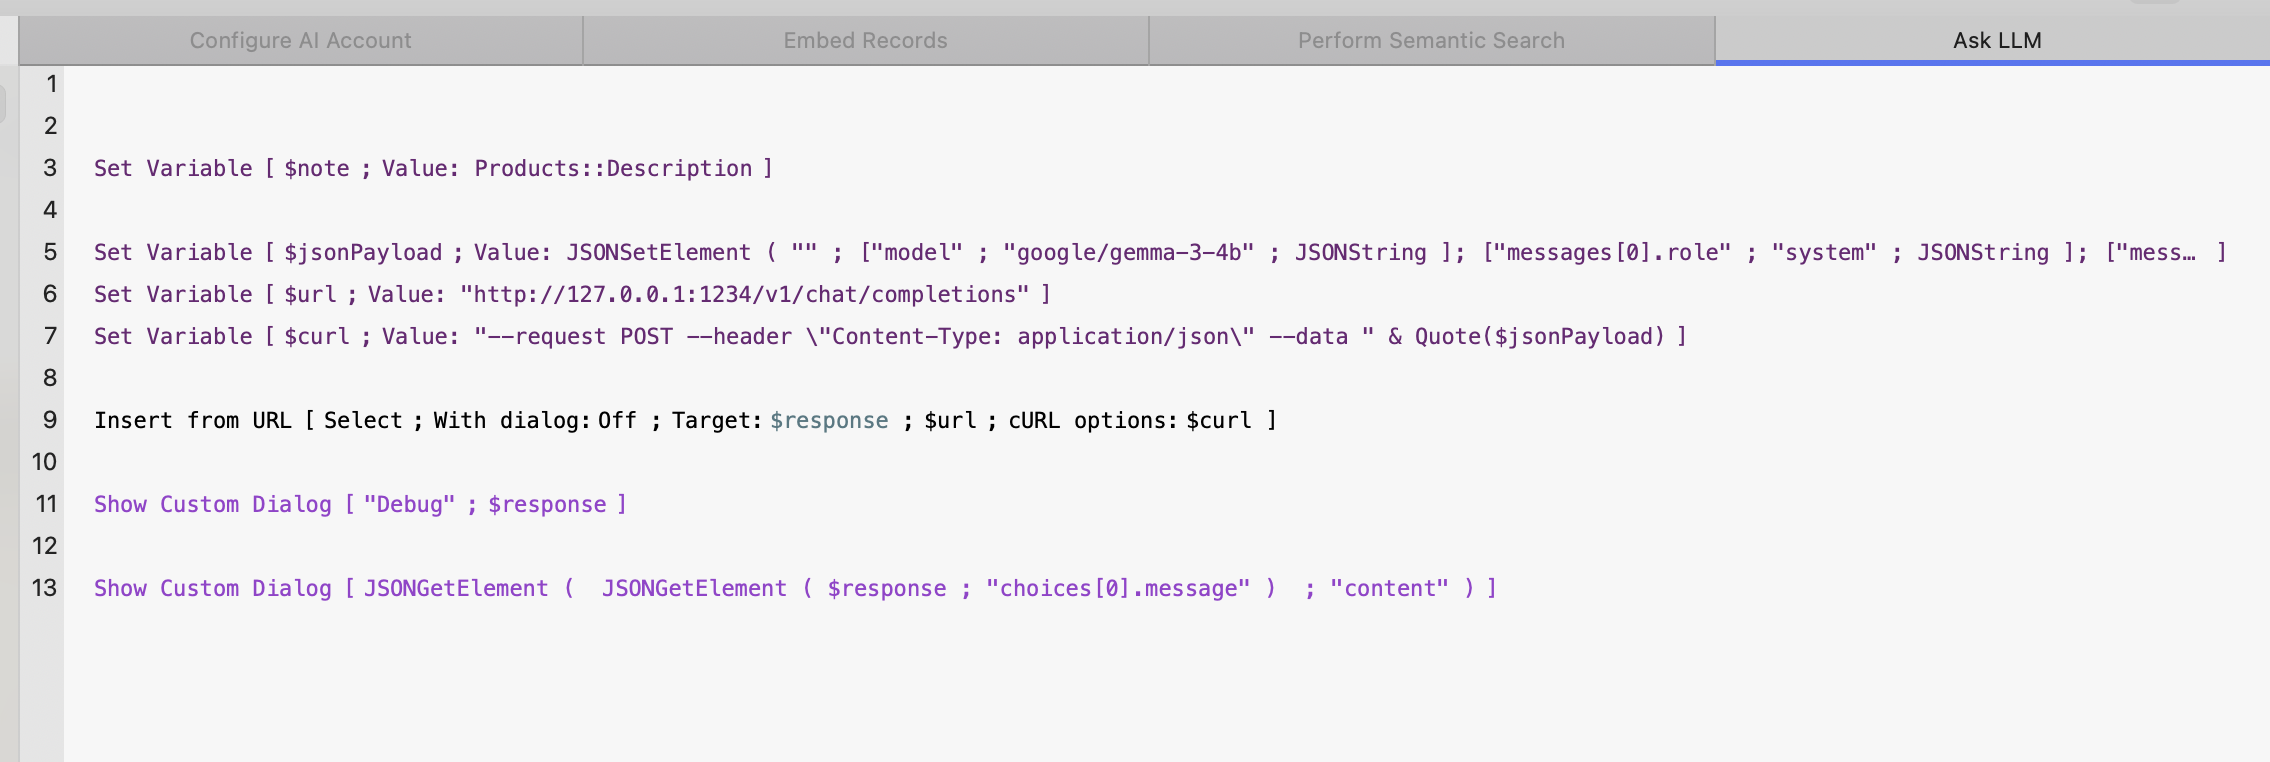
The Ask LLM script
Let’s run our test using a maximum price of $600 , and ask for a fire pit with natural colors and a cover .
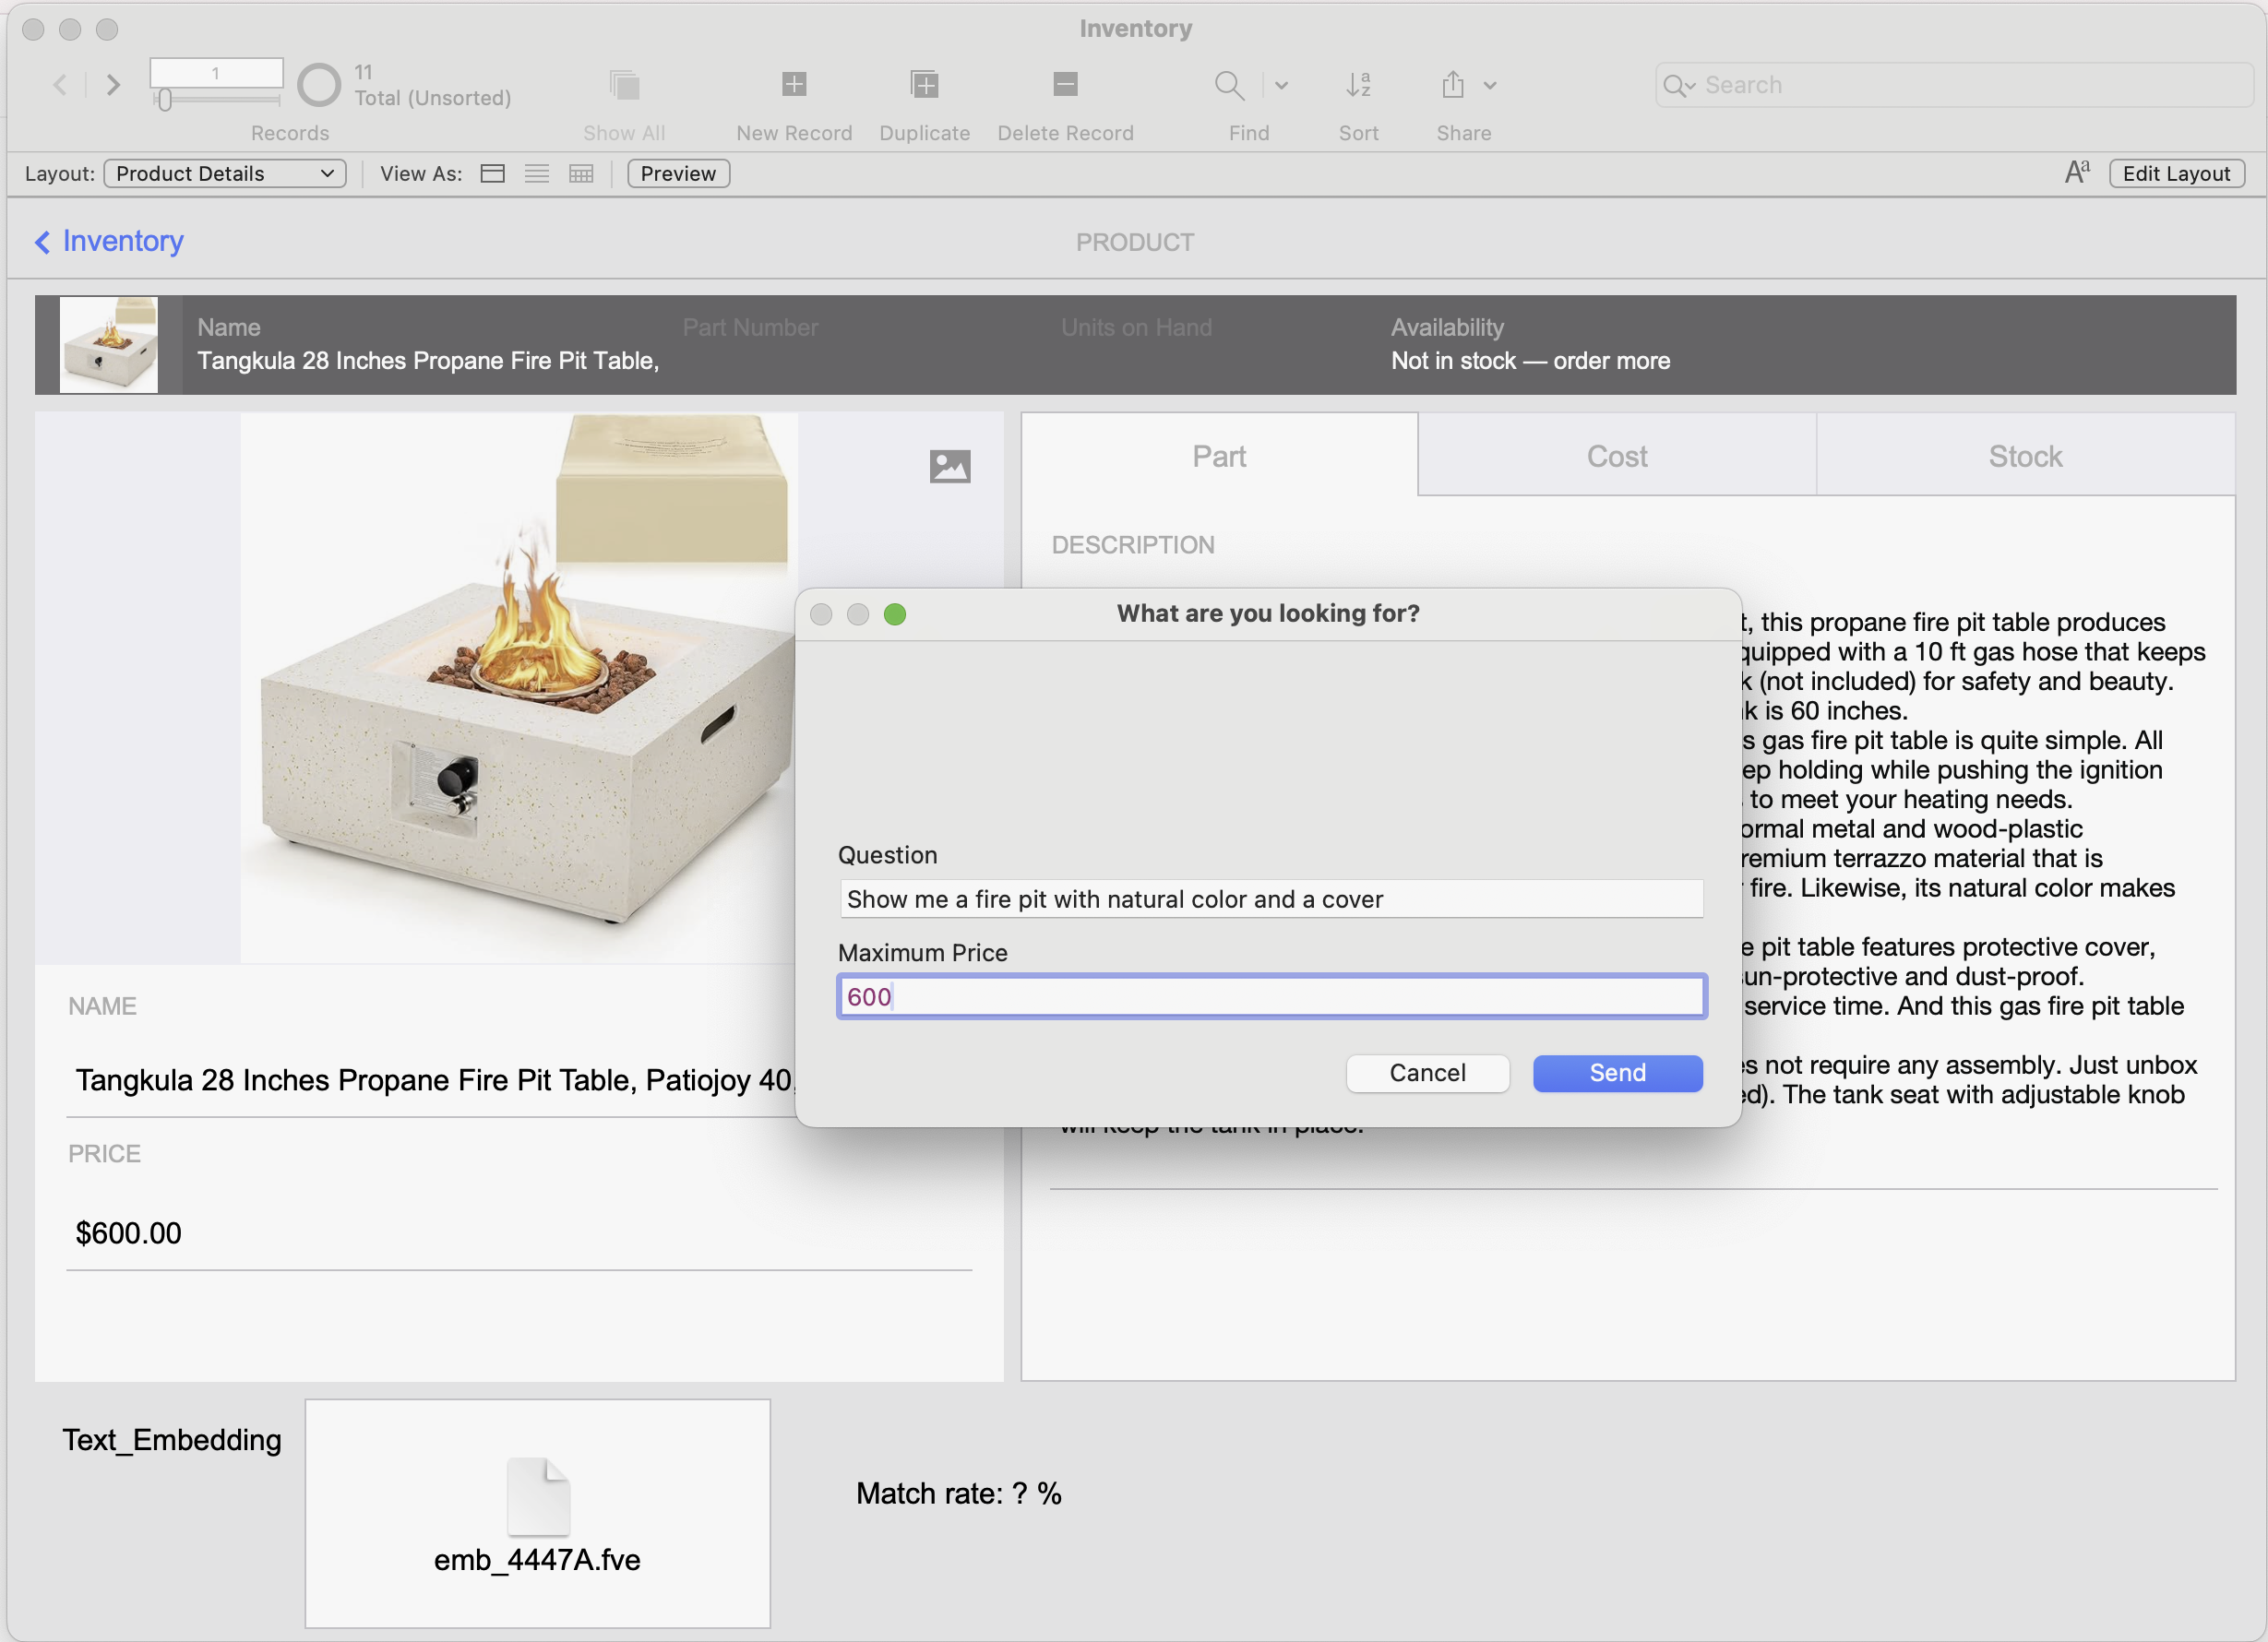
Prompting our LLM with a custom query and a maximum price parameter.
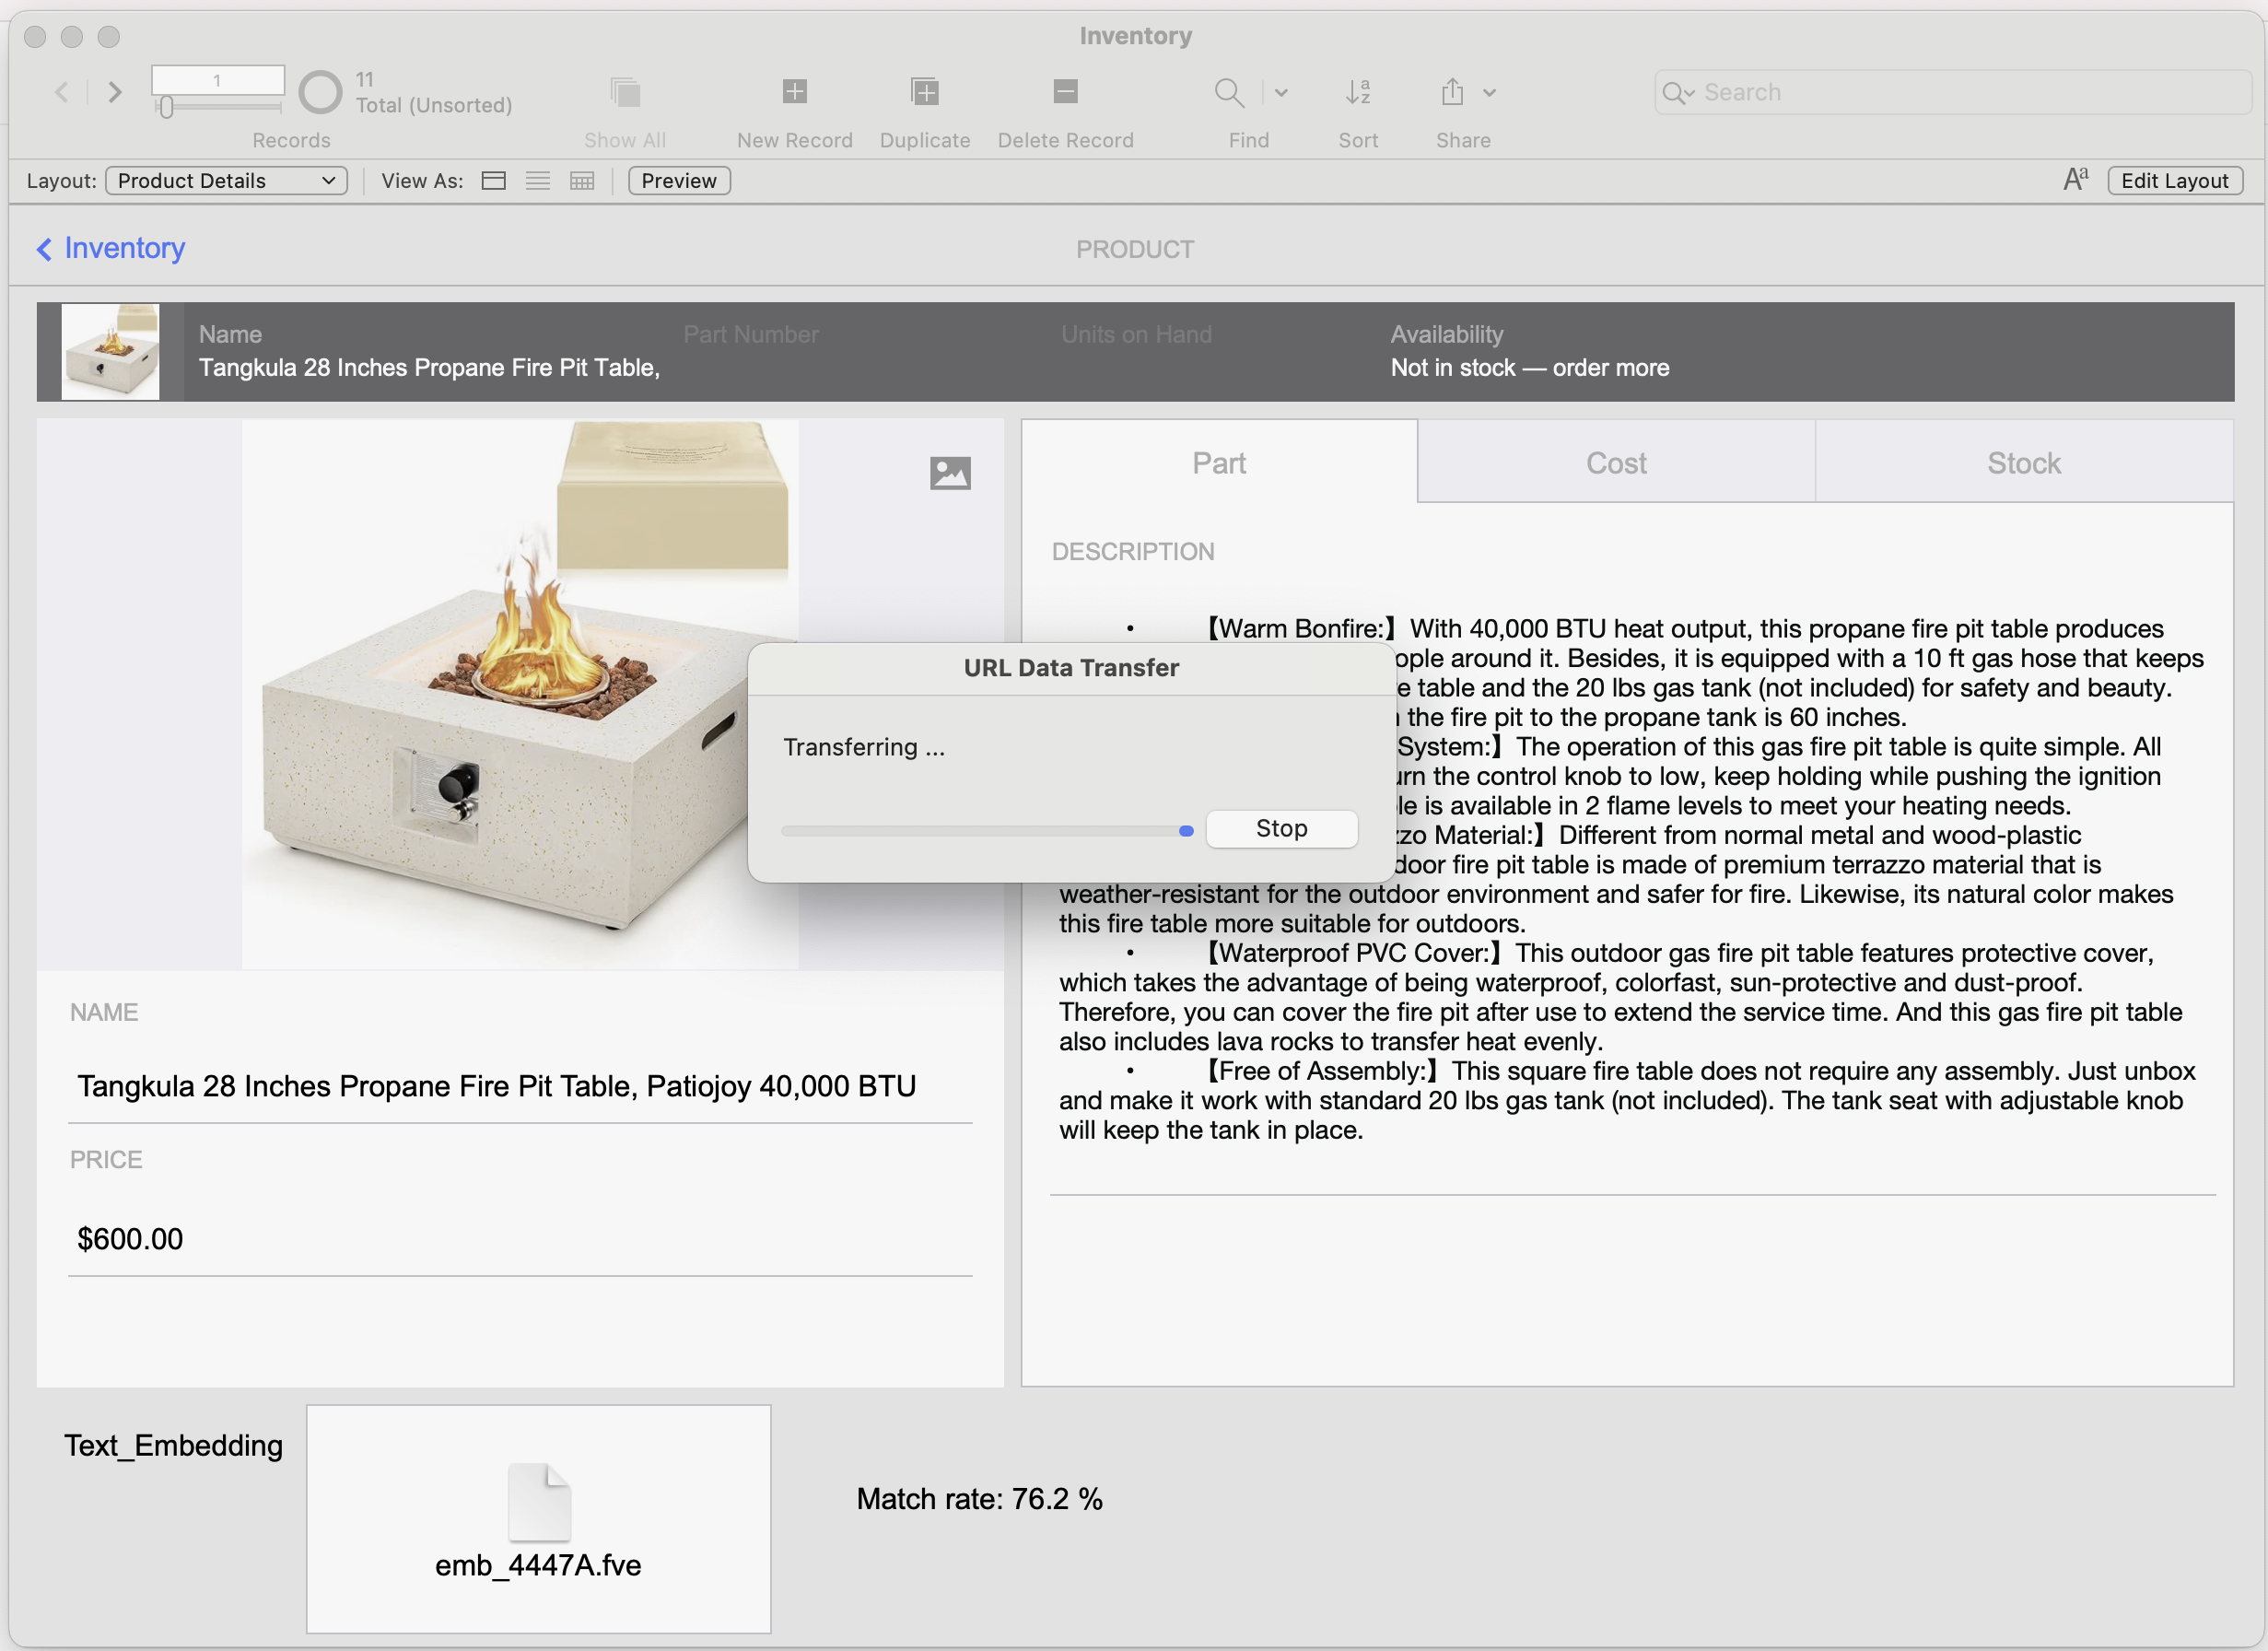
Semantic search complete—we’re now using Insert from URL to prompt our local LLM for a summarized sales pitch.
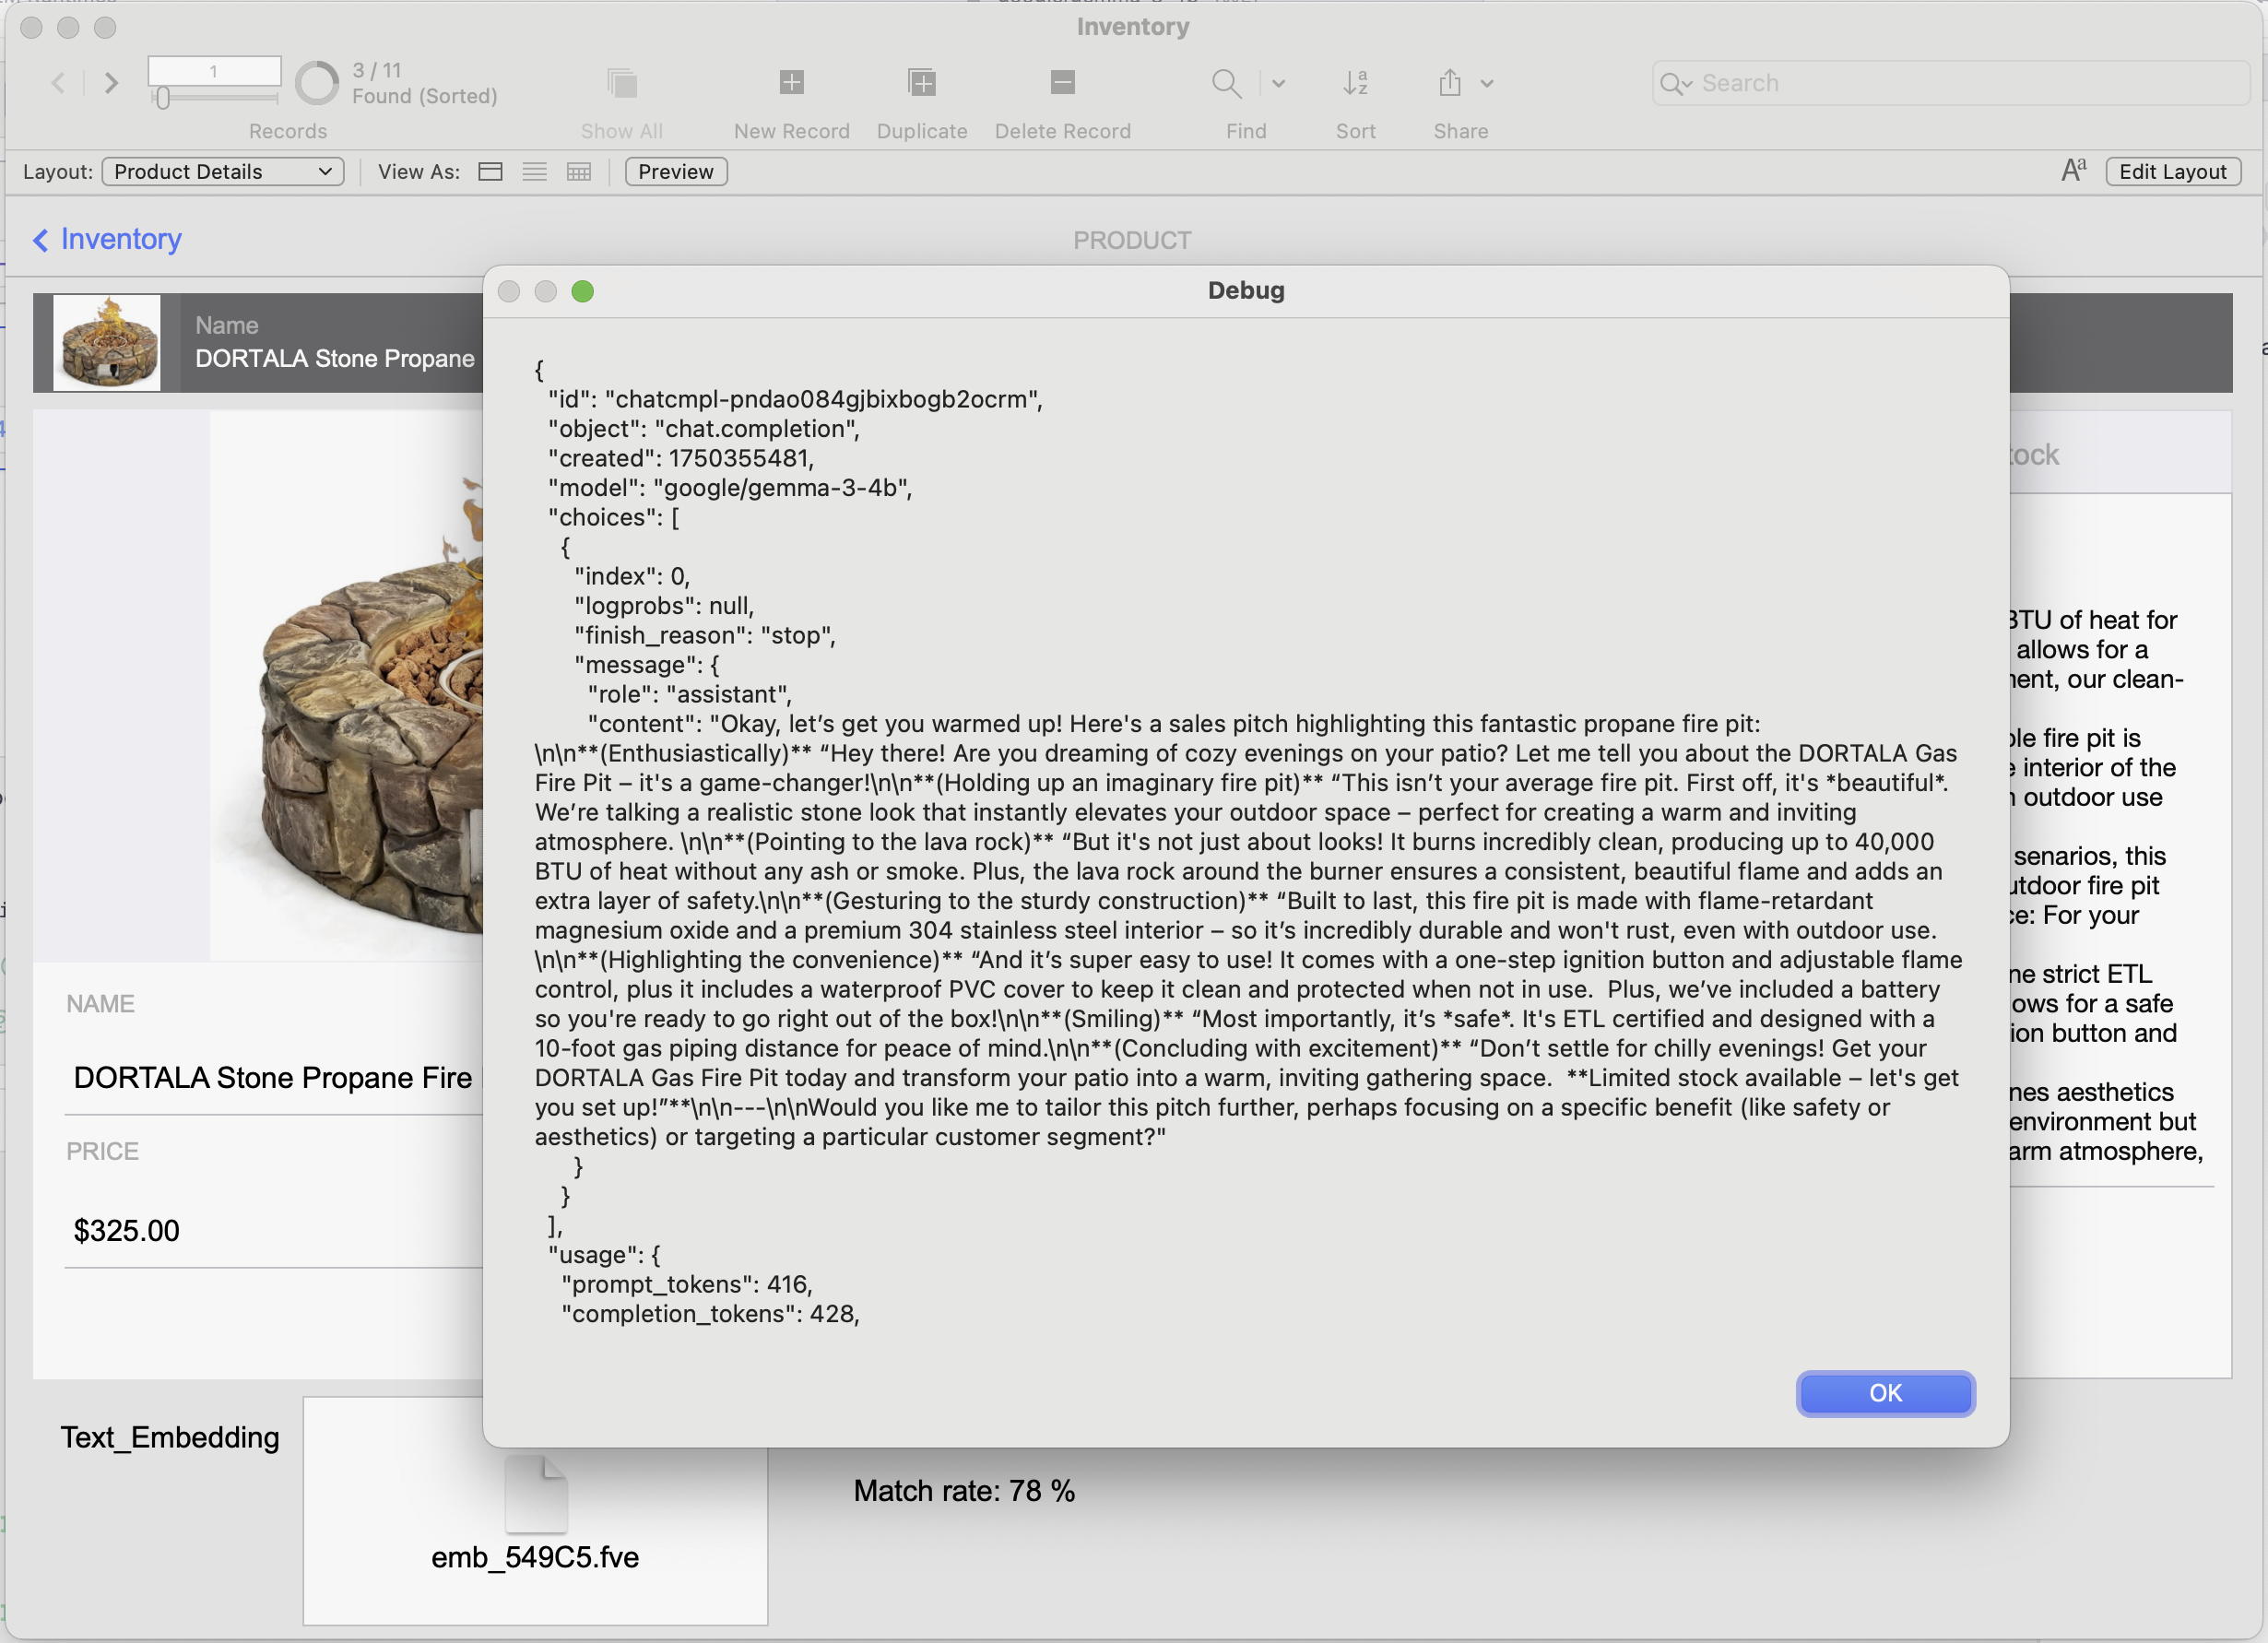
Debug dialog showing the full JSON response returned by the LLM.
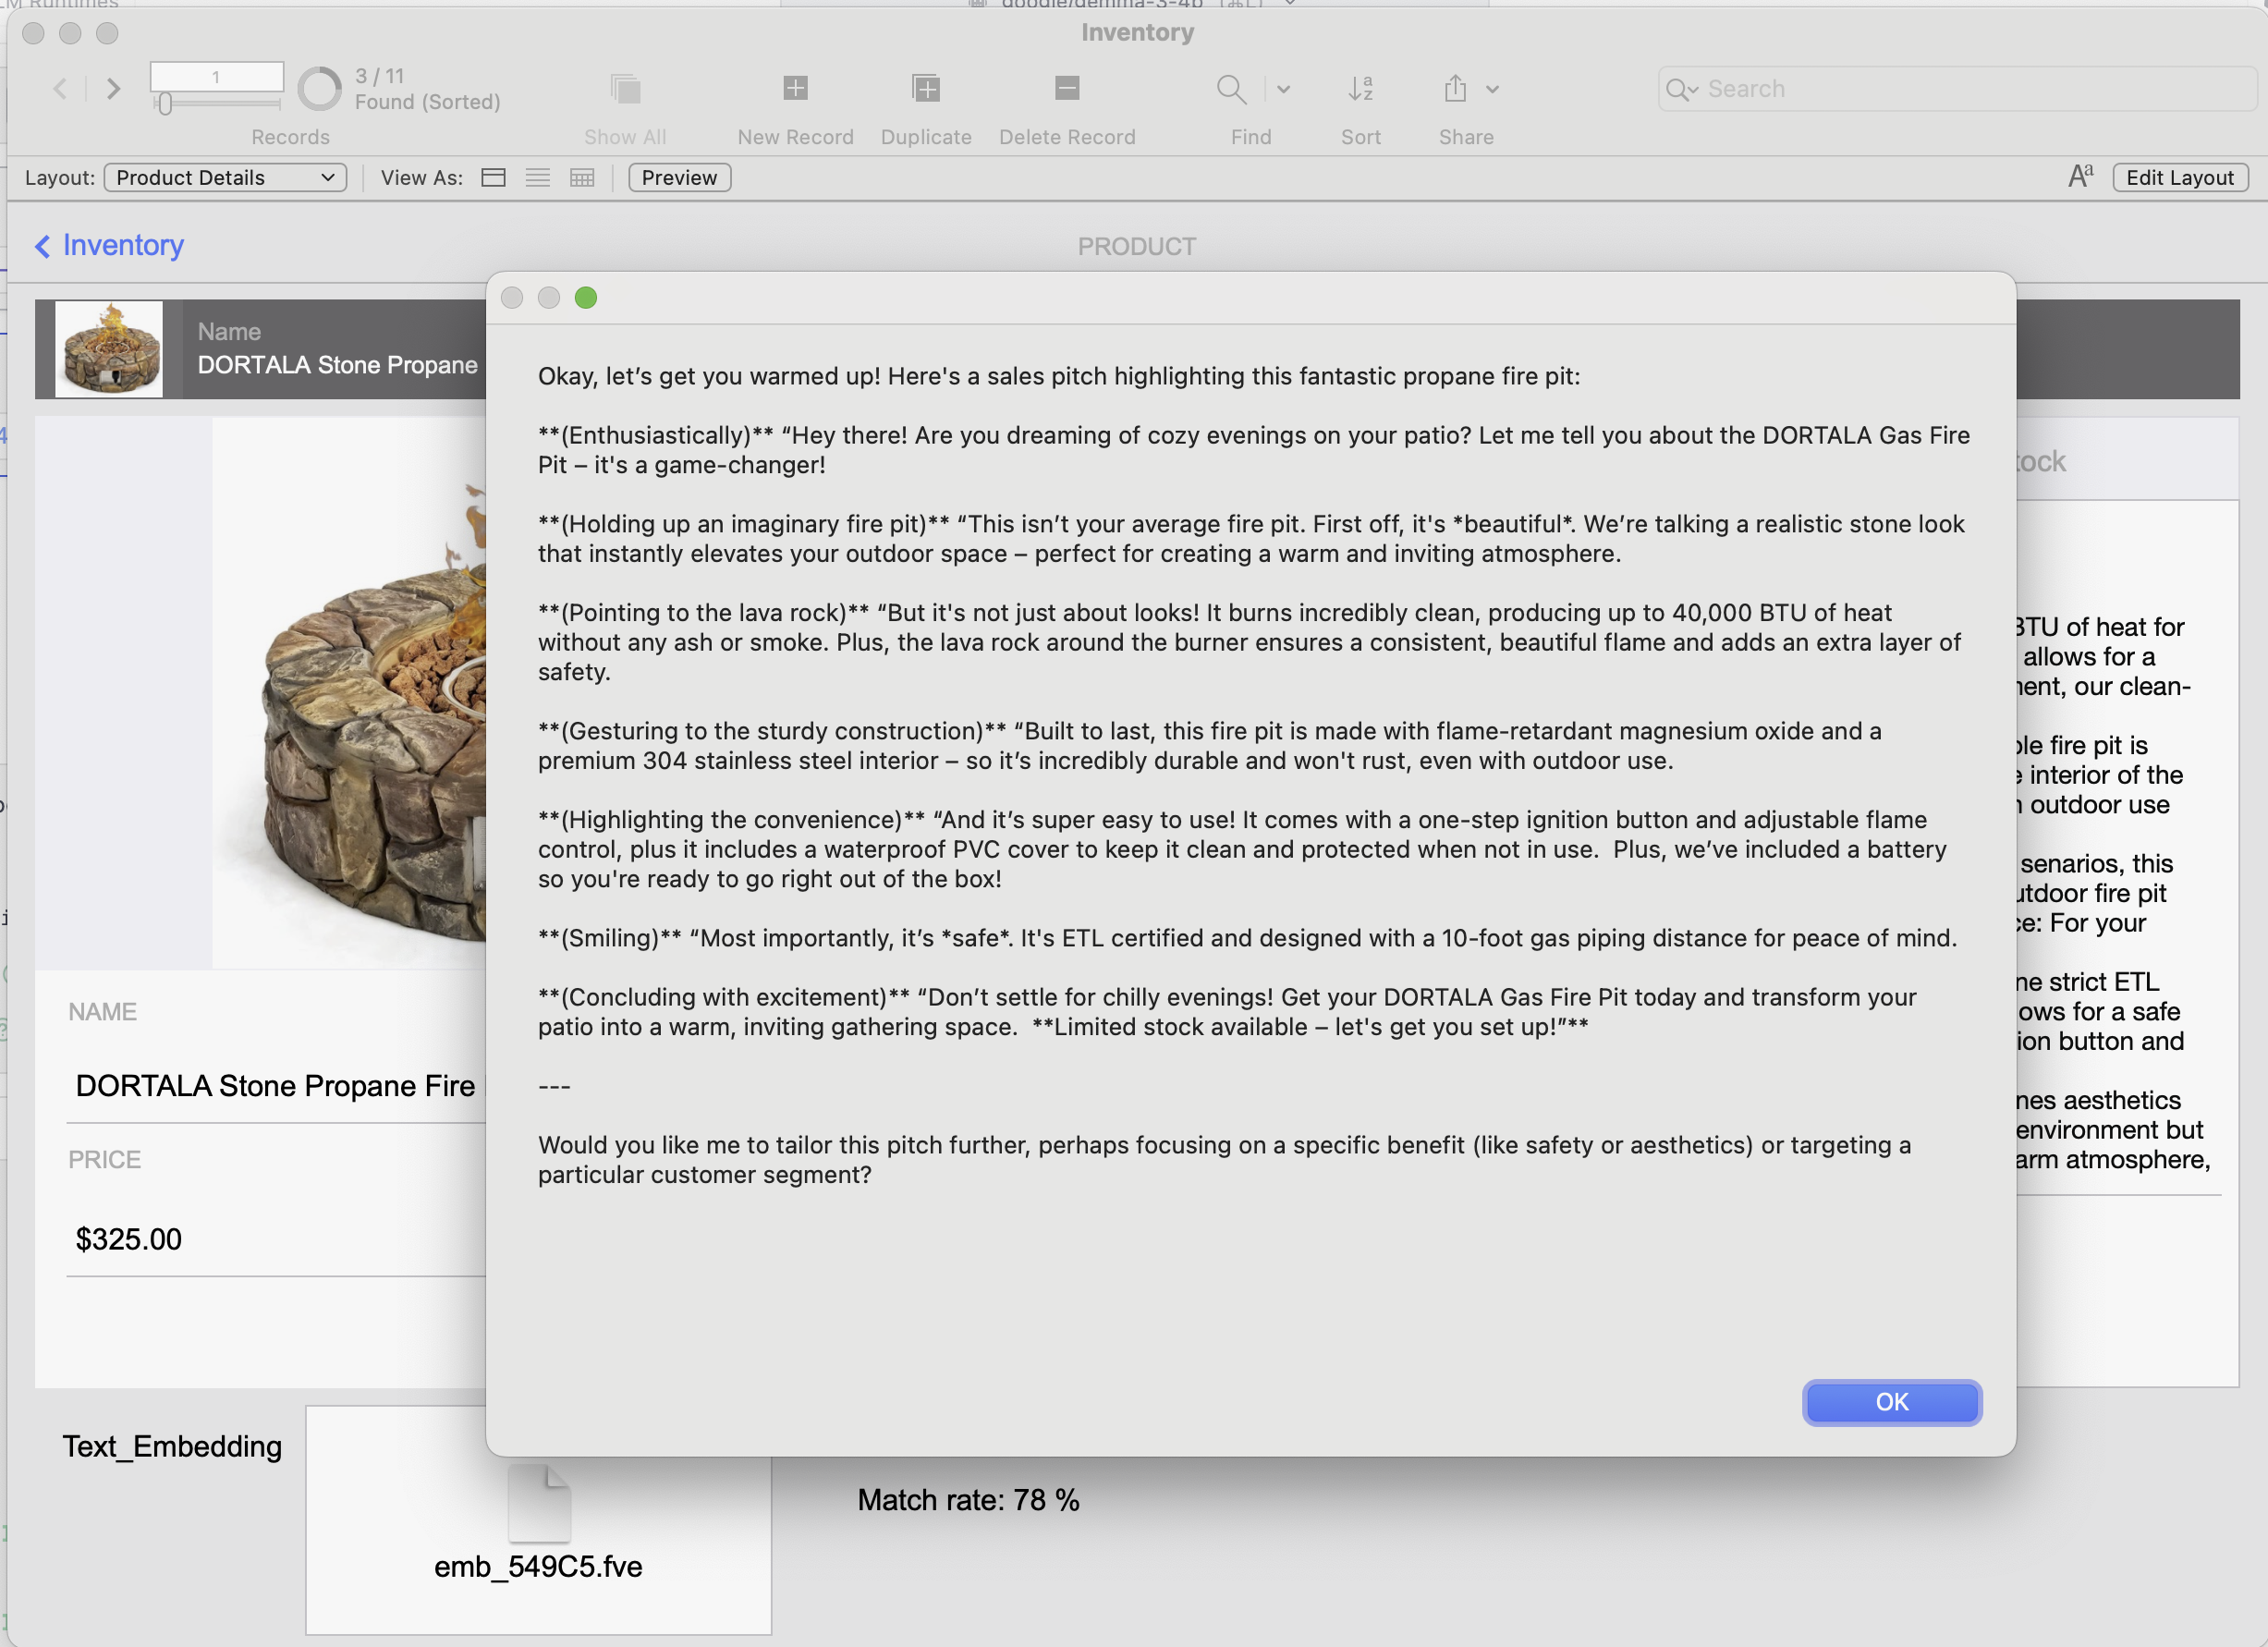
Final result: a clean, conversational sales pitch generated from the product description by our local AI.
Conclusion
As you’ve seen throughout this walkthrough, the possibilities for integrating local LLMs into your FileMaker solutions are truly impressive. By layering semantic search capabilities with natural language prompts—and leveraging tools like Insert from URL—you can transform a simple find request into a fully automated, intelligent interaction , even generating tailored sales pitches in real time.
This example only scratches the surface. With local LLMs, you can go beyond traditional text queries. Imagine enhancing your solution with image-based semantic search , contextual suggestions , or multilingual support —all without relying on cloud-based services or compromising data privacy.
You could instruct your model to respond like a friendly assistant, a technical expert, or even a chatbot integrated into your CRM—custom-tailored to your workflow and brand.
As local AI continues to evolve, FileMaker developers have a unique opportunity: to build private, intelligent, and deeply personalized tools that work offline, run fast, and feel futuristic—all from within a platform we already love.